
Table of Contents
Trigger Emails
Accessing Trigger Emails
-
Navigate to Administration > Settings > Trigger Emails.

-
Click on the Notification Flags tab.

Editing or Creating New Flags
-
To edit an existing flag, click Edit on the default flags available.

-
To create a new flag:

-
Enter a Flag Description.
-
Select a Color.
-
Click Save Flag Settings.
-
Fill in any blank areas as necessary.
-
Click Save Flag Settings again to confirm the changes.

-
Setting Up Vendors
-
Navigate to Administration > Portal Management > Vendors.
-
Vendors can be added to provide services to students, allowing staff with Contact Manager access to enter vendor session details

Adding a New Vendor
-
Click the Pencil Icon to Add New Vendor.
-
Enter all necessary information.
-
Click SAVE.

You can set-up vendors that will be providing services to students, so that staff that have access to Contact Manager for student can enter information related to the Vendor Session with the student(s). Once vendor names are entered, they will be available for selection from a drop down box when entering contact information.
Adding Staff to a Vendor
-
Click Show Staff.
-
Click Add Staff.
-
Enter the name of the staff member providing vendor services.

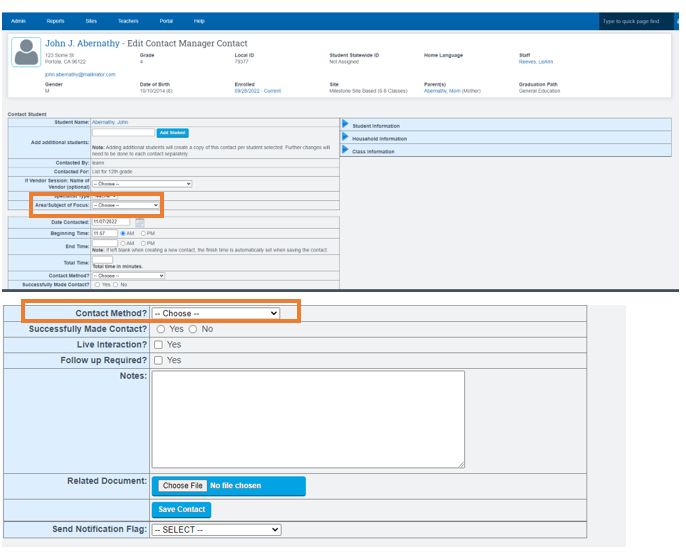
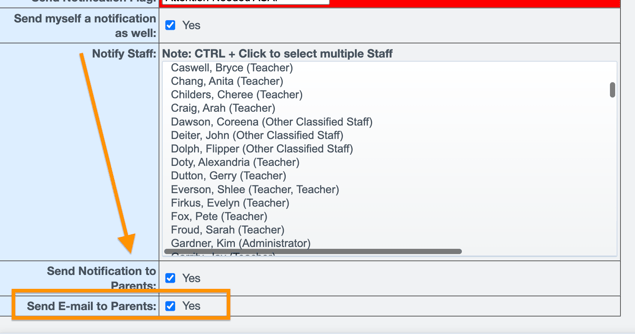
Sending Notifications to Students/Parents
When a school enters a message in the Contact Manager and chooses to send it to a parent via email, the following information will be included in the email:
-
Your Area/Subject of Focus: This will appear as the subject of the email.
-
Notes: The message entered in Contact Manager will be sent as the main body of the email.
-
Title and Notification Flag Type: The email will also include the selected title and flag type next to the Send Notification option.
-
Time and Date: The exact time and date of the notification will be included.
-
Student Name: The email will display the student's name to ensure clarity.
Example Notification Email:
The following notification was sent on 03/15/2025 at 12:45 AM by Pathways, School regarding:
Student: Rivera, Nathaniel
Subject: Monthly Mtg #1 (Attendance Issues)
Message: Please contact me ASAP regarding this.Please contact Pathways, School for additional information regarding your student and this notification.
Customizing Contact Manager Policies
-
Navigate to Admin > Settings > Policies > Contact Manager.

-
Click to Show Policies.
-
Customize the policies as needed.


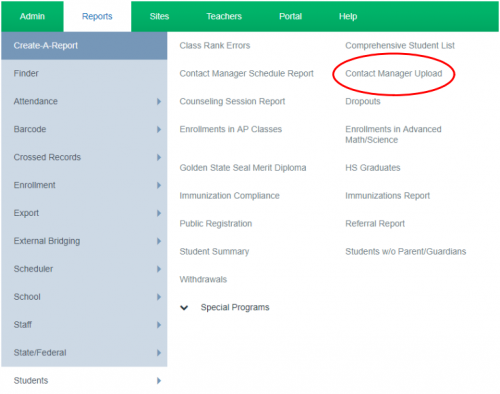
Uploading Data into Contact Manager
Uploading a CSV File
-
Navigate to Reports > Students > Contact Manager Upload.
-
Prepare a CSV file with the required column headers.
-
Required fields are highlighted in red, while optional fields may be included.
-
Once the file is ready:
-
Click Choose File.
-
Locate the file on your computer and select it.
-
Click the blue Import button.

-
General CSV Header Guidelines
-
Student ID: Local ID or Student Number - Legacy/External ID
-
Contacted By: Username of the person uploading the file (e.g., jdoe)
-
Contacted For: Staff member assigned to the contact (formatted as Last Name, First Name)
-
Duration vs. Time Entries:
-
If Duration is entered, Finish Time is not needed.
-
If Duration is not entered, both Start Time and Finish Time must be included.
-
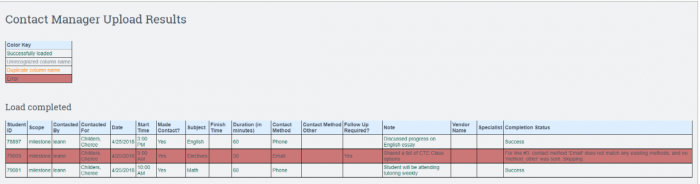
Upload Results
After import, a Results Page will display:
-
Successfully loaded records
-
Errors encountered during the load (if any)
Sample CSV Upload Format

Last Updated: 03/15/2024