
Teachers > Contact Manager > Contact Manager
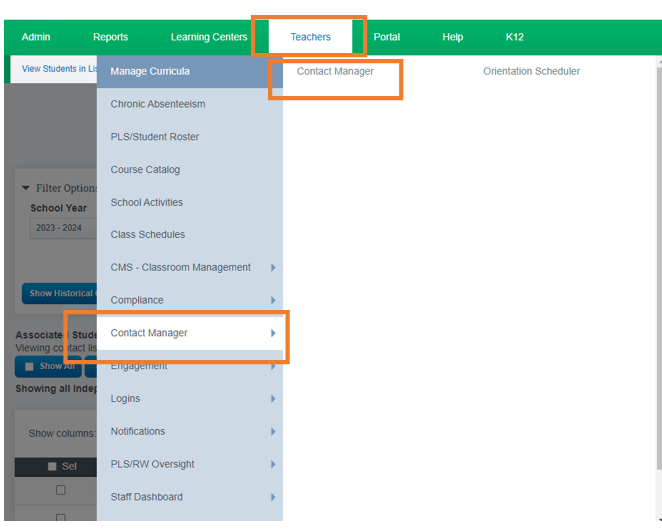
To access the records you want to work on, utilize the filter section.
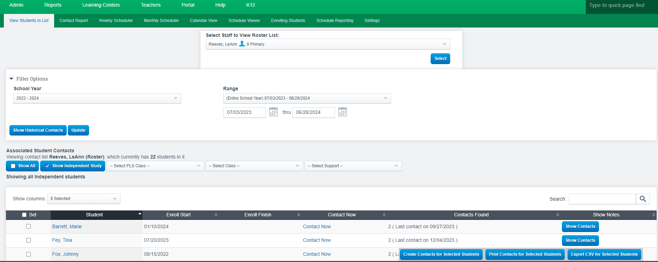
The Contact Manager has been updated so that when more than one student is included in the record, all students will receive credit for Live Interaction if the Live Interaction text box is checked.
Create Contacts for Selected Students
- Click “Contact Now” to create contact for individual student.
Or
Select a Group Students by placing a Check Mark in the box in front of their names
and
Click the “Create Contacts for Selected Students” button.
Sending a Notification
- Create contact as described in steps above and enter all relevant information
- Click Contact User
Flag a Contact
- Prior to saving contact, select type of
“Notification Flag” from the drop-down box. Once the flag is selected the color of flag will be displayed (Example: “Attention Needed ASAP” is highlighted red)
Where will staff see the notifications they have received?
- When creating a contact in Contact Manager, you may send a notification to selected staff members and/or parents of the student, regarding the nature of the contact that is being created.
- Staff members will have notification flags appear next to the profile picture at the top of right of the SIS
-
Color of the flag indicates level of importance or priority of notification (Emergency, Attention Needed, Academic Failure, General Information)
Color of the flag will indicate level of the importance or priority of notification