Navigation:
Go to Teachers > Manage Curricula

-
Click Add New Curricula

-
-
Name: Give the Curricula a Name
-
General Category: Is this Language Arts, Electives ETC?
-
Grade Levels: Grade Level this is applicable too
-
Range: Whole school Curricula or to a Particular Teacher/Private Curricula
-
Creator/ Owner: Who Created this Curricula
-
Text Description: A brief description of the Curricula
-

-
On the Right Side of the Screen you have the option to use the Standards School Pathways has built into the system
-
Click the box next to standards you desire to use
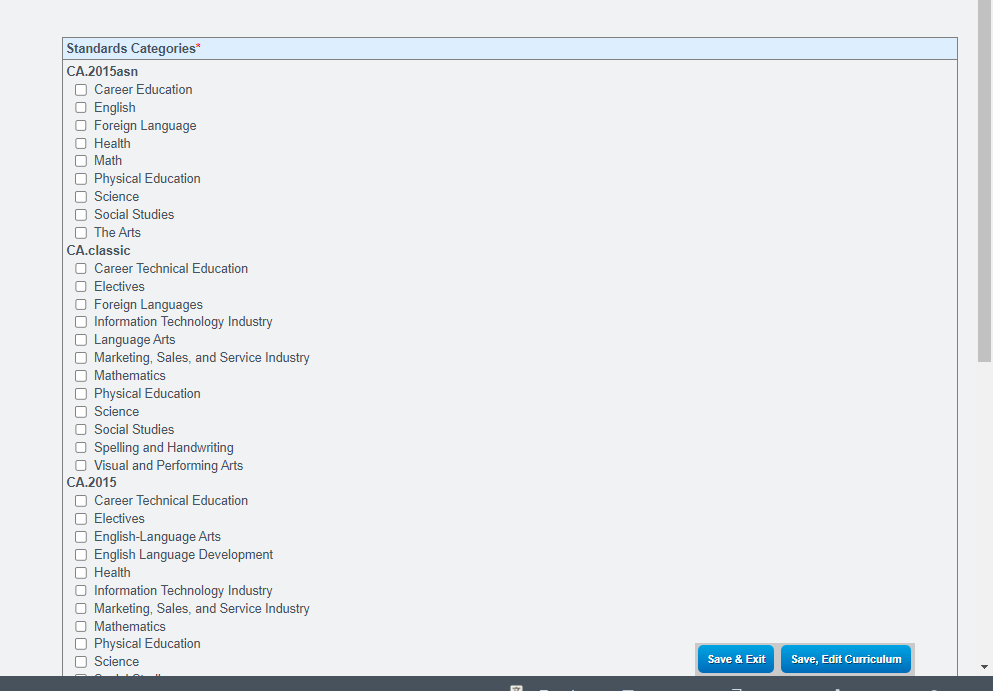
- CA Classic Standards are the Old Standards LRRs ETC
Standards in CA Classic will typically math the Category Name - CA2013 Common Core Standards
-
Once Everything looks good on this screen
-
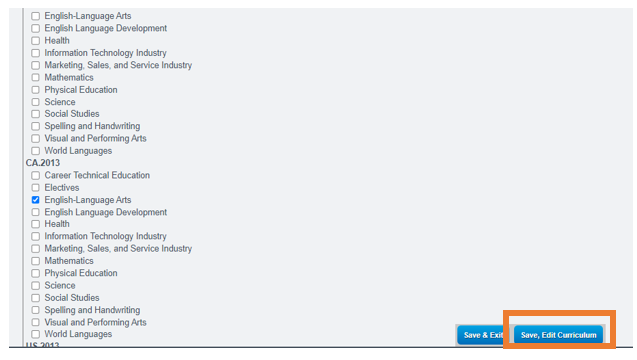
Click Save, Edit Curriculum
-
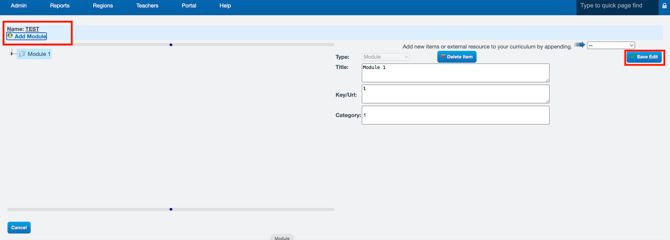
Click Add Module

-
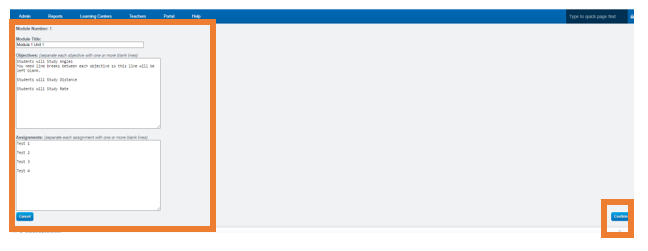
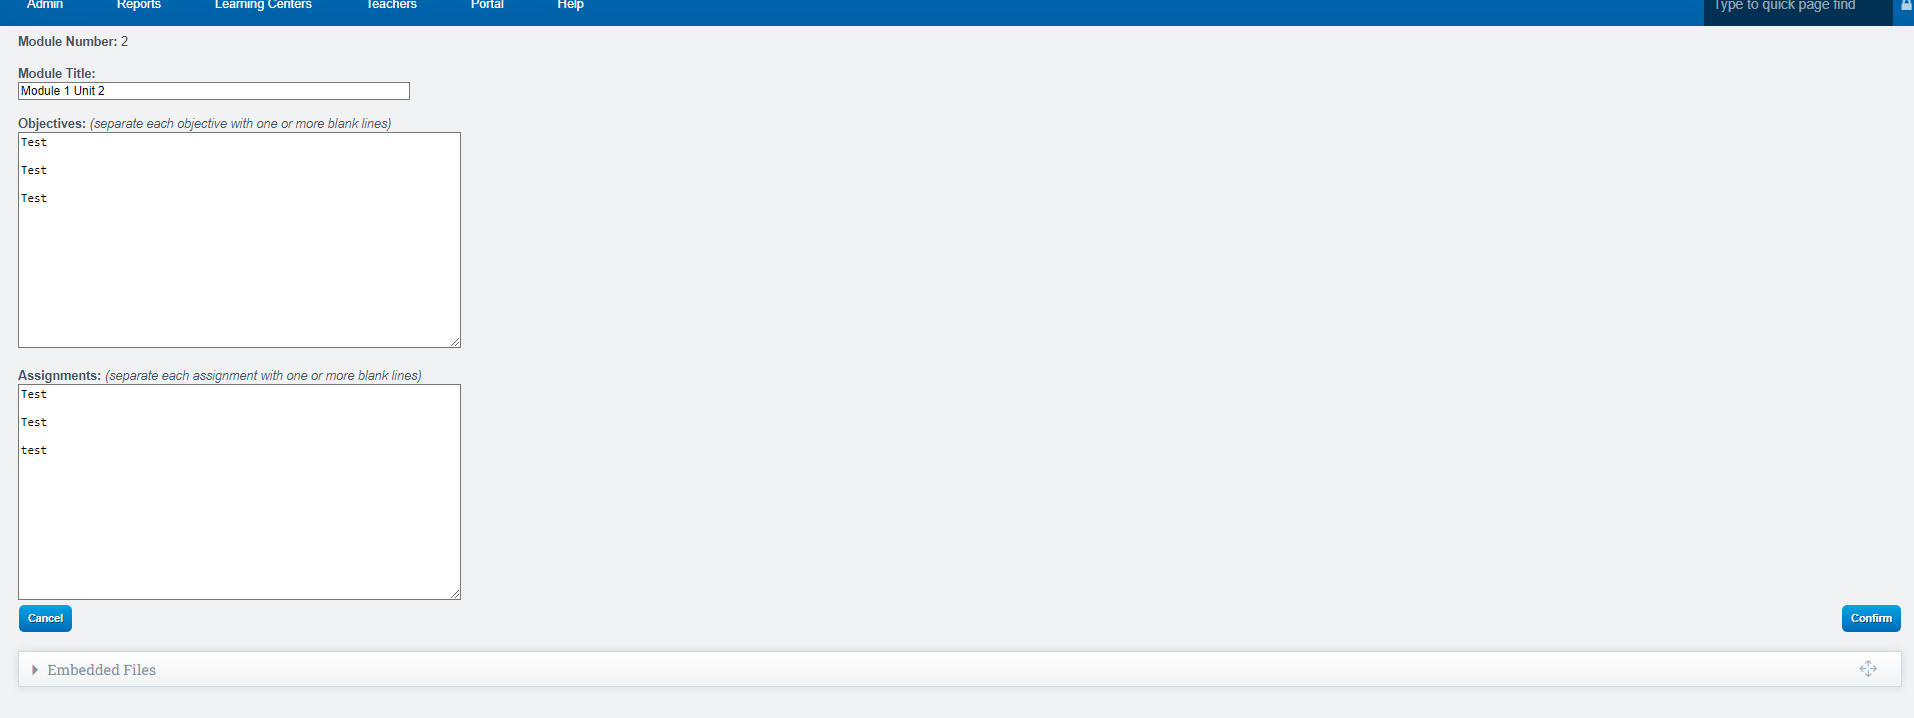
Give the Module a Title: Example Module 1 Unit 1
-
Objectives: Between Each Objective be sure to skip a line leaving a line space between each objective
-
Assignments: Between Each Assignment skip a line leaving a line space between each assignment
-
-
Click Confirm when complete
-
On the Next Screen Confirm everything looks good, if not click go back to edit
-
If everything looks good Click Save As Is

-
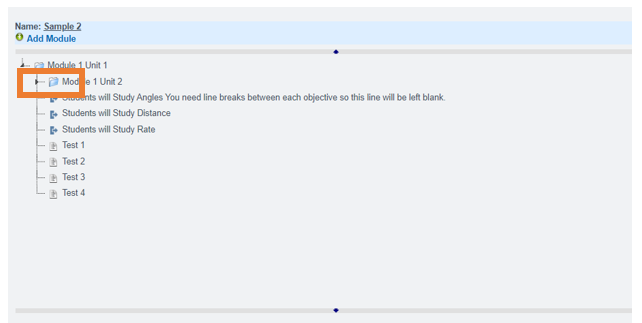
Click on the Folder to edit curriculum once you are complete.
- Category: The Category field allows you to enter the 1–2 character Weighted Category code associated with that curriculum node (for example, 1 or 2).
- The Category field is a plain text field and does not provide a dropdown of available categories. Users will need to know the appropriate Weighted Category code before entering it.
- Select Save, Edit once entered.
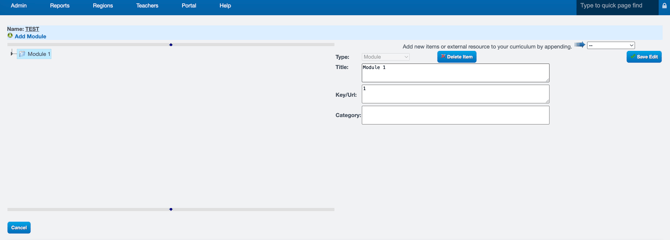
Appending standards to your assignments
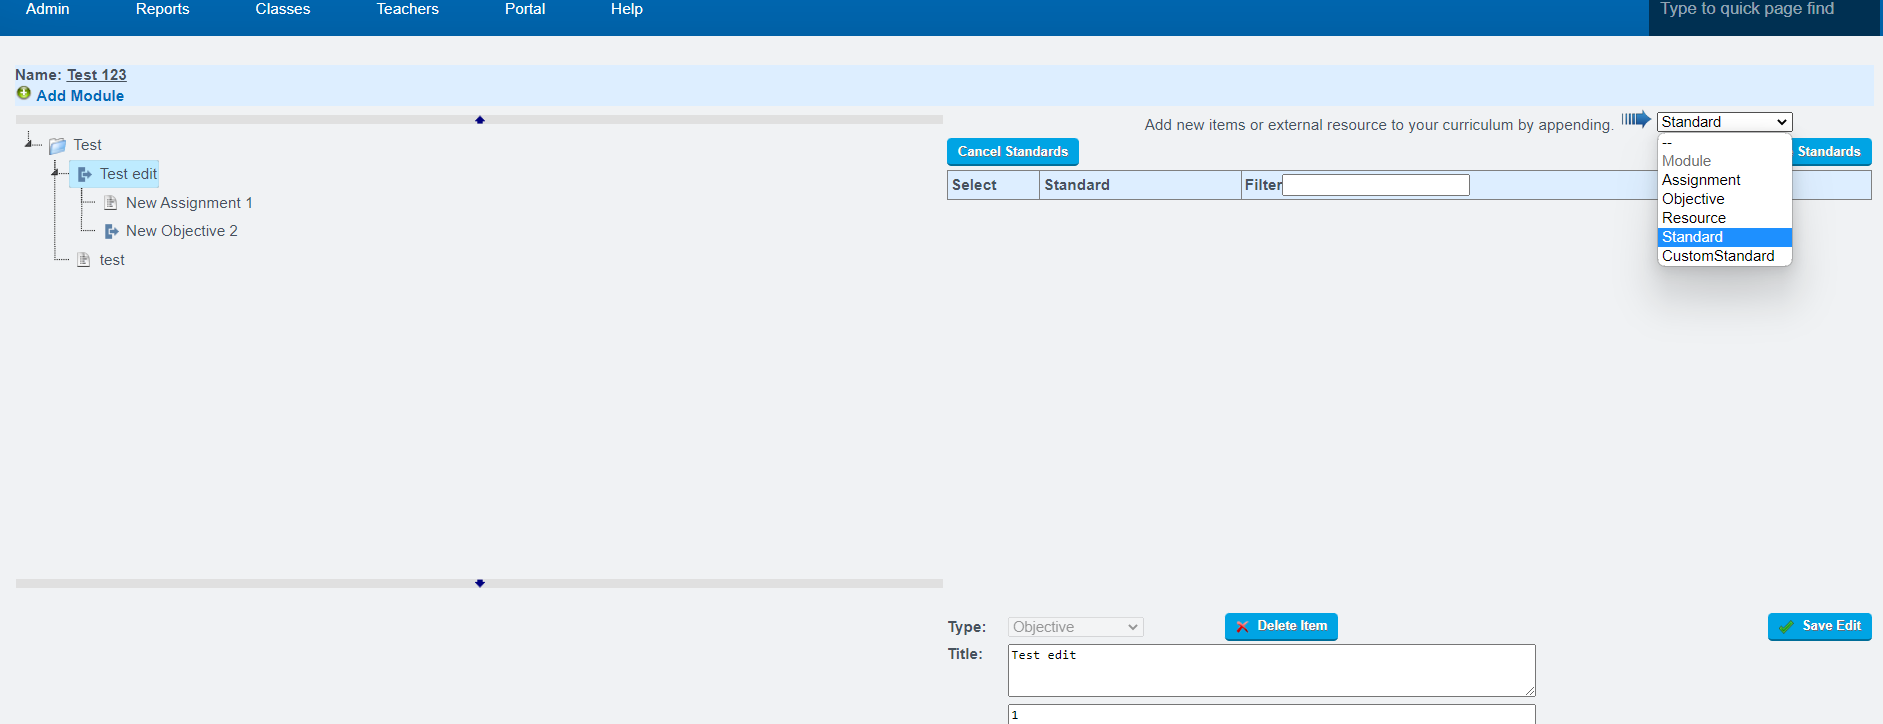
- To add a standard to a specific assignment or module, click on the Assignment or Module Title then choose Standard from the drop down. The item highlighted in blue will gain the appendage.
- Open the standards viewer by choosing “Standard”
- Open standards by clicking on the dropdown.
- Choose Standards
-
Check any desired standards
-
SAVE at the bottom right
-
The standard is now attached to the assignment

Adding Resources to your assignments
- Click Assignment Title you desire to add a resource to
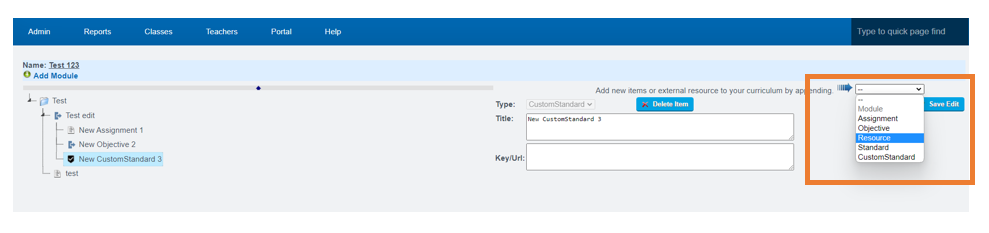
- Click on resource in the “add new items” drop-down
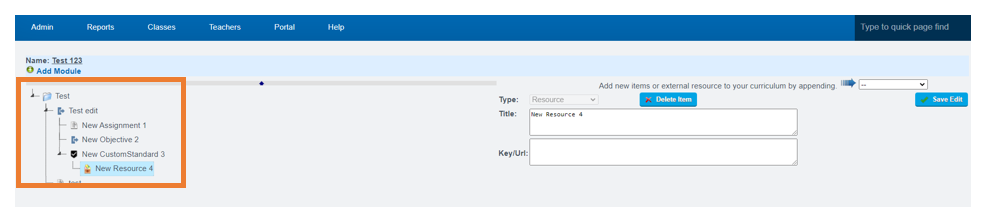
- A new item called “New Resource” will appear in the list of assignments on the left
- Click “New Resource” to edit (scroll to the bottom of your module assignment list)
- Rename Title and click Save Edit
-
Click Add Module to add more Modules
-
Repeat steps to create another Module.
-
After you have finished creating the Module, you have the option to rearrange it within the Folders by simply dragging and dropping the envelope. This allows you to easily organize the Modules according to your specific needs and preferences. Be sure to focus on the small black line and line it up in-between folders if you want the new module to go into a folder.