
Table of Contents
- 1: Go to Admin > Staff Info > Find/Add Staff
- 2: Search for Existing Staff Record
- 3: Add New Staff Member
- 4: Complete Employment Record
- 5: Job Classification/Assignment Information
- 6: Complete Credentials/NCLB Information
- 7: Staff Login Setup
1: Navigation
- Admin > Staff Info > Find/Add Staff
- Start by navigating to the Admin menu, selecting Staff Info, and clicking on Find/Add Staff. This is where you’ll begin the process of adding a new team member.

Important: Before adding a new staff member, make sure to check for existing records by following Step 2.
2: Search for an Existing Staff Record
- To avoid duplicate entries, type the staff member’s name into the search bar. This step ensures you’re not re-entering information that may already exist from previous employment.

- Click Search.
Pro Tip:
- A green highlight means the staff member has a current employment record.
- Red or grey indicates they have a record from previous employment but may not have an active job classification.
Red = Not Employed
Grey = Not currently Employed (but have a current job classification record)
3: Add a New Staff Member
- If your search confirms that the staff member isn’t already in the system, go ahead and click Add New Staff.

- You’ll then be prompted to fill in all the necessary information. Once done, click Next Page to proceed.

- Continue clicking Next to complete all required tabs, including Demographics, Education, District Information, and Language Fluency.

- Once every tab is filled out, click SAVE on the final tab (Emergency Card).
* Complete as much information on the Demographics, Education, District Information and Language Fluency tabs as possible.
4: Complete the Employment Record
- Next, navigate to Admin > Staff Info > Show Staff List. Here, you’ll see a list of staff members. Click the Suitcase Icon (Employment Icon) next to the new staff member’s name to open their employment details.

- If the staff member’s name is highlighted in red, it’s a signal that their employment information needs updating. Simply click the Suitcase Icon in the bottom right to update their record.
- On the Employment Data Screen, select Add Staff Employment Record. Fill in the required fields, including Start Date, Hiring Terms, and Time Base.
Click SAVE.
5: Job Classification and Assignment Information
- Accurate job classification is crucial, especially for state reporting requirements like CALPADS. Here’s how to ensure this information is correctly entered:
- Click the Job/Assignments tab.
- Select Add New Job Classification.
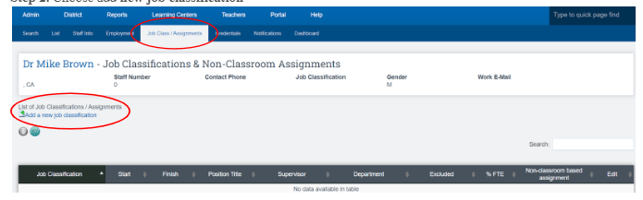
- Fill in all fields marked with a red asterisk (*); other fields are optional but can be completed for more detailed records.
- Click Save.

Note: The titles in the Staff Titles drop-down are now determined by the %FTE (Full-Time Equivalent) values from the staff member’s Job/Class Assignments. You can adjust these by going to Admin > Staff Info > Show Staff List > User Name > Job Class/Assignments.
6: Record Credentials and NCLB Information
- Now it’s time to record the staff member’s credentials and NCLB (No Child Left Behind) status.
- Click the Credentials tab.
- Then click Add Credential Record.

- Enter the required information, and when you’re ready, click Save.

7: Set Up Staff Login
- Finally, it’s time to set up the new staff member’s login so they can access the system.
- Go to Admin > Settings > Security > Security.
- Click Define Users.


- Next, click Add New User.
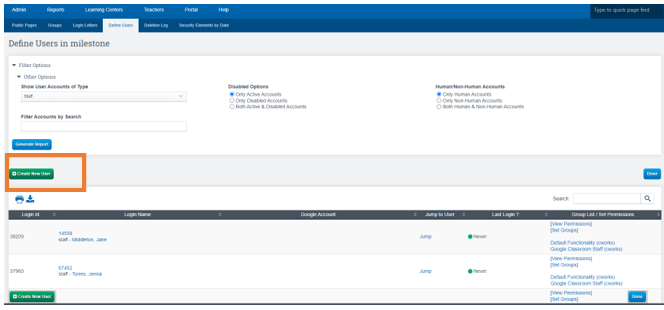
- For the Login Name, enter the first initial and last name of the new staff member. Choose a simple, temporary password that they can change upon first login.
Click Save.
Tip: We usually set a simple initial password to make the first login process easier. The staff member will be required to set a new, secure password on their first access.
- To link the staff member’s file to their login, click the Icon.

- Find the staff member’s name in the list on the right, and click the green circle button next to it.
Note: If you don’t see a matching name, double-check that Steps A and B have been completed correctly.