Table of Contents
- Navigation
- Forms & Surveys Management Dashboard
- Creating the Form
- Activate the Form
- Signatures and Work Flow
- Send form to Recipients
- District Push
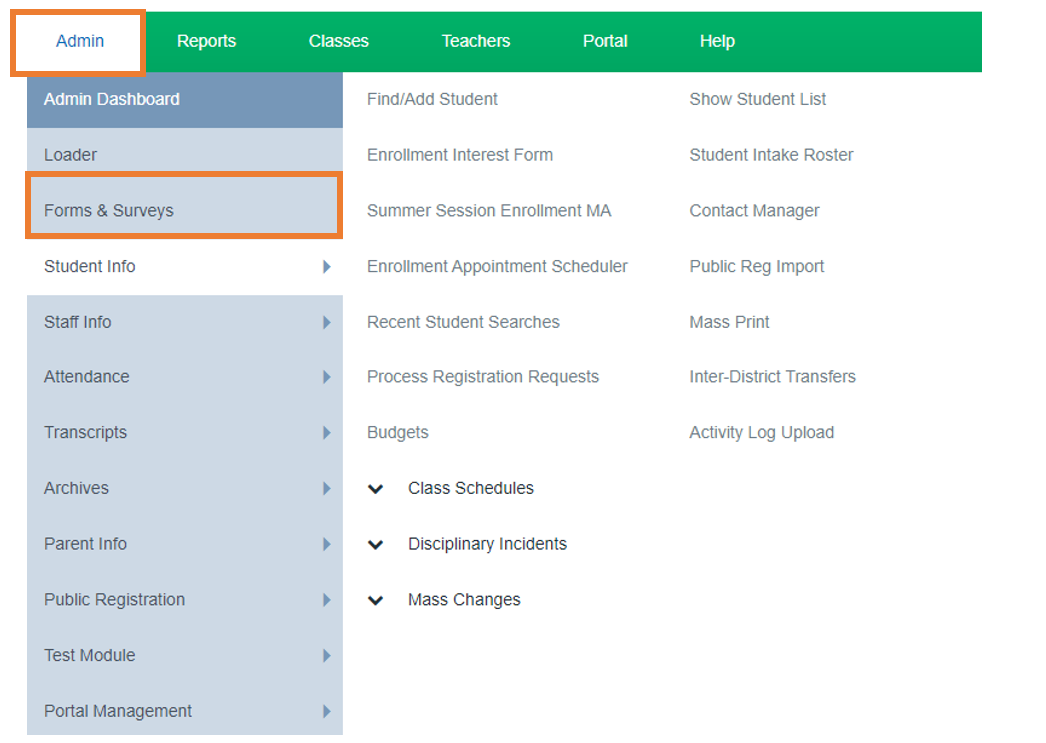
Navigation
- Go to Admin > Forms & Surveys
Forms & Survey Management
Dashboard View:
- Copy: Copy the Document for future use, or to make edits to an Active Form
- Edit: Allows you to edit the form if it hasn't been activated yet
- Preview: Allows you to see the what your form looks like, as well allows you to Print the form if you would like someone to fill out a paper form.
- Workflow: Allows you to have the form approved prior to the form going live
- Report: Will give you an overview of who has opened the form, filled out the form, answers that were provided etc
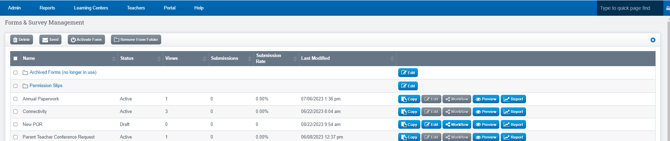
Icons across the top of page will appear grey until at least one form has been created

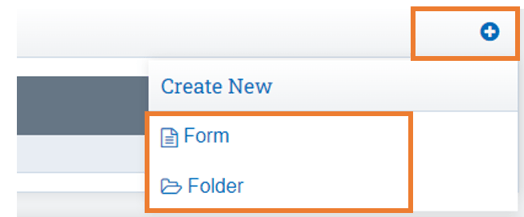
Creating A New Form
- Click the Plus Sign to the far right of the screen
- Click Form : One form
- or
- Folder: Store multiple forms for the same topic Ex : Field Trips
Form Settings:
- Form Name: Name Your Form
- Form Type:
- One time : You won't use the form again
- Repeatable Form: If this is a form the student will have to repeat on a regular basis
- Include in Reg Online: If Marked, The form will be visible for use with Reg Online
- Include this Form In Student Archive: If Marked, The form will go to the Zip File for Archive and can be found under Archive Compliance Report
- From Archiving Handle: Create a new section on your Archive Compliance Report
- Form Repetition Requirements: Do you want this form to repeat its use? If so click in the box to choose the frequency
- Form Expiration: After the date provided, the form cannot be completed any longer. It will still be there, but you’ll get an error if you try to open it to fill in
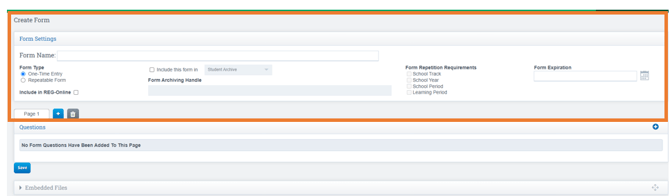
- Click the Plus Icon to the right of the screen to start creating the form
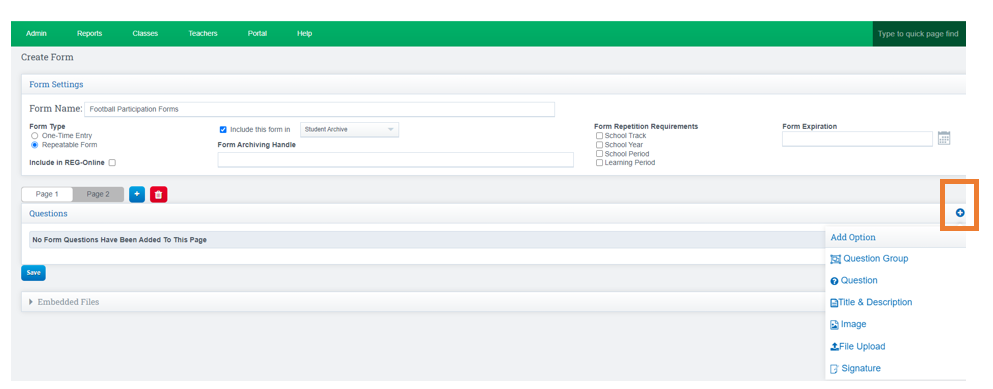
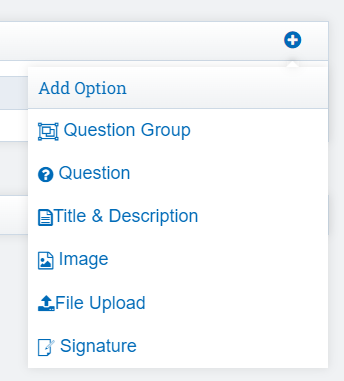
Options When Clicking the + Sign: Start of creating your form
- Question Group Option: Allows you to put more than one question on a row
- Question Option: What data you want to collect on the form
- Title & Description: Allows you to have the title appear on the form
- Image: Upload an Image to your form
- File Upload: Adds an option for the form completer to upload a file
- Signature: Add signature lines
Options for Type of Question(s):
- Question Group Option Sample: allows you to put more than one question on a row(see sample below of letter preview) EX: Student Information (First, Last Name) Parent Information ( Email, Address).
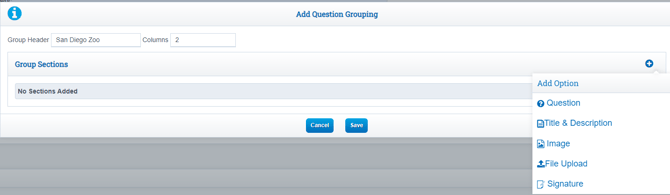
- Question Option: What data you want to collect on the form
- Columns allow you to have items such as First, Last Name next to each other.
- Click the + sign each time you want to add a new line item
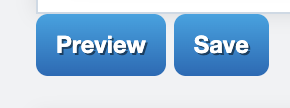
- Click Save and/ or Preview to Review the Form once complete.
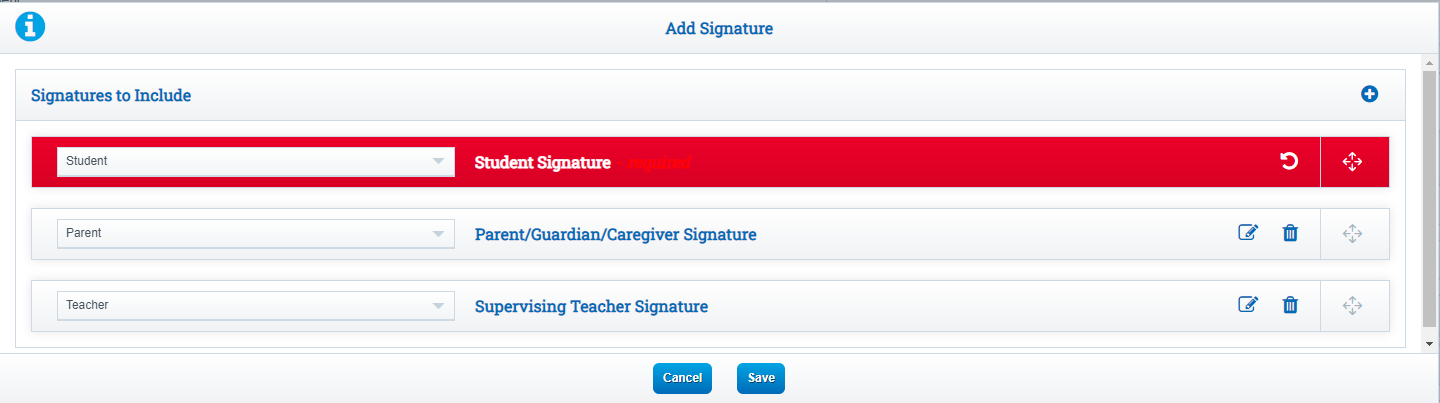
Signatures and WorkFlows
- If you do not want a signature line click the trash icon and that area will turn red.
- To edit the signature select the icon next to the trash can. Here is when you can make the signature also optional or required.
Work Flow
- Work Flows will appear once you add a signature to your form and press save.
- You can also adjust the Workflow on the Dashboard by selecting the Workflow icon to the right of the survey.
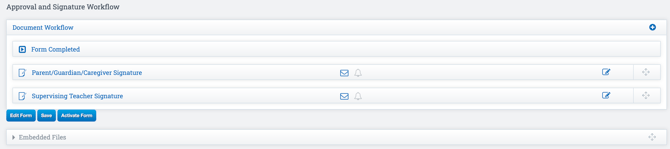
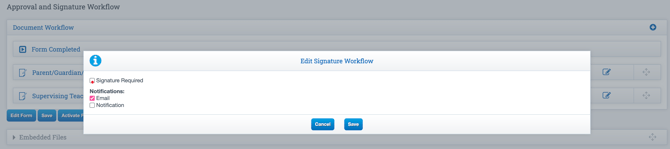
- Edit the Workflow and how the person or staff needing to signature is notified by selecting the notepad next to the signature type.
- To determine the flow, move the Signatures by using the icon to the far right of the signature.
Activate Form :
- Click in the box next to the form you want to activate
- Click Activate
- Now you will see ACTIVE next to the form

***Once the Form is Active is can't be edited
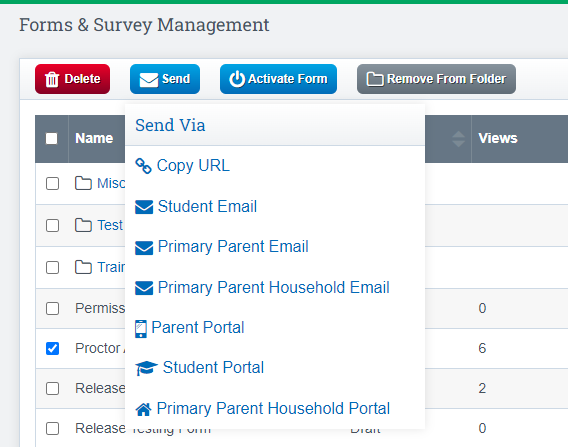
Send Form to Recipients:
Form must be Activated in order to send to recipients.
- Click the checkbox next to the form you want to send
- Click Send

Choose how you want to distribute the document
- Student Email: Sends an email with a link to fill out the form
- Primary Parent Email: Sends an email with a link to fill out the form
- Primary Parent Household Email: Sends and email that will automatically group students by shared Primary Parent
- Parent Portal: In the Parent Portal, the link to complete the form will appear under Forms & Survey Tab
- Student Portal: In the Student Portal, the link to complete the form will appear under Forms & Survey Tab
- Primary Parent Household Portal: In the Household Portal, will automatically group students by shared Primary Parent
Click Send
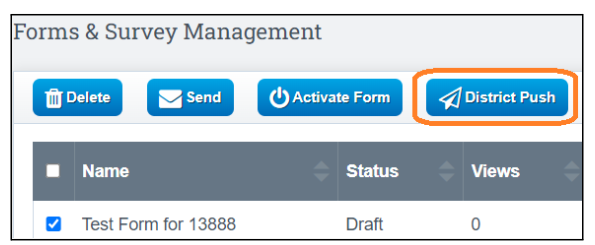
District Push
- Forms can be created in district scope and be pushed to the child scopes as well.
.