Managing Embedded Letters
This guide will walk you through the process of accessing, editing, and managing Embedded Letters. Embedded Letters allow you to create customizable templates for communication, such as disciplinary letters, that can include important information.
Table of Contents
- Accessing and Editing Embedded Letters
- Viewing All Embedded Letters
- Creating an Embedded Letter: Example – Discipline Letter
- Creating an Embedded Letter: Example – Cumulative Record Request
- Embedded Letter Updates
- Printing and Emailing Embedded Letters
Accessing and Editing Embedded Letters
To edit an existing Embedded Letter, follow these steps:
- Navigate to the page containing the Embedded Letter you wish to edit.
- Click on the blue pencil for the letter you want to modify.
- Make the necessary changes to the letter content, and then click Save to apply the updates.

Viewing All Embedded Letters
- If you need to view or manage all the Embedded Letters within your school, you can do so by clicking on the Manage button. This will display a list of all available letters.

- Click on the blue arrow icon next to any letter to edit its content.

Creating an Embedded Letter: Example – Discipline Letter
The following is a detailed example of the process for creating and editing a Discipline Embedded Letter:
-
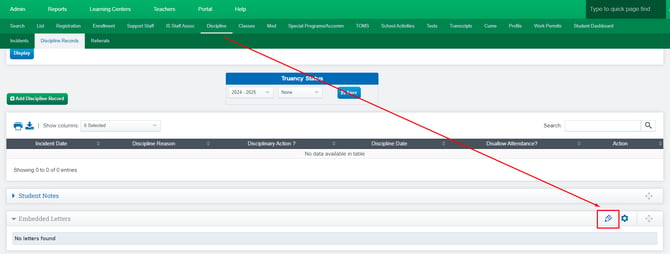
To begin, access the Student Information System (SIS) and navigate to: Student Dashboard > Discipline > Discipline Records > Embedded Letters.
Select the Discipline option.
- Scroll down to the Embedded Letters section.
- Click on the pencil icon to create or edit a letter

Creating an Embedded Letter: Example – Cumulative Request Letter
The following is a detailed example of the process for creating and editing a Cumulative Request Form:
- To begin, identify the student within the SIS and navigate to the following path: Student Dashboard > Embedded Letters (located towards the bottom of the page).

- If you need the template to enter information for this example, please follow the provided link here and copy the information into your scope.
The linked template is intended as a sample for demonstration purposes. We encourage you to customize and modify the information to align with your specific requirements.
Embedded Letter Updates
Recent updates to Embedded Letters now provide users with enhanced features, such as:
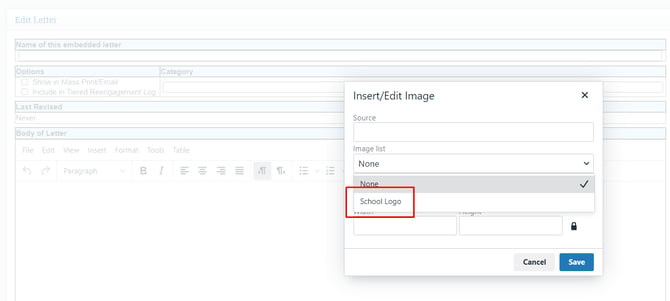
- School Logo Access: Users can now access and add their school's logo directly within the letter using the "Add Image" icon. This ensures that your letters are consistent with your school’s branding.

- New Options: The fields Discipline Reason and Offense Code have been added as available options for inclusion within the letter template. This allows for more customized and relevant communication in discipline-related letters.

Printing and Emailing Embedded Letters
After creating your letter, you have the option to either email or print it.
To email the letter, click on the Email icon, and the system will prompt you to choose a recipient from a list. This will allow you to open the embedded letter in a new email window for easy sending.
If you prefer a pre-filled PDF version, simply click the Print icon. This will automatically download a copy of the letter, which you can then print or email as needed.

Last Updated on 10/03/2024
