
You are able to modify the template to:
- Add or remove sections
- Add or change wording
- Add master agreement settings to pull data into the agreement
- Add formatting to include line and page breaks
Verify the following prior to creating a Master Agreement:
- Review master agreement settings
- Review page policies
Setting your school policies :
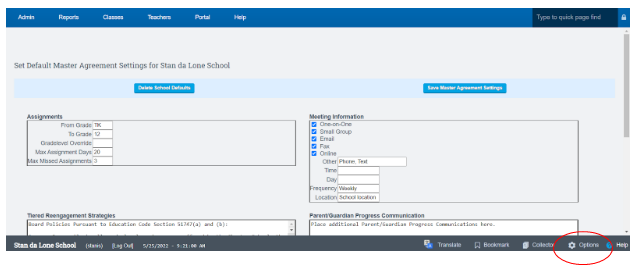
Admin > PLS/Report Writer > Oversight > School Default Master Agreement Settings

Setup your Meeting Information Settings:
Step 1. Meeting Information section can be left blank for teachers to customize for individual MAs
Step 2: Tiered Reengagement Strategies and Parent/Guardian Progress Communication sections have been populated from the template, may be overridden
Step 3: Click Save Master Agreement Settings
Step 4: Click Save Settings
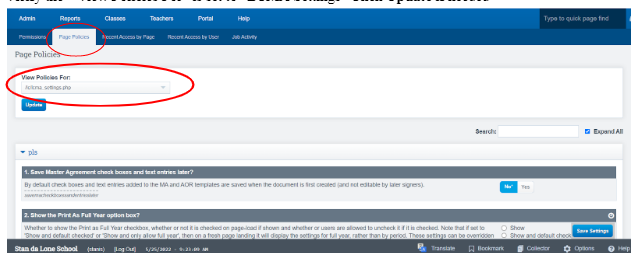
Page Policies: This will allow you to define which fields may be edited by teachers for individual MAs
Click Options Cogwheel on the bottom right of the page
Click Page Policies Tab
Verify the “ View Policies For” is set to “LCMA Settings” Click Update if needed
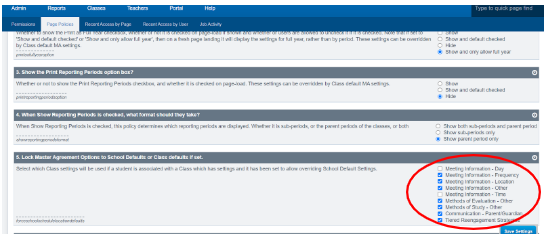
Scroll down to the “ Lock Master Agreement Options Section '' Select fields to be locked. Any fields selected Teachers will not be able to edit.
Master Agreement Template Customization:
Admin> PLS Report Writer> Oversight> Master Agreement Template
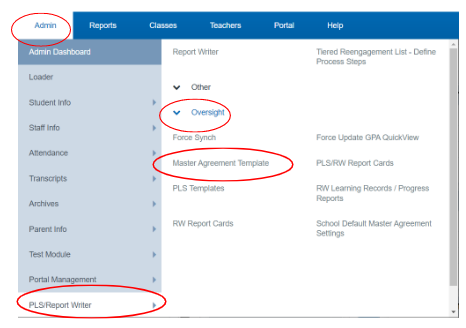
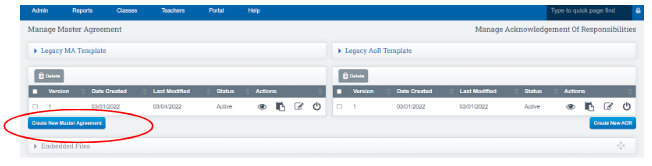
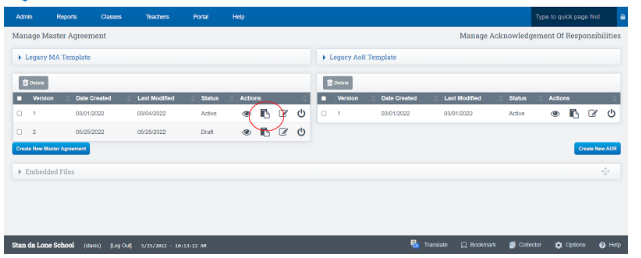
Left side of the page is for Managing the Master Agreement Template
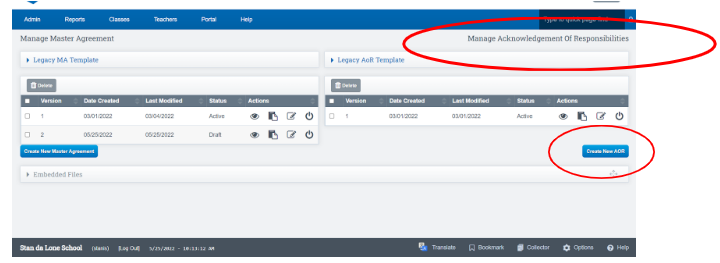
Right side of the Page is for Managing Acknowledgment of Responsibilities Template

Modify the School Pathways Default Master Agreement Template:
To Modify the default agreement, click Create New Master Agreement
The template layout page is displayed
To edit the wording in a section:
- Click the Edit Icon for that section
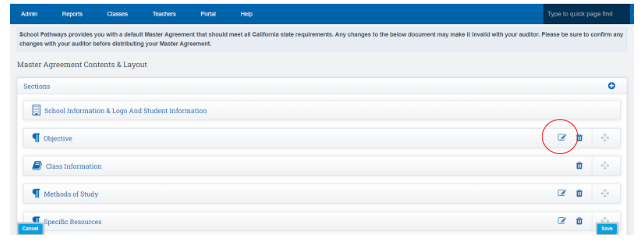
*All fields are prefilled with the language that meets CA state requirements
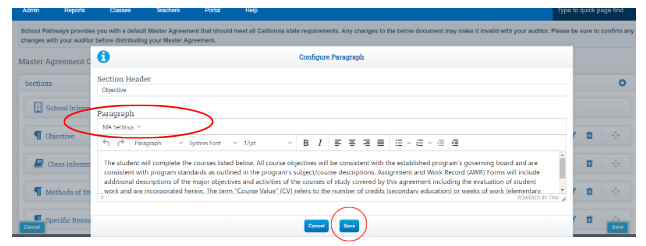
- You can type the text in the text box as you would like it to appear in the MA
- Click the MA Settings to change the format you desire to be used for the template
- Click Save
*If you already have a customized master agreement you will need to:
- Copy and paste your custom text into the proper sections of the template
To add a new section to the MA:
- Click the (plus) icon top right of the page
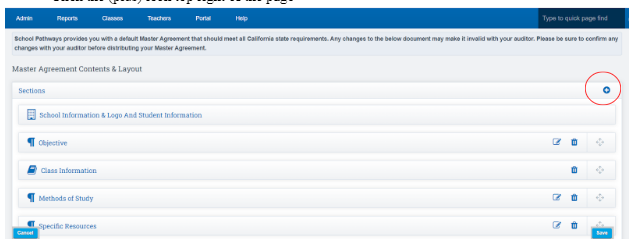
- Select Paragraph
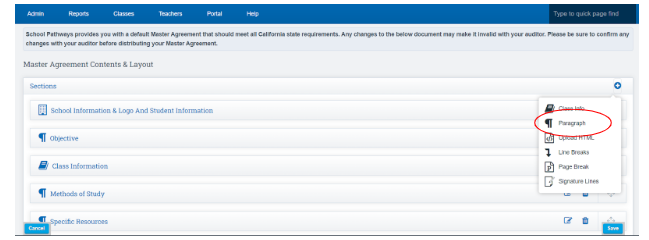
- Fill in the section Header
- Fill in the paragraph section as you desire
- Format the information you type into the paragraph box
- Click Add
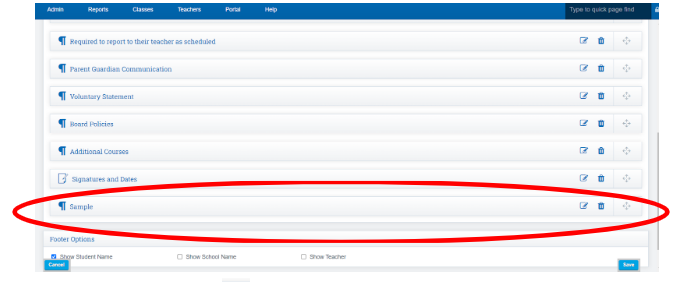
The section you created will appear at the Bottom of the list of sections
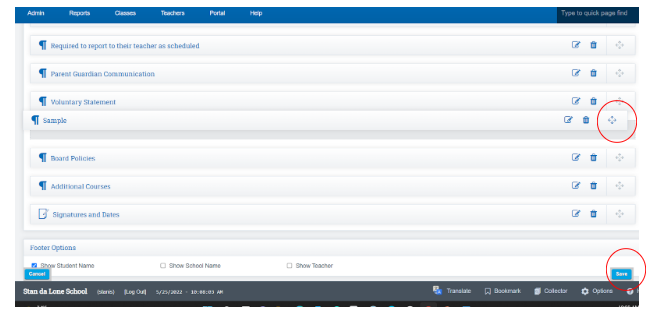
Click the Drag and Drop Icon to drag your new section in the place you desire it to appear
Click Save to view a preview of the template
Your customized template is displayed in the Manage Agreement Area
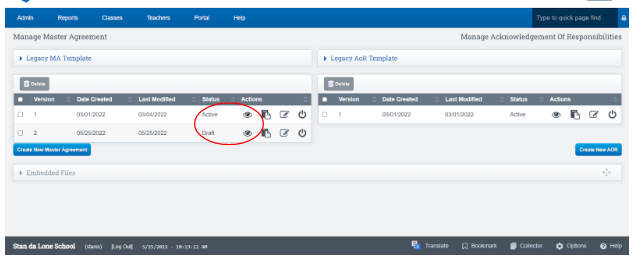
Actions Tab:
- Eyeball Icon View MA
- Paper Icon Create Duplicate
- Pencil w Paper Icon Edit Document
- Power Icon change the status of the document
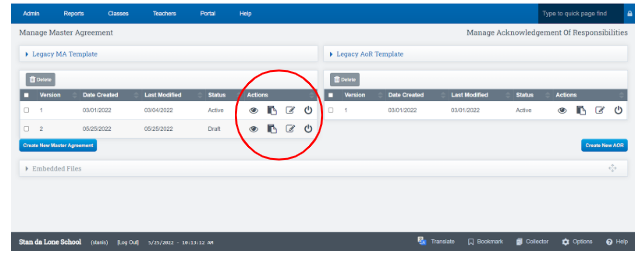
*You can view different versions in this sections
*You can also see it is a draft
Click the Eyeball Icon to view your Master Agreement Template:
Click the Pencil Icon to make any additional edits
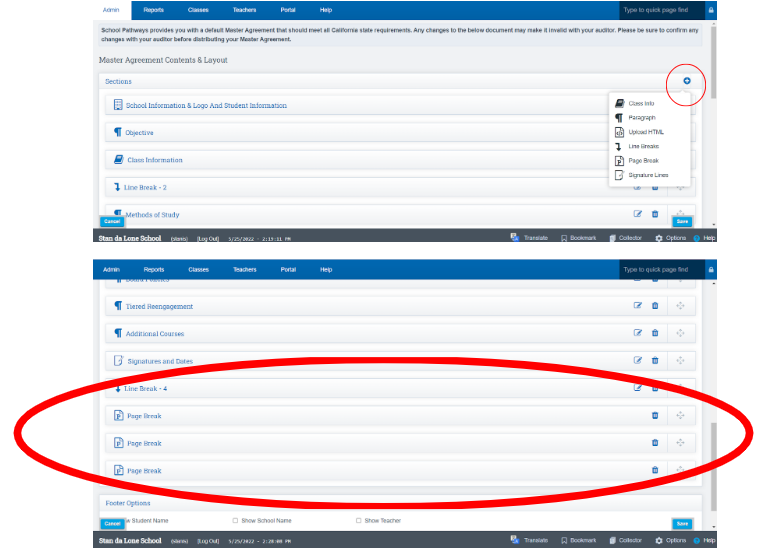
- Add Line and or Page Breaks:
Line Breaks: Choose the number of line breaks you desire to add by:
- Clicking Line Breaks
- Click the Plus Icon to add the number of breaks you would like
- Click Add
- Scroll to the bottom of your page
- Click the drag and drop icon to drag and drop the line breaks where you want them
Page Break:
- Click Page break
- Page break is added to the bottom of the page
- Drag and drop the page break to the desired placement
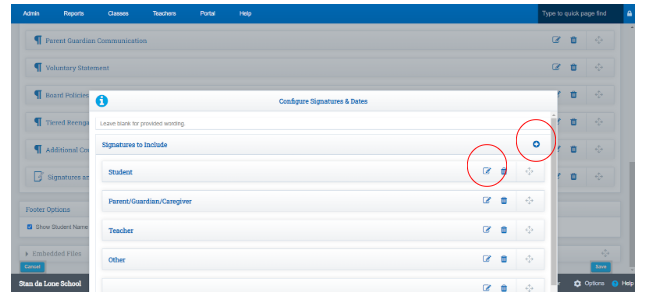
Signature and Date Section:
Click the Edit Icon to the right of the signature and date
Click the Edit Icon next to the signature lines if you want to add or delete signature lines
Footer Area:
Default Student name is added
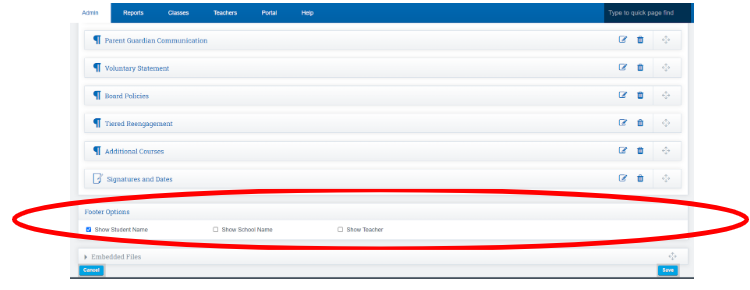
*You have the option to have the Teacher and School name appear on the footer
Make the Master Agreement Active:
Double check your template once all changes have been made, if everything looks good and your Admin approves of the changes you can now change the Master Agreement from draft to Active by clicking the Power Icon button.
Create Another MA :
Click the Copy Icon to create duplicate of your current agreement
Follow all the above steps to make changes
When you are ready to switch to the new agreement click the Power Button to make it active
Your old agreement will appear as Retired
Delete old Template:
Click the Box next to the Version Number and it will be deleted from the template list

Modify Acknowledgement of Responsibilities:
This section can be modified the same way we modified the MA template
Click New AOR
Edit the sections as you feel necessary
Click Save
You will now see the AOR template displayed on your screen
Customize your MA Template Overview:
- Click Create New Master Agreement
- Modify the existing content by changing the text and adding MA settings fields
- Add new section paragraphs and signature lines
- Format the agreement with additional line and page breaks
- Preview the agreement template
- Activate the new master agreement template