The possibilities are endless! You have the ability to manage your enrollments, forms, and rosters. Reports available.
Page Policies:
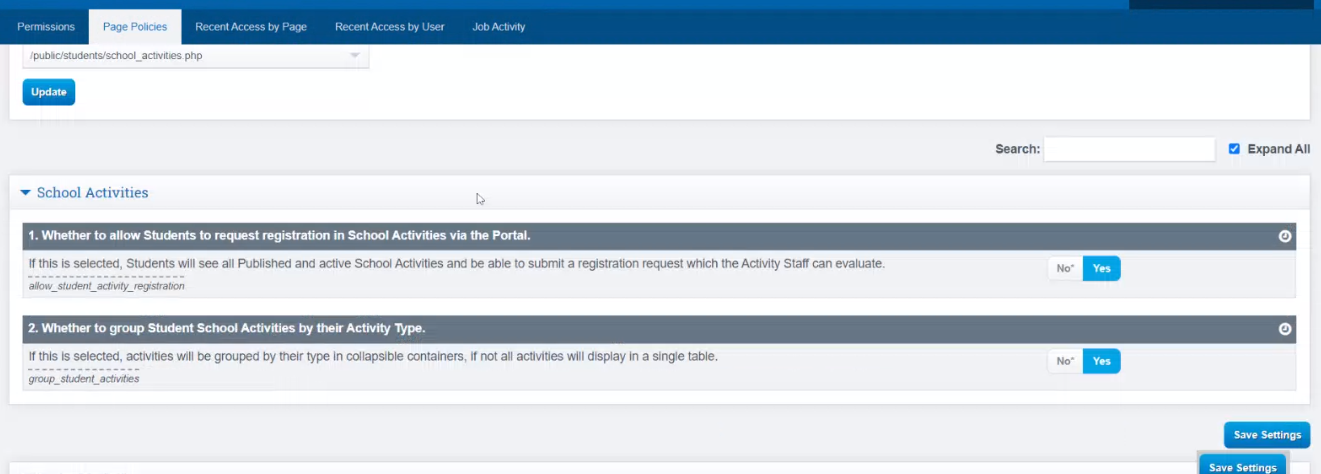
Cogwheel > Page Policies
It is recommended to follow the setup steps below in the order presented for the first time. Once you have all the necessary information in the Student Information System (SIS), you can then manage the activities that have been created using the guide provided.
Setup Steps:
- Page Policies
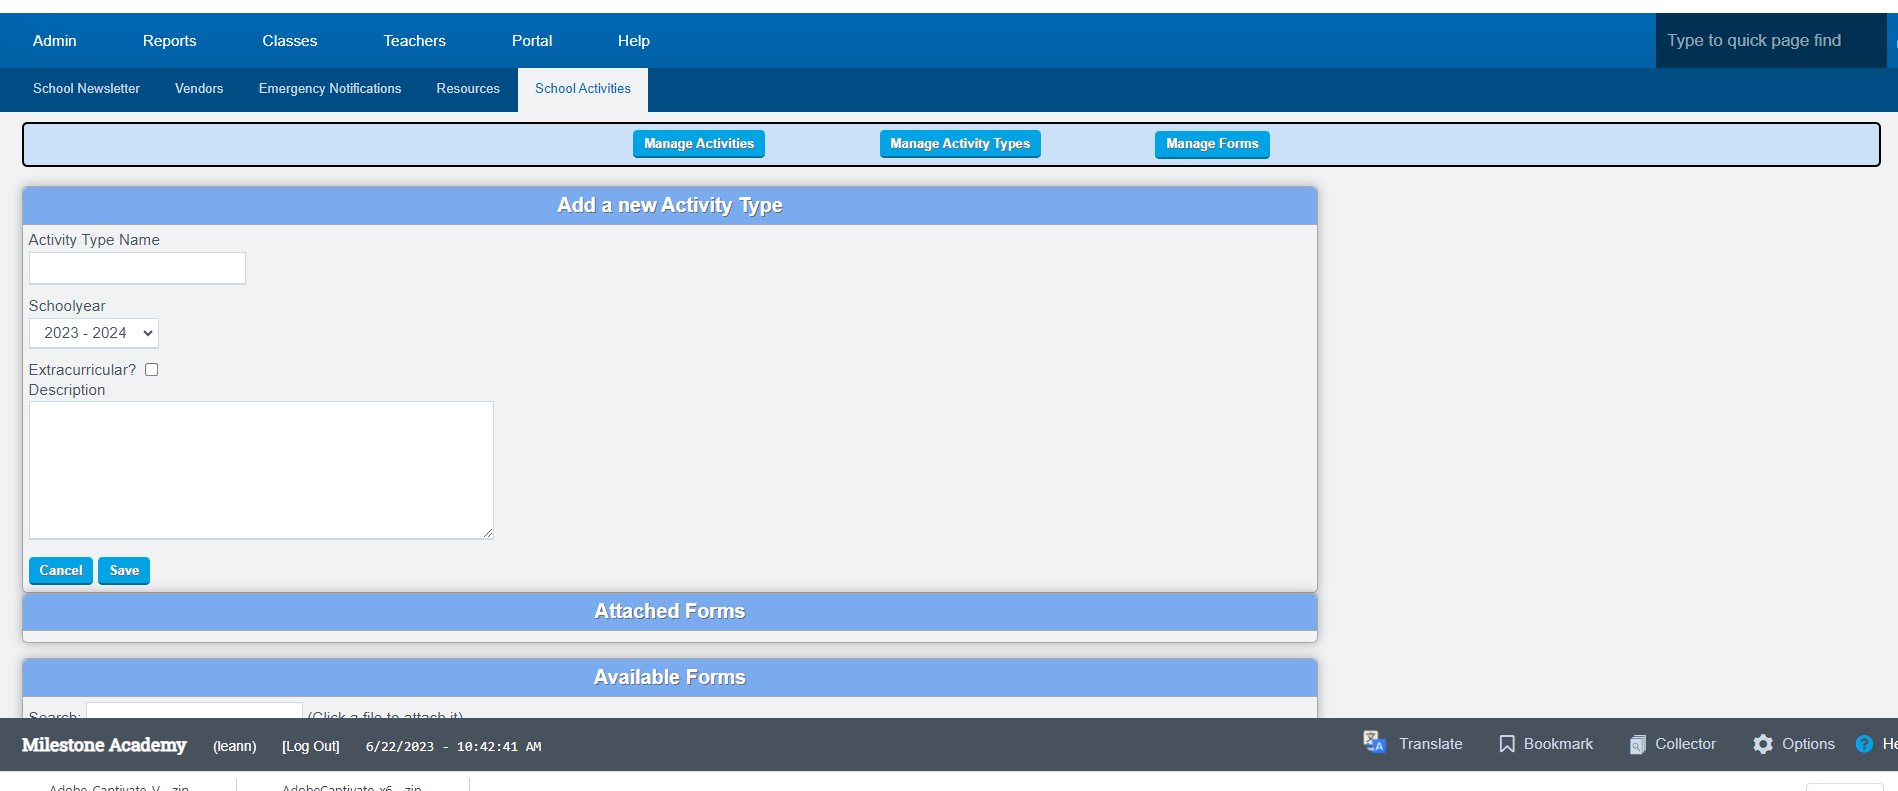
- Forms
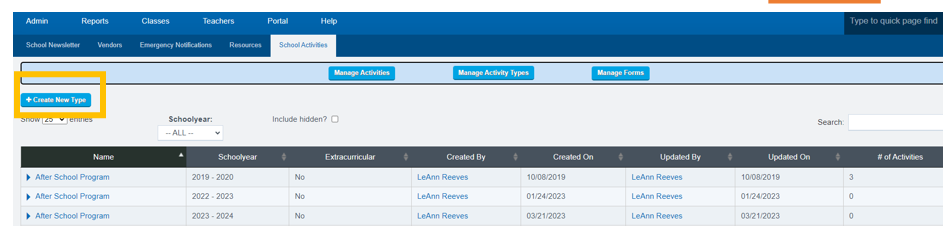
- Manage Activity Types
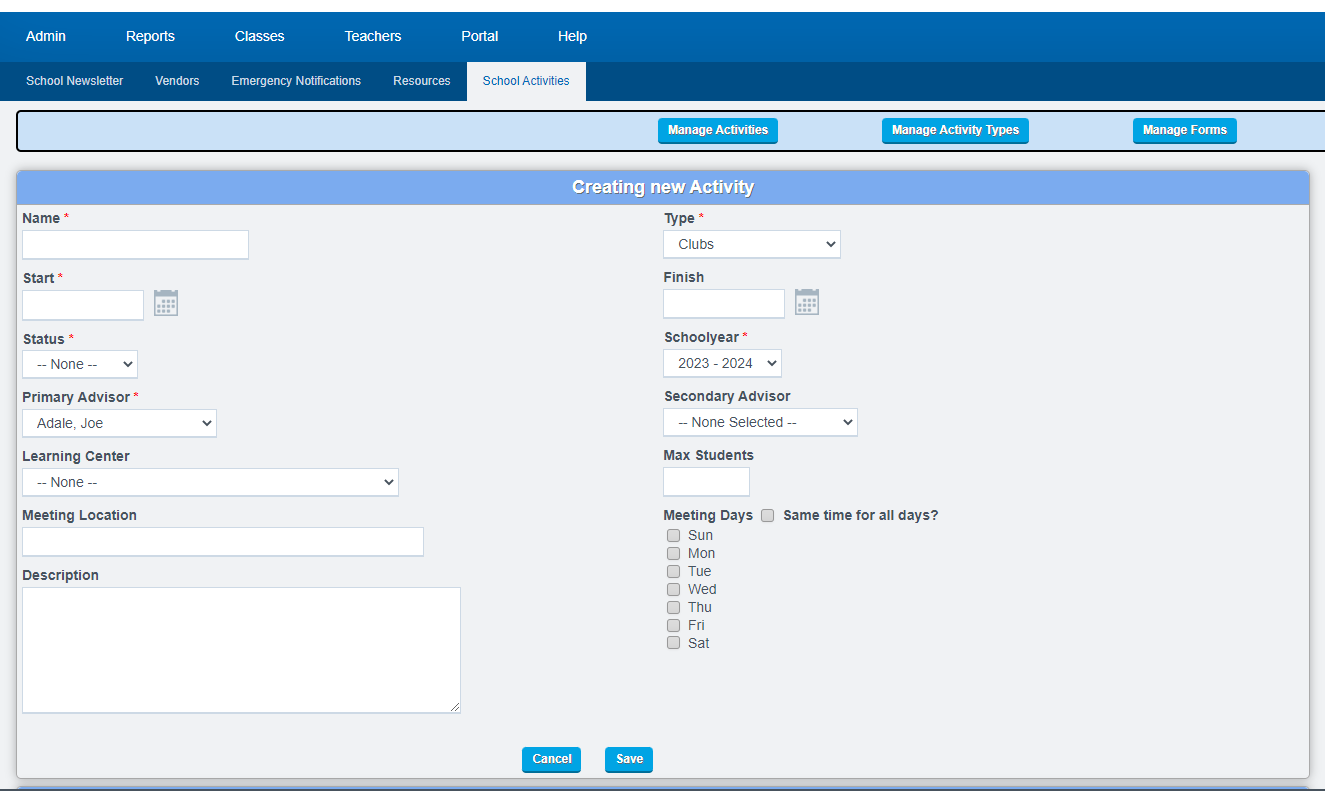
- Create New Activity
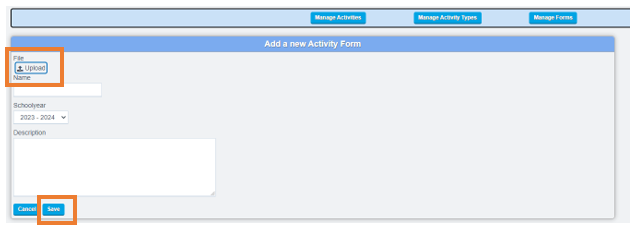
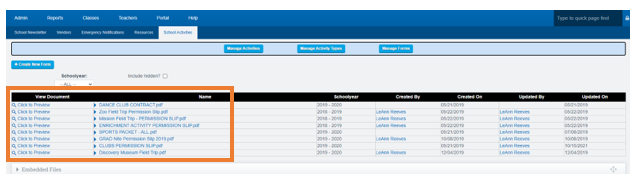
Manage Forms
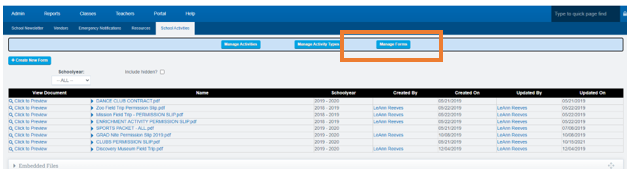
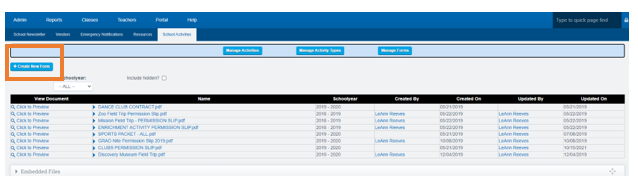
Manage Activity Type
Create New Activity
Click Manage Activities

-
-
Enter in the relevant information. Required fields noted with red asterisk:
-
Name
-
Start
-
Status
-
Primary Advisor
-
Type
-
School year - make sure to associate with correct year
-
-
Description & Meeting Days/Times
-
Not required, but this info will be visible in the Portal and used on the printed schedules
-
-
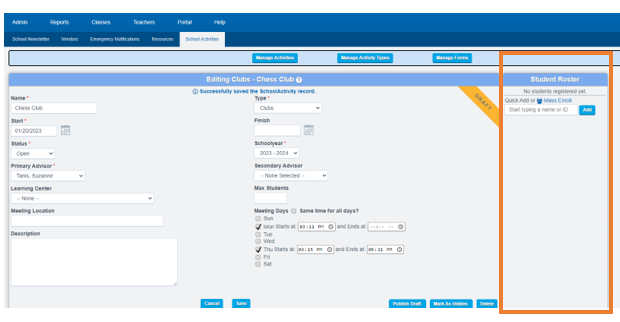
Attach Form (permission slips, contract, etc.) to specific activity byclicking directly on one of the Available Forms
-
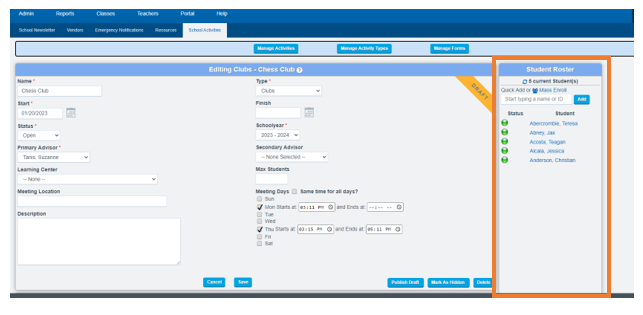
Once the event is Created , Once the event is created, you can easily enroll students by clicking on the far right of the screen
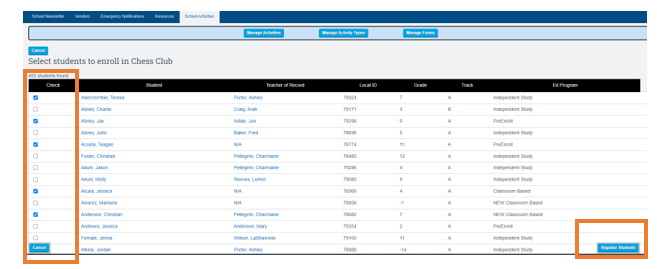
Click Add and or Mass Enroll Using the "Mass Enroll" option, you can select multiple students and register them with just a few clicks.
When you click Mass Enroll ,Once you click on Mass Enroll, you will be taken to a page where you can select multiple students and register them with just a few clicks.
Check the box next to each student you want to enroll
Click Register Students
You will then be redirected to a screen where you can see the students who are now enrolled
and you can create a New Activity if desired
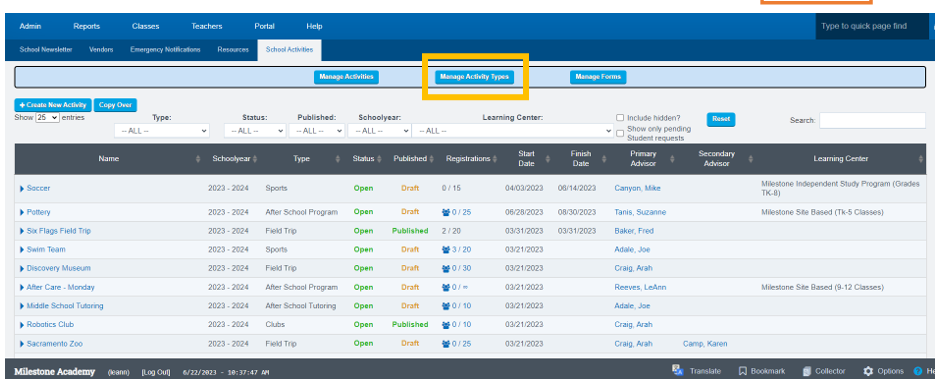
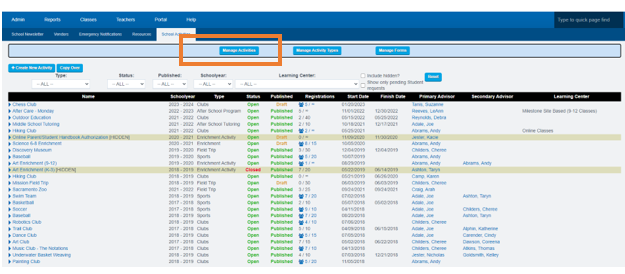
Manage Activities
-
Make sure to click on the Manage Activities button to return to the main page
-
This is an overview page of ALL activities that you have available
- All columns are sortable
- You can click on the Title of the Activity to edit the activity
-
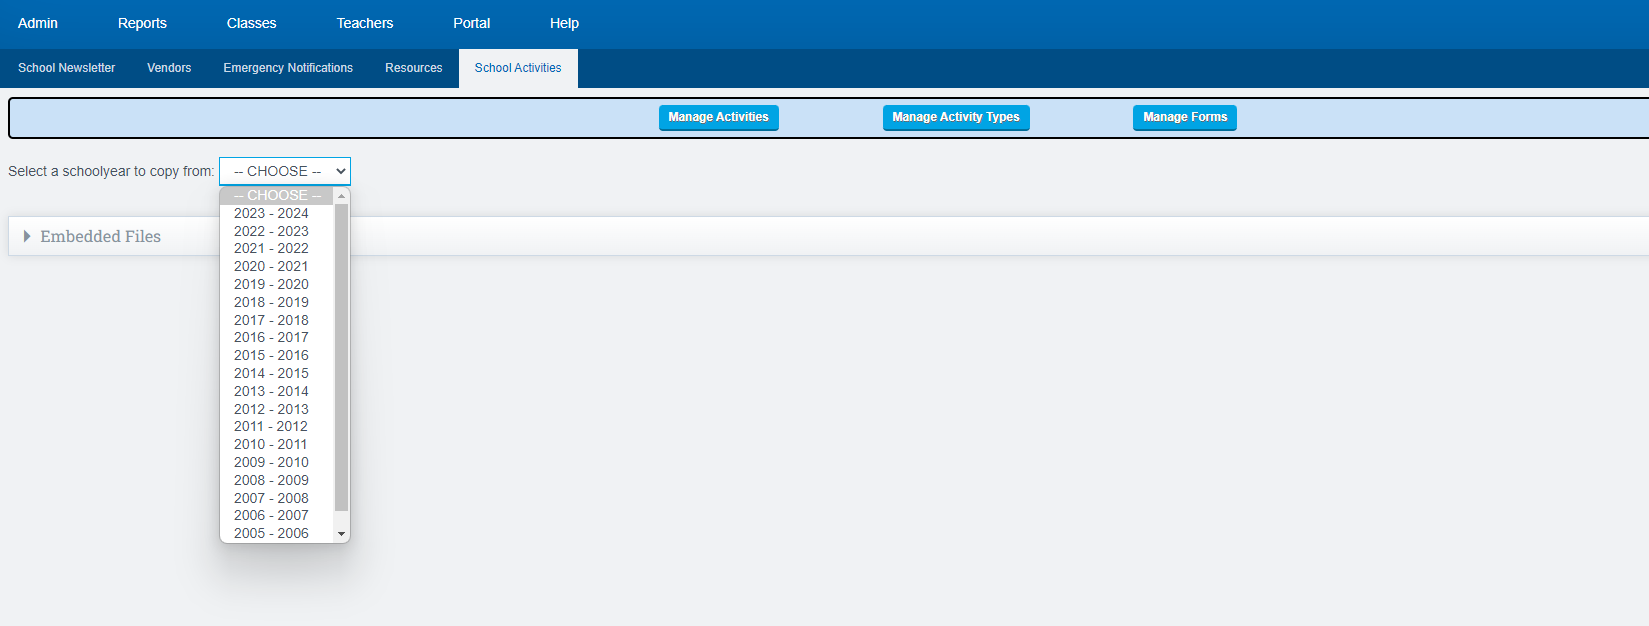
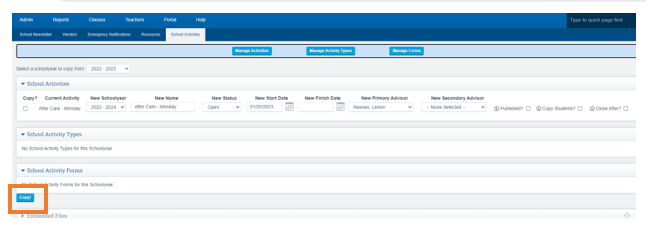
Click Copy Over
Choose the School Year
Select what you would like to copy and option to edit various fields for the upcoming school year.
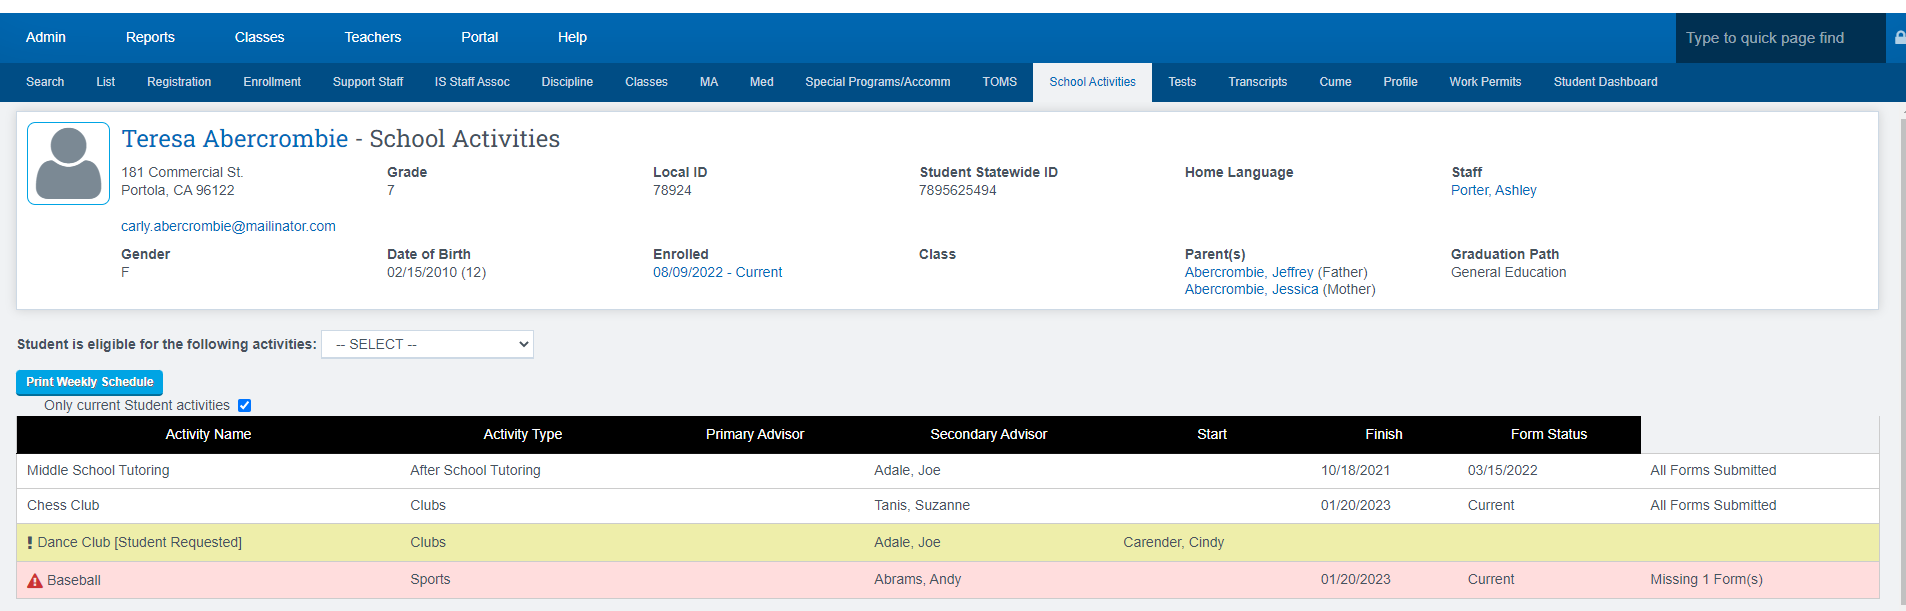
From Student Dashboard: to add a student to an activity
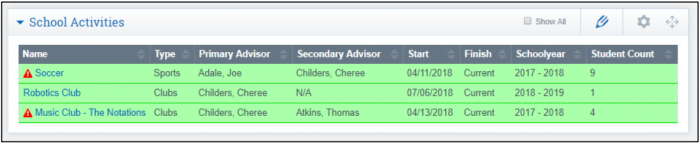
School Activities Tab
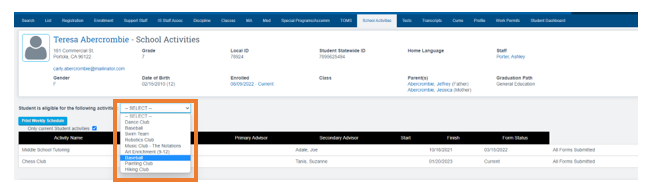

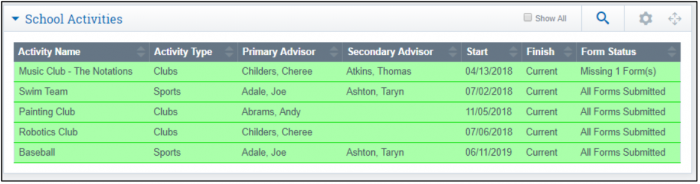
- When you click on the Activity name, you will see details regarding the Student enrollment in activity.
- Click the Red form if the form has been submitted, which will update the Status of forms to Green.
- Enter a Finish Date if needed
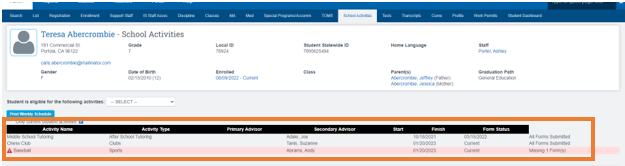
- If student is missing a form, the title of the Activity will be shown in red
- Link will be available to download the missing form
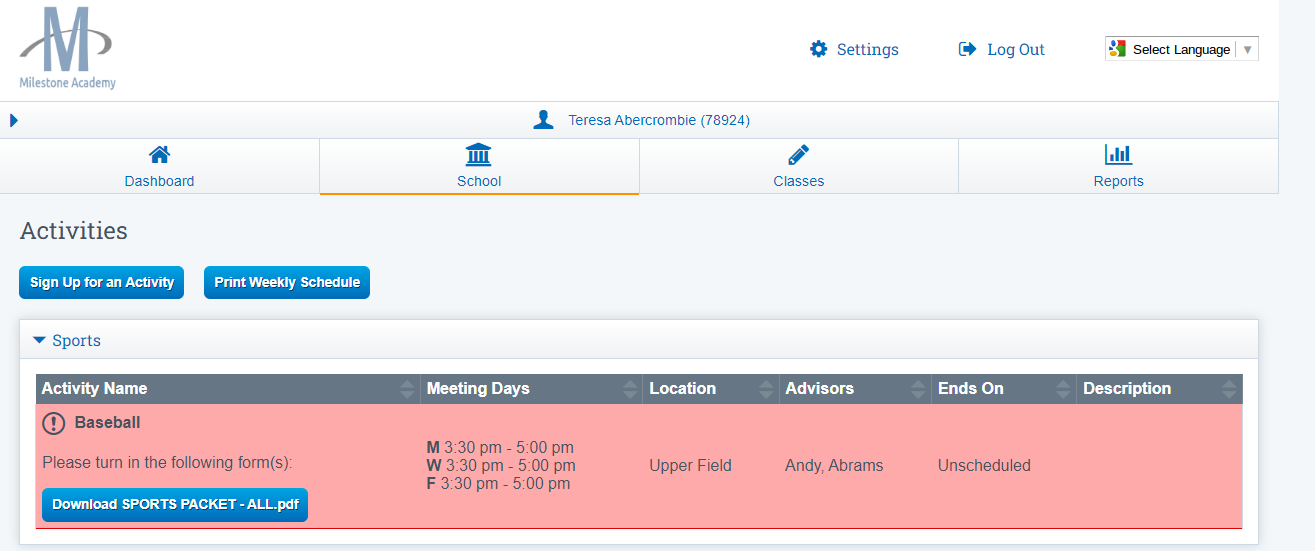
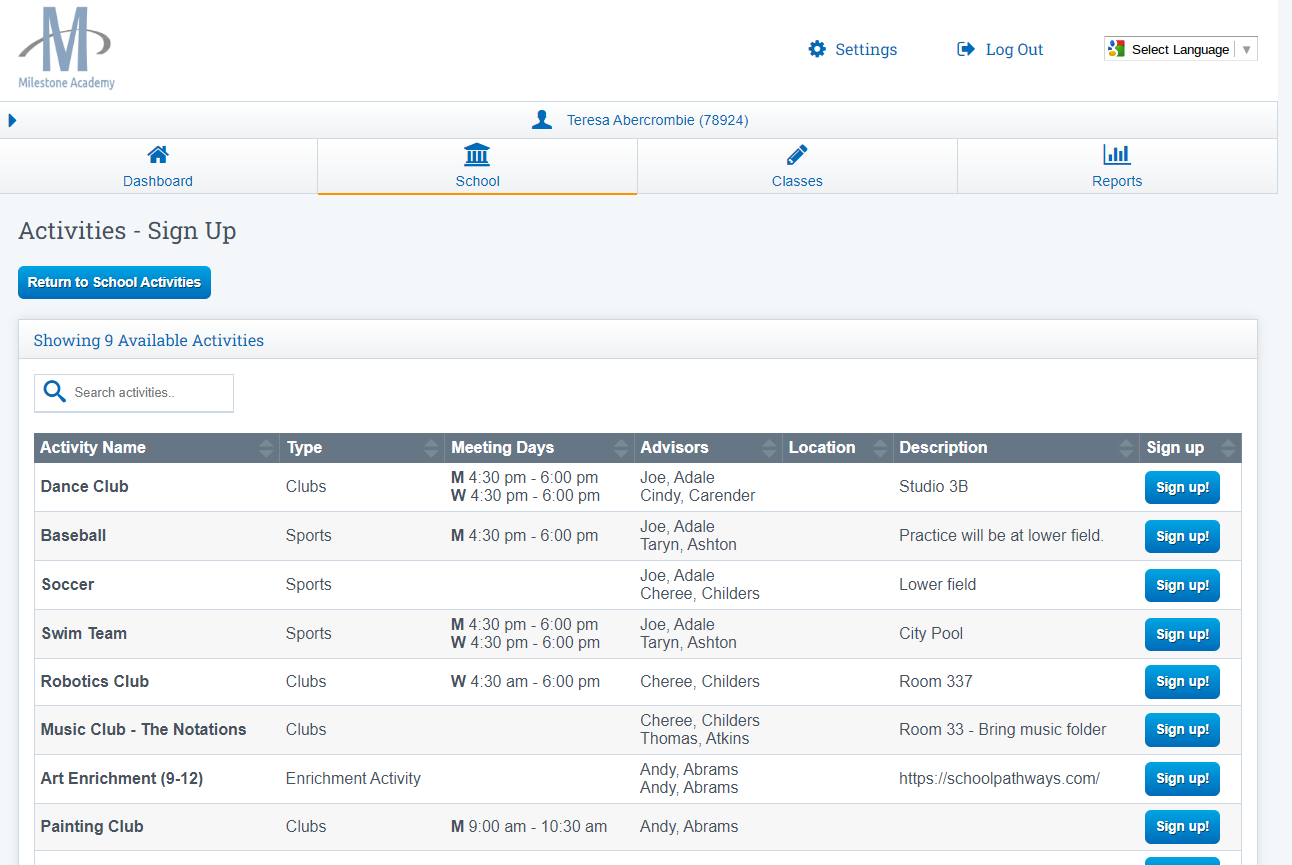
Student can Sign up for an Activity from their Student Portal
Click Sign up For Activity Tab

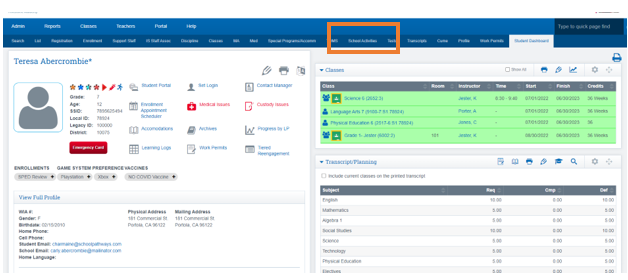
School Activities Panel - Staff & Student Dashboard
Student Dashboard
Staff Dashboard
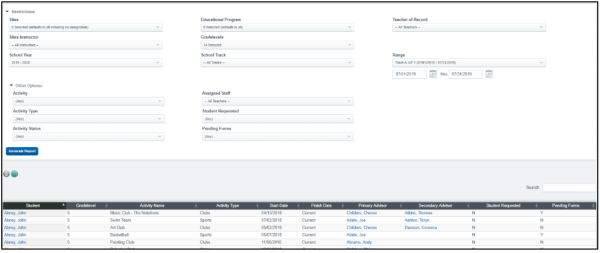
School Activities Report