
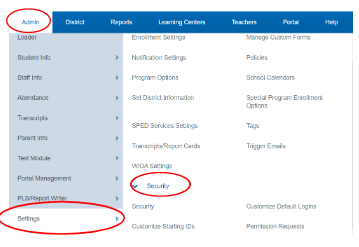
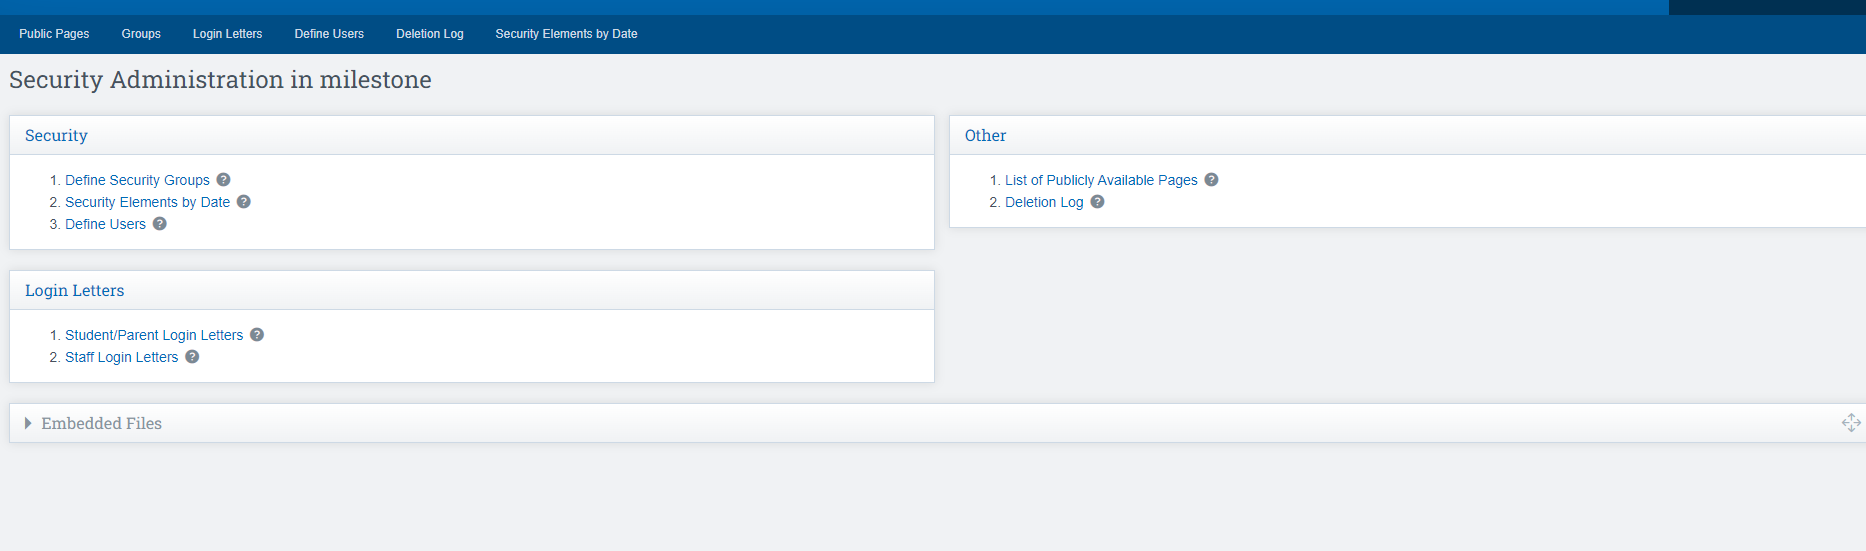
Admin>Settings>Security>Security
Security Admin Page links
Security:
- Define Security Groups – Complete List of all School Pathways security groups with the capability to customize, create manage and see school groups.
- Security Elements by Date –
- Define Users – This section allows you to place users into security groups, and or edit their login information.
Log In Letters
- Student/ Parent Login Letters – Generates a list of active/disabled Students /Parents as well as allows you to send welcome emails. Click this link for more information.
- Staff Login Letters – Generates a list of staff so you can send Login emails on how to use account and system. Click this link for more information.
Other:
- List of publicly Available Pages – shows a complete list of pages parents and students can access through the portal or REG-Online.
- Deletion Log – Searches for records that were deleted per username, IP address, page, and date range.
Adding Groups
Custom Group: Created at School Level to manage security elements for the school level
*If the group name appears “Blue” in the list of groups, it is because it is a Custom group the school made
Admin>Settings>Security>Security
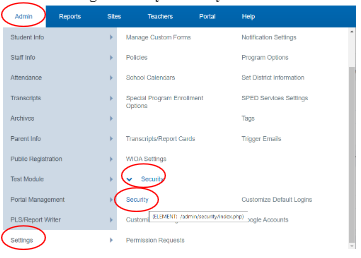
Step 1: Click Group Tab
Step 2: Click Add New Group
- Active Group (Green)
- Inactive Group(Red)
Step 3: Create a new title for the group
Step 4: Group Type : Private
Step 5: Set the User type that is applicable to your group
Step 6: Check the Box for “Default District Group” If you are a district with an Oversight scope (Umbrella school)
Step 7: Click Save
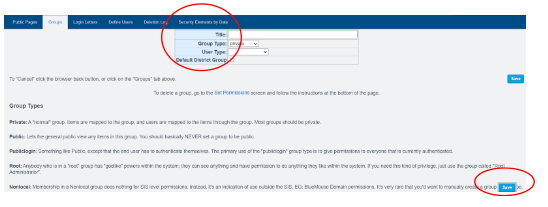
*Be sure to Name your group in a way in others know what the group is by looking at the title of the group
* Private Group (Definition)
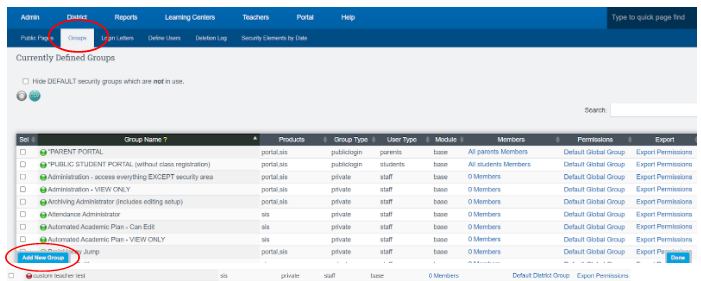
Step 8: Locate your group in the list and Click Set Permissions (AKA: Page Elements)

Step 9: Check the box next to the name of item you wish to grant access to
Step 10: Click Set
Step 11: Click Details
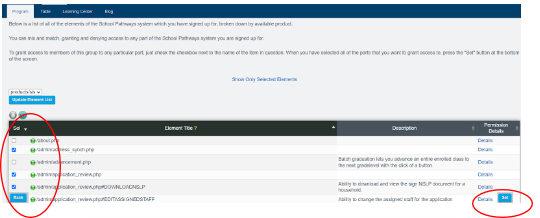
*The Details Link navigates you to our page level permission details for that specific url/page.
Detail View
*Permissions Tab - All of the Security Groups that page is in, and you can expand in to see the users in those groups.
*Page Policies - The Page Policies (customizations per page) that page has, there may be none.
*The other three tabs are not applicable to the client : Recent Access by Page, Recent Access by User, Job Activity
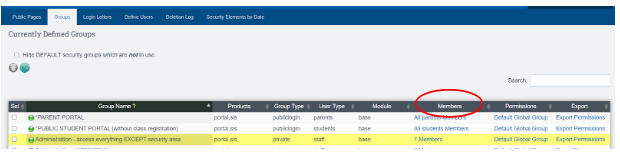
Step 12: Click the Members Link in the Members Column
Step 13: Click in the Box next to the name of the associate you want to add to the group(right side)
Step 14: Click Save Changes 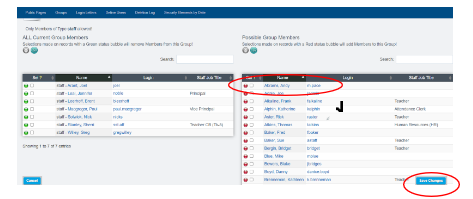
*The associate you chose should now appear in the box on the left where the bubbles are all green
* All names listed on the left side of the page are IN the group.
To remove a member from the group
- Place a check mark in the box next to their name in the box on the left side of your screen
- Click SAVE CHANGES
- Their name will now appear in the box on the right side of your screen
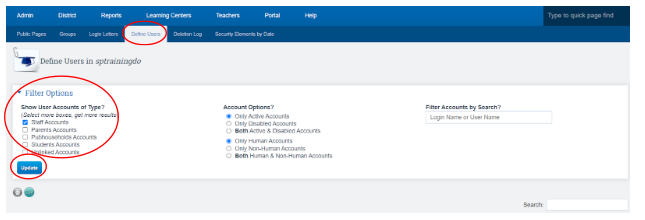
Define Users
Users must be added to the system and linked to their registration record.
Step 1: Click Define Users Tab
Step 2: Check all appropriate fields under filter options
Step 3: Click Update
*The Data in image below was pulled based of off what I placed in “Filter Options” above, there are several items in this image you can click on to change the view on your screen
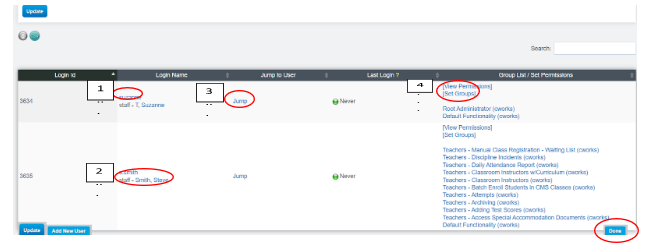
1. Clicking on the Login name link shows the current username and password.
2. Clicking on the Staff member’s name takes you to their staff record
3. Clicking on Jump logs you in as the user
4. Clicking on Set Groups allows you to add an individual user as a member to a group