Admin : Attendance Codes
When students are marked absent or tardy, schools enter a code for the type of absence. This manual explains how to set up the codes your school and the two ways you can mark the codes for the absent days.
Setting Codes for your School
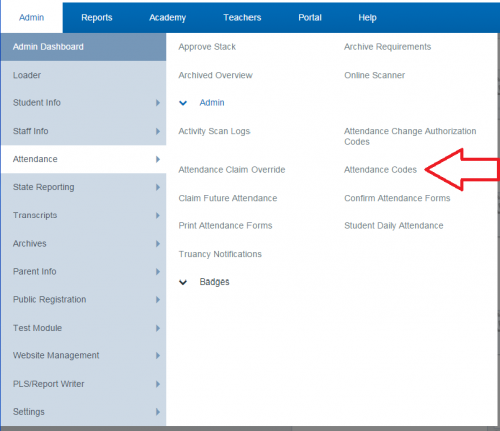
Admin>Attendance>Admin>Attendance Codes

To enter new codes,
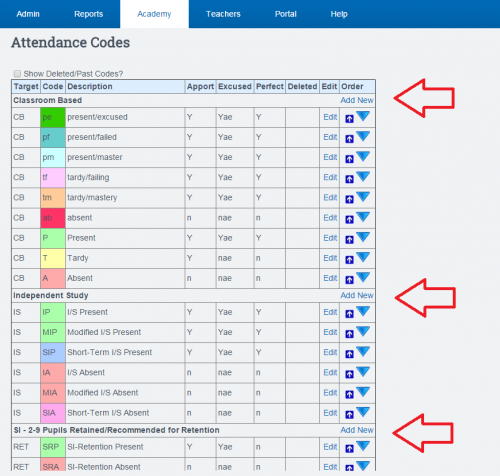
click Add New under the desired program type.
Some codes are preset.
Some codes are preset.


Fill in the following fields:
-Code: What do you want the code to be.
-Color: Choose a color that will be distinct and has not been used yet.
-Brief Description: Enter a brief description so other people will know what the code is.
-Attendance Target: What type of attendance is this code for.
-Apportioned: Will this code allow apportionment?
-Excused: Will this code mark the day as excused?
-Perfect: Will this code be considered analogous to 'Present' and be eligible to be considered in the “Perfect Attendance” report.
-Show in Admin Override: Will the code be available on the Administration Claim Override Report.
Click the Save Changes button.
Now the code will be shown as an option on the attendance Codes page.
Now the code will be shown as an option on the attendance Codes page.
The "Present" code(s) must always be the first on the list. Use the blue arrows to move the codes to the top
Enabling New Codes for Instructor Use
Following the steps above, your new attendance codes are available in the system for administrators to use in Attendance Claim Override, but are not available for instructors to use on their initial attendance claims.
If you'd like instructors to be able to use the codes, complete the following:
-
Go to Admin > Settings > Program Options
-
Click on the Edit link to the far right of the program name matching the Attendance Target you chose for the new code(s) (See Step 3 above)
-
Find the new codes in the list in the Attendance Codes section near the center of the next page.
-
To make the code available for instructors, check the box in the Code column. To make it the default code when claiming attendance, check the box in the Default? column.
