Quickly allows staff to note time, focus, and outcomes of any meeting with any student. In addition, there is an option to send notifications to specific individuals, regarding the specific contacts.
The Student Engagement feature integrated into Contact Manager allows a school to track any instructional sessions for any student across time. Any staff member who deals with any student can leave brief information regarding:
-
Time spent with the student (minutes, hours). This can be documented in the past or automatically in the present.
-
Any type of educational activity can be tracked: phone, in-person, class time, small group instruction, tutoring, email, etc.
-
Time and subject matter information can be left for every student in a class or for an individual student.
Depending on permissions set, some users will be able to view all contact lists while others will be able to only view the homeroom teacher's/independent study teacher's contacts if they teach the student.
Access to Contact Manager
Contact Manager can be accessed from different vantage points:
Administration > Student Info > Contact Manager
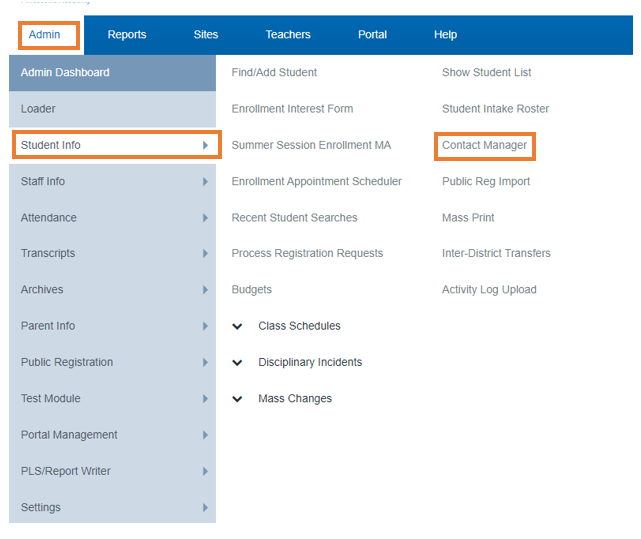
If you enter Contact Manager via this route, you have the ability to select and view contacts for any Staff if Security privileges allow
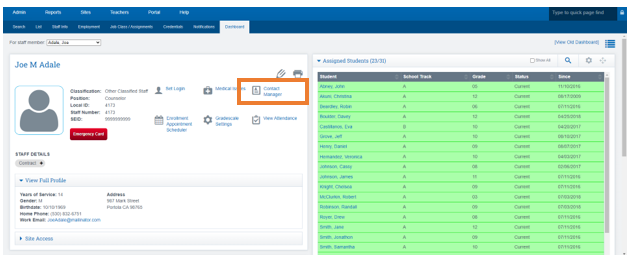
Staff Dashboard
Click Contact Manager
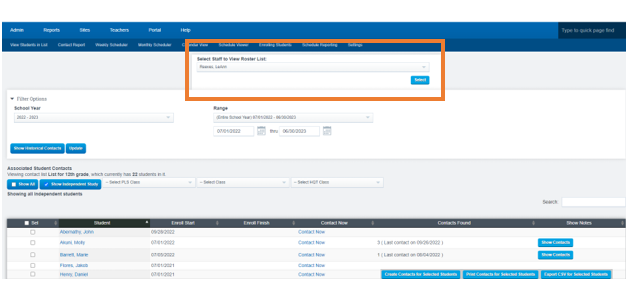
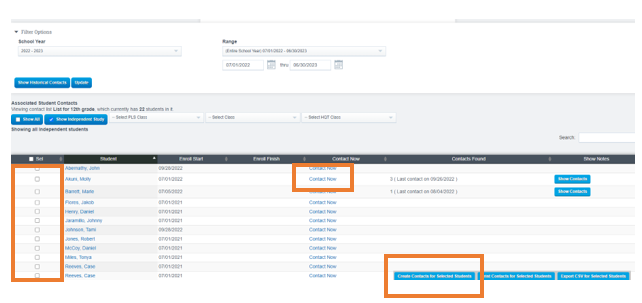
Create Contacts for Selected Students
Click “Contact Now” to create contact for individual student.
Or
Select a Group Students by placing a Check Mark in the box in front of their names
and
Click the “Create Contacts for Selected Students” button.
Or
Select a Group Students by placing a Check Mark in the box in front of their names
and
Click the “Create Contacts for Selected Students” button.
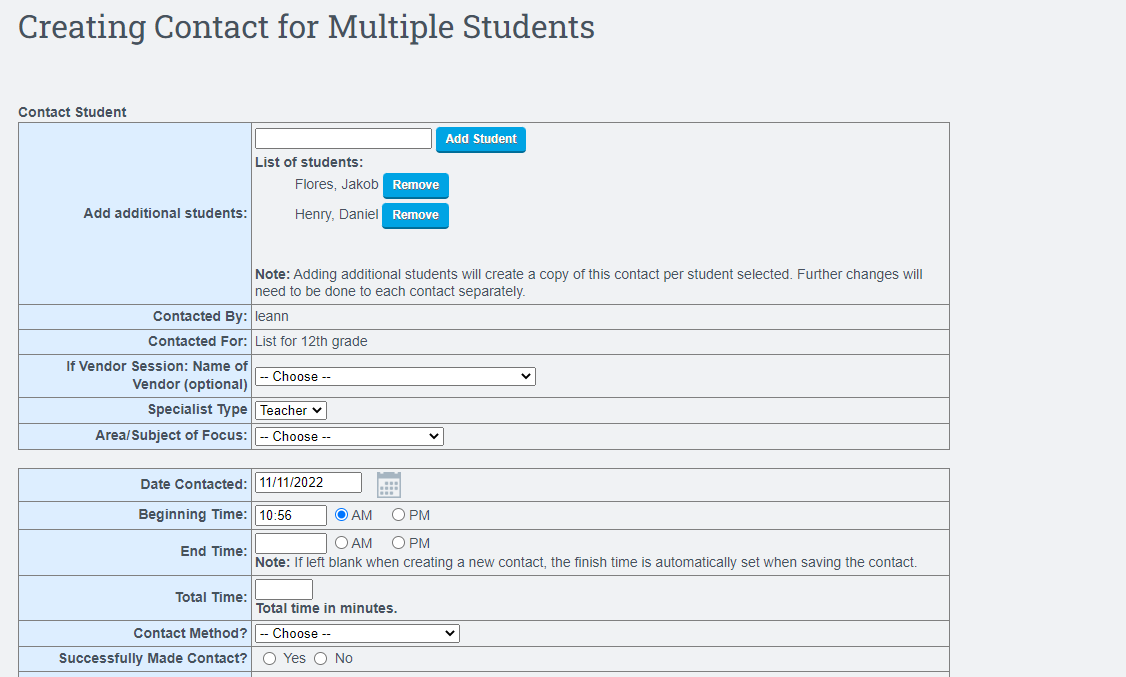
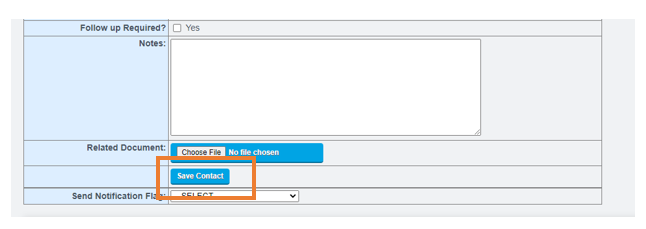
Enter all relevant information to the contact and “SAVE CONTACT”
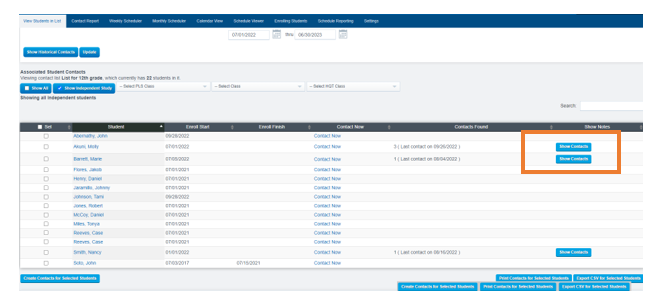
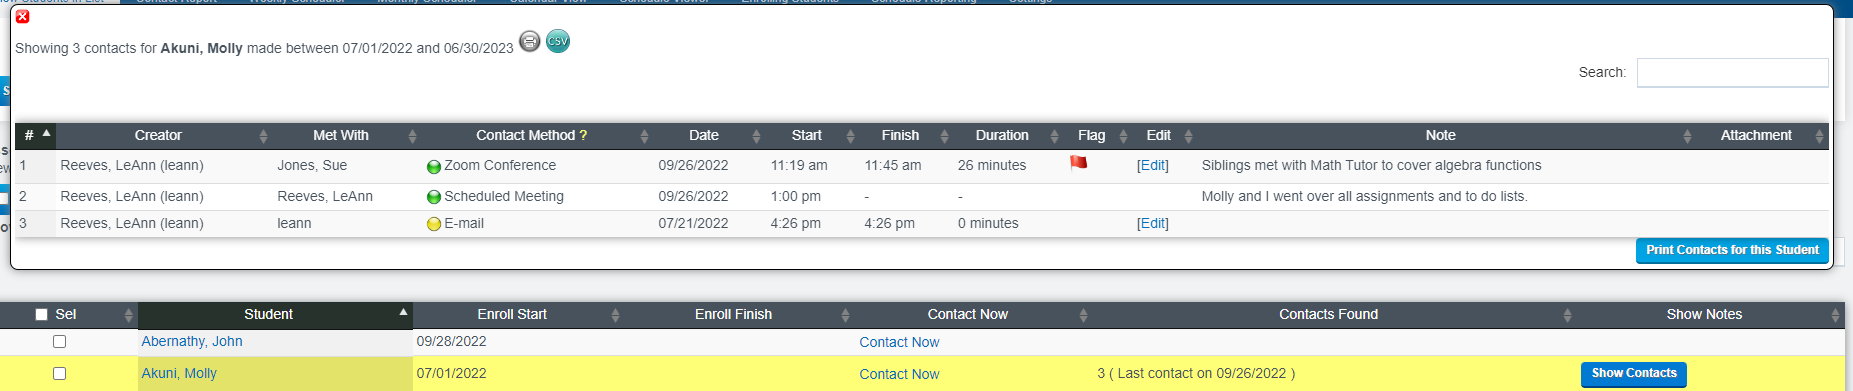
After your contact is saved, you can view all contacts By clicking "Show Contacts"
Administrative Contact Report
-
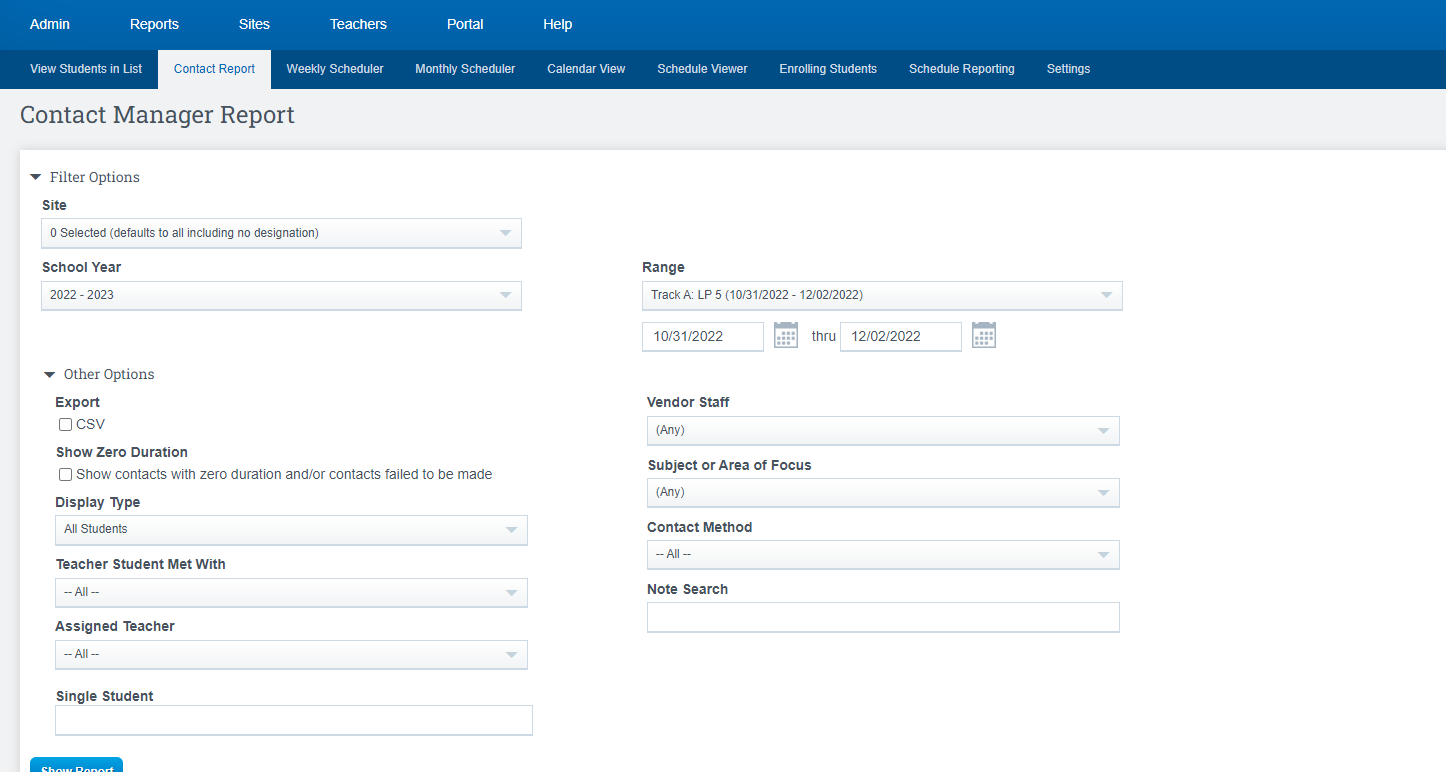
This report is used to view contacts for a specific date range, Teacher, Student, and Vendor Staff, and more. Various filters are available to pull a report of contacts that have been logged within Contact Manager.To access report, click the gray Contact Report tab > Select dates & filters > Show Reportfrom the contact manager page
Sending a Notification
Create contact as described in steps above and enter all relevant information
Click Contact User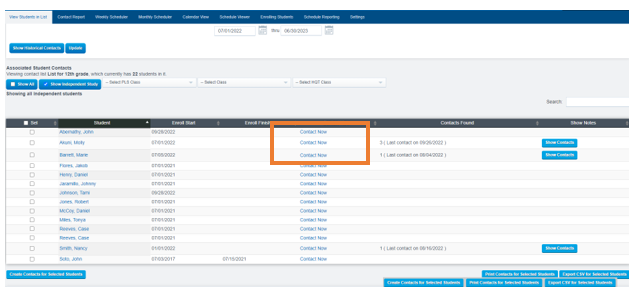
Fill out all Information on the screen

Select staff members to notify.
Flag a Contact
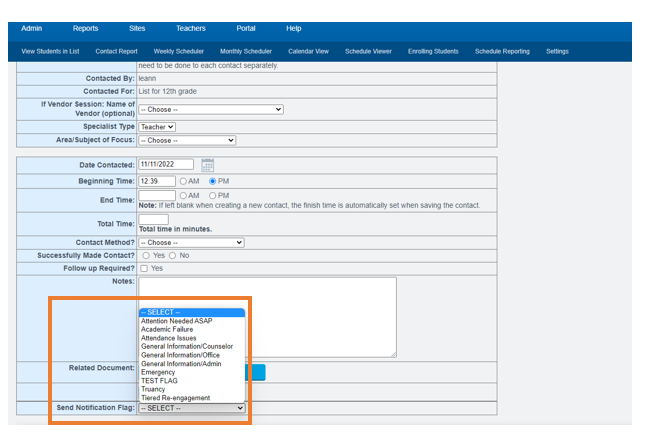
Prior to saving contact, select type of “Notification Flag” from the drop-down box. Once the flag is selected the color of flag will be displayed (Example: “Attention Needed ASAP” is highlighted red)Select staff members to notify.
Multiple staff may be selected by holding CTRL + Click to select multiple Staff and/or chose to send Parents an Email notification.
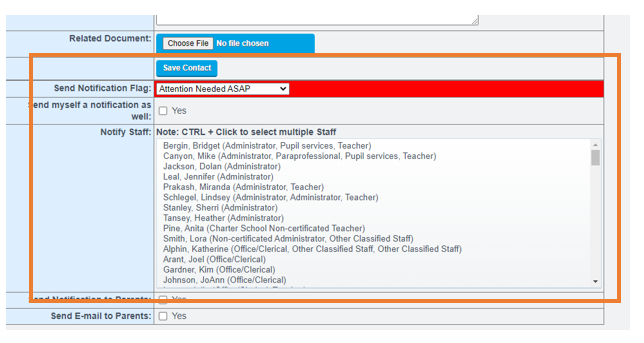
SAVE Contact
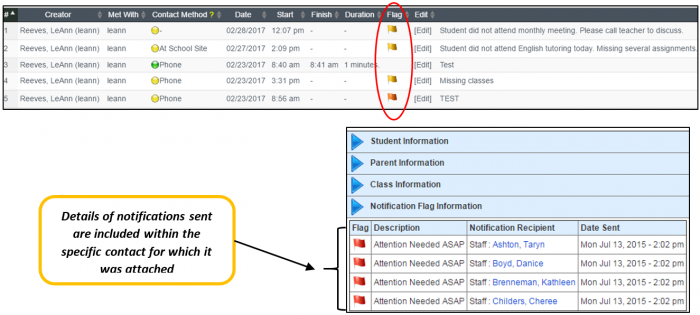
Once the contact is saved and you “Show Contacts” for a specific student “Notification Flag Information” the flag notification sent will be noted.
You can also clicking on “Edit” of contact saved
Where will staff see the notifications they have received?
When creating a contact in Contact Manager, you may send a notification to selected staff members and/or parents of the student, regarding the nature of the contact that is being created.
Staff members will have notification flags appear next to the profile picture at the top of right of the SIS
-
Color of the flag indicates level of importance or priority of notification (Emergency, Attention Needed, Academic Failure, General Information)
-
-
Color of the flag will indicate level of the importance or priority of notification

-
Hover over the flag for a brief description
-
Click directly on the flag to read notification
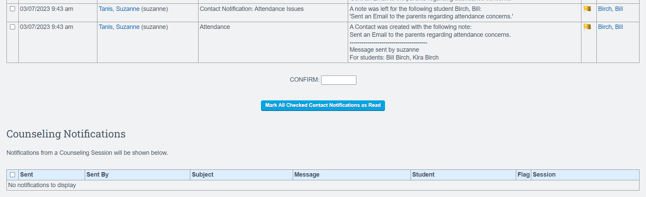
To mark the notification as Read:Click the box to the left of the notification,Typing CONFIRM, andClick Mark all Checked Notifications as readThe Date and time read will be noted.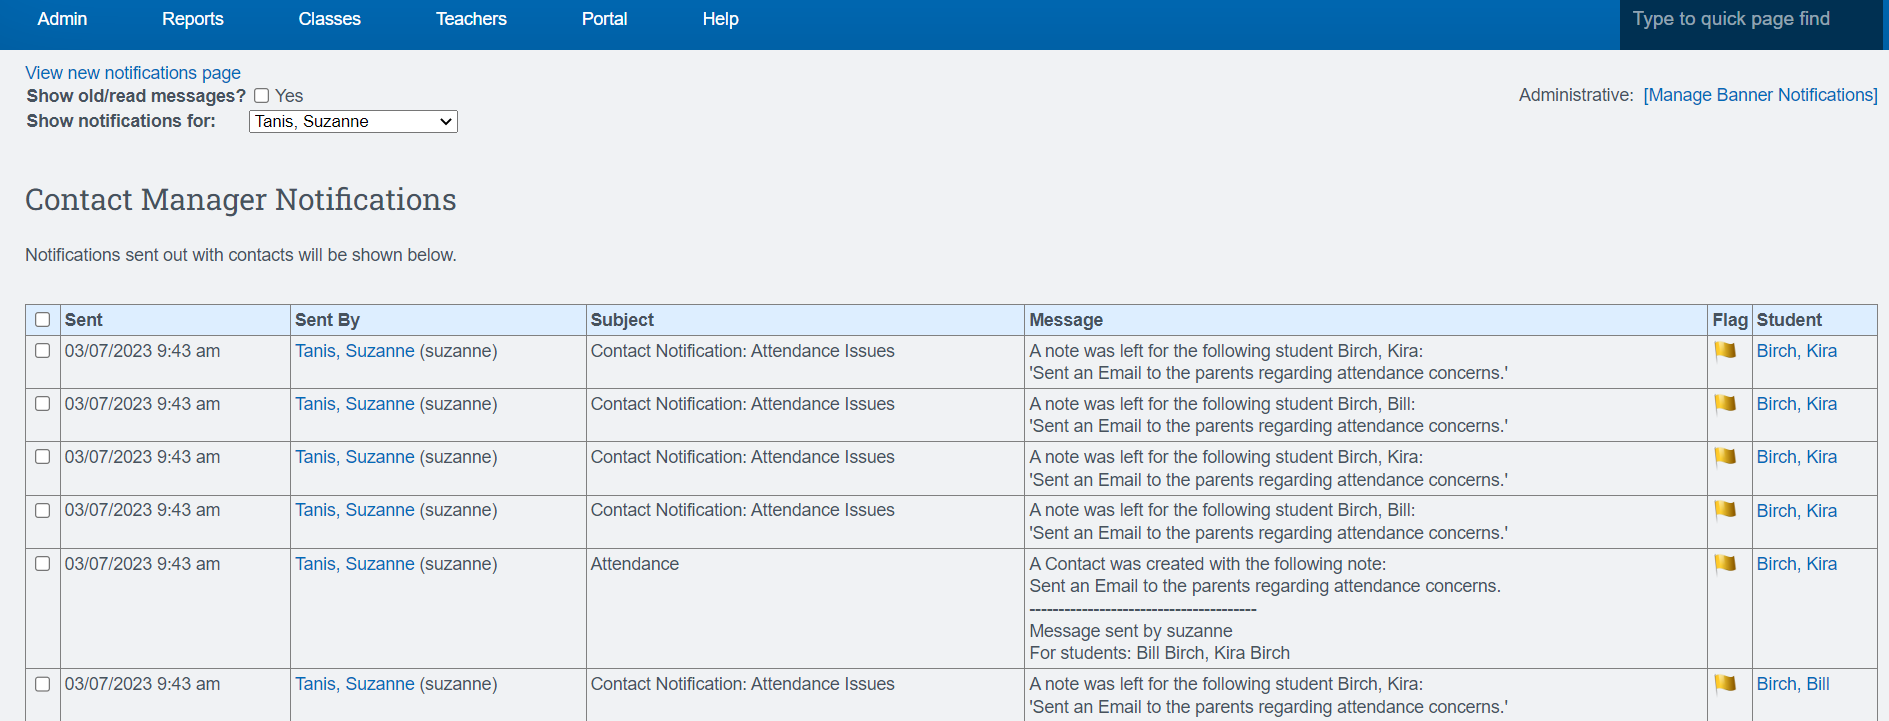
-