
Setting- Up
Step 1.
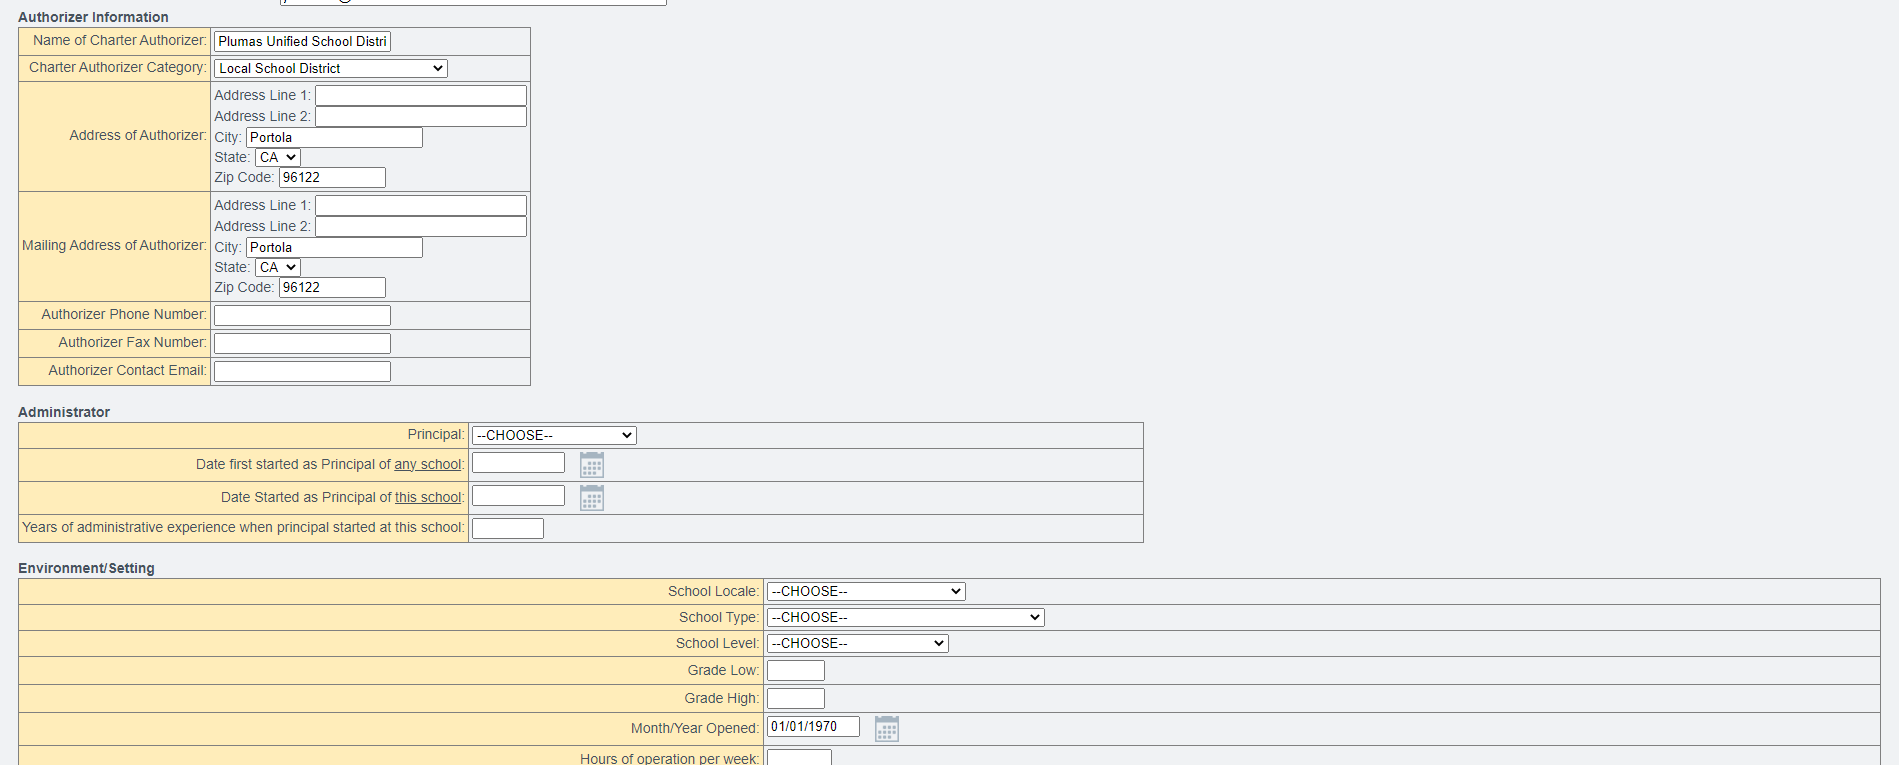
- Admin > Settings > Set District/School Information
- Fill out the info to best fit the needs of your school
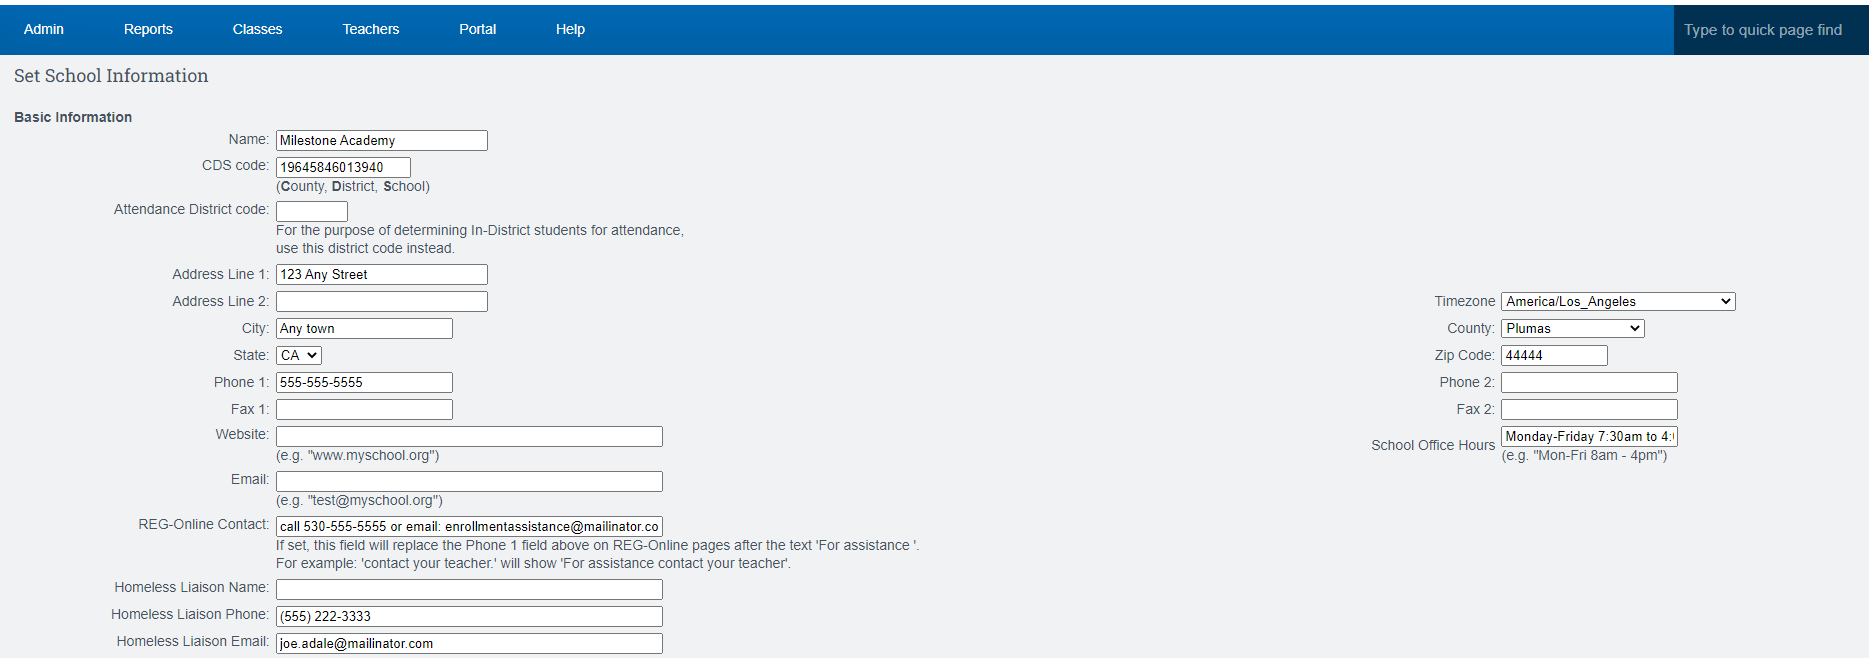

- The phone number listed on this page will be posted on the public side of the registration window
- Office hours listed on this page will be viewed on the public side of the registration window
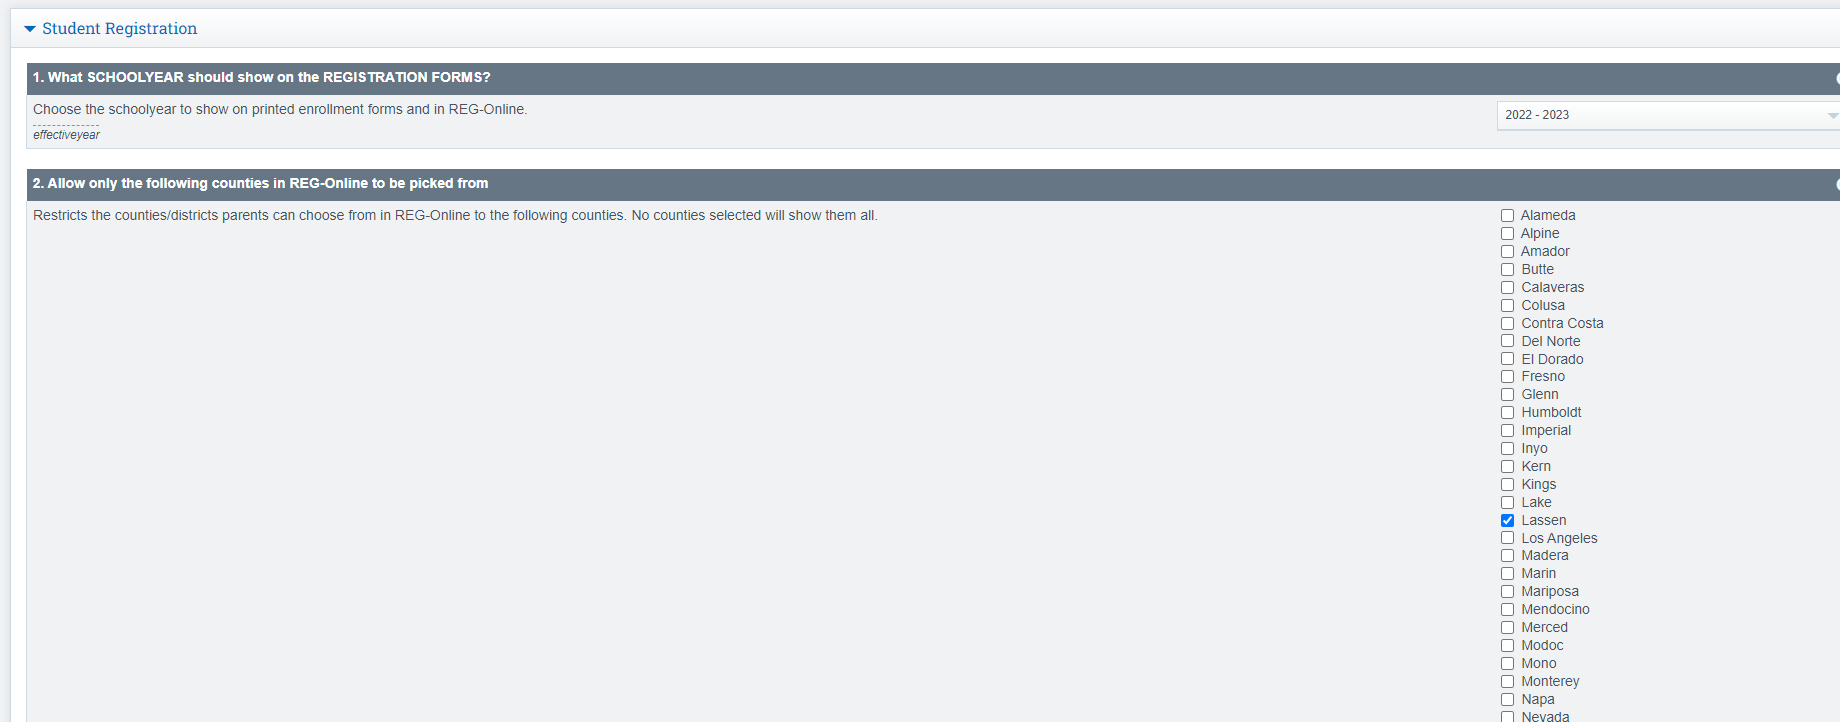
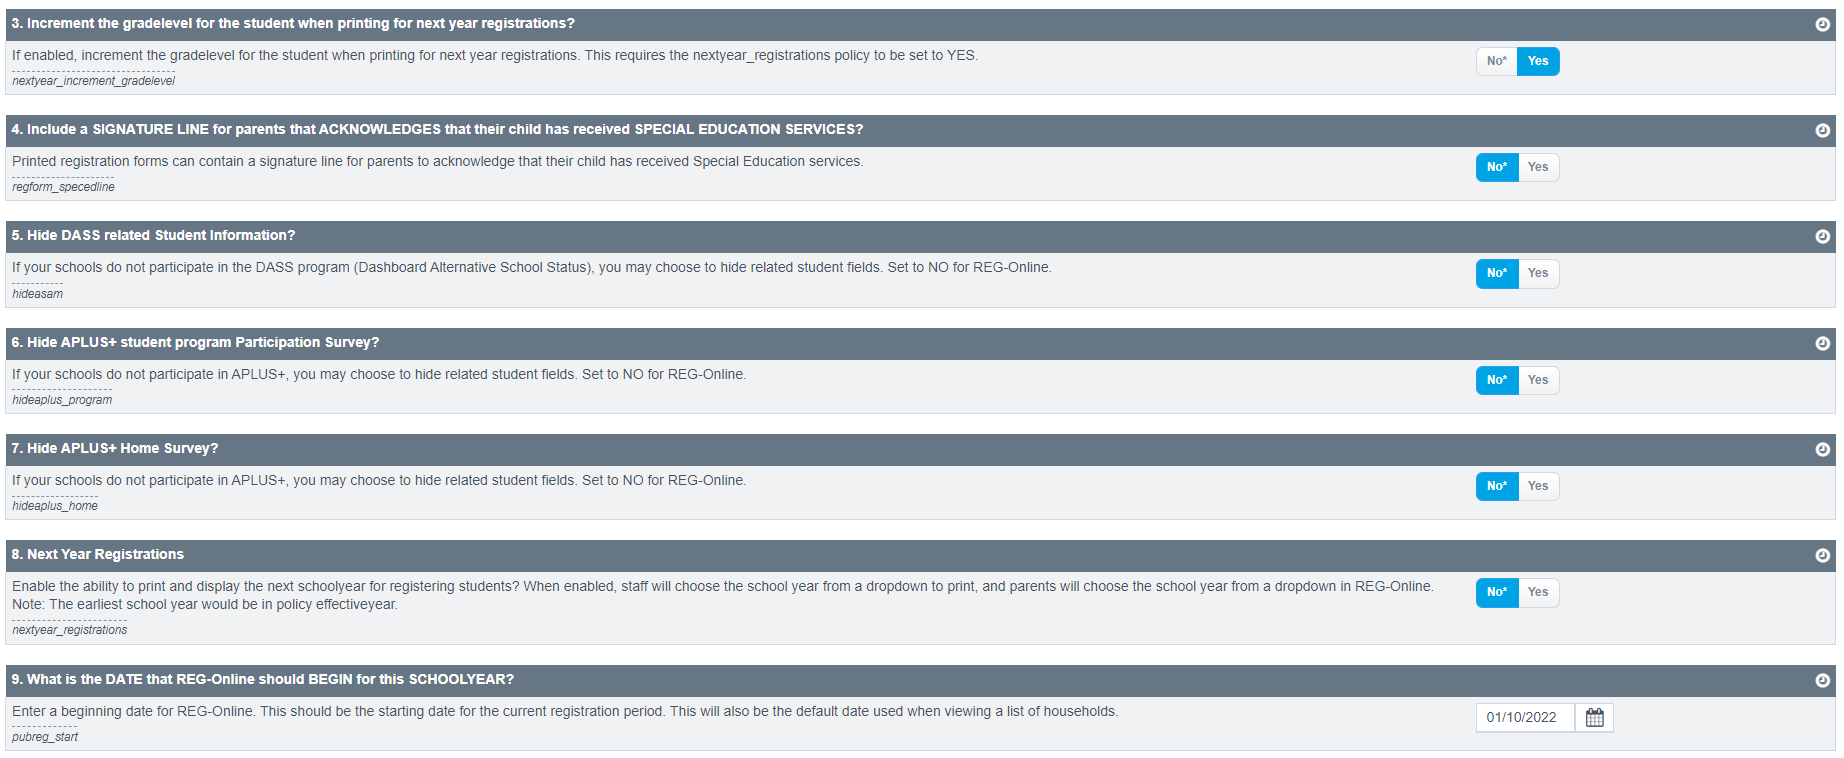
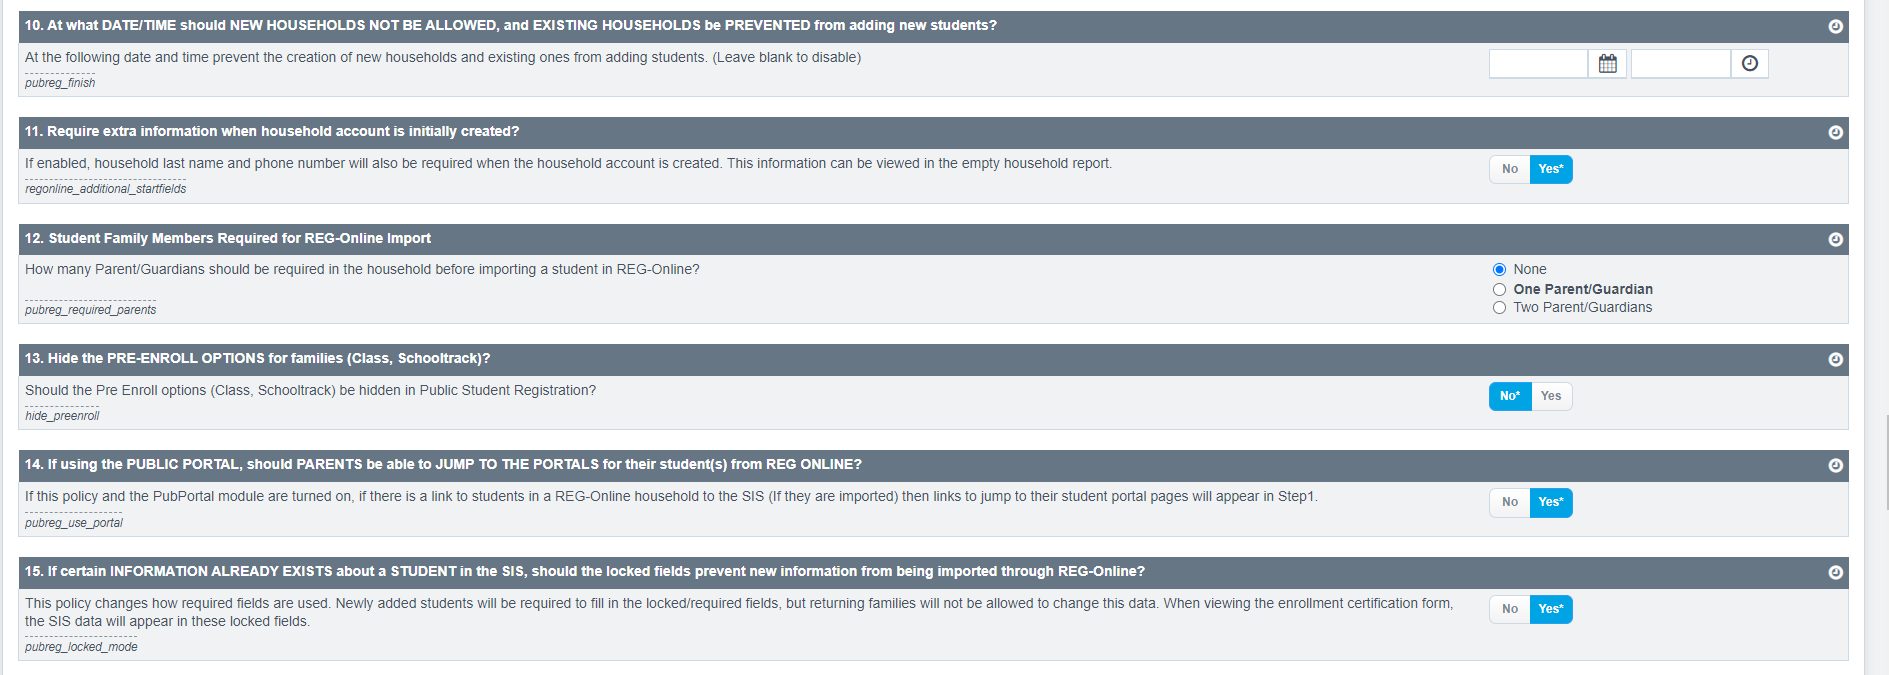
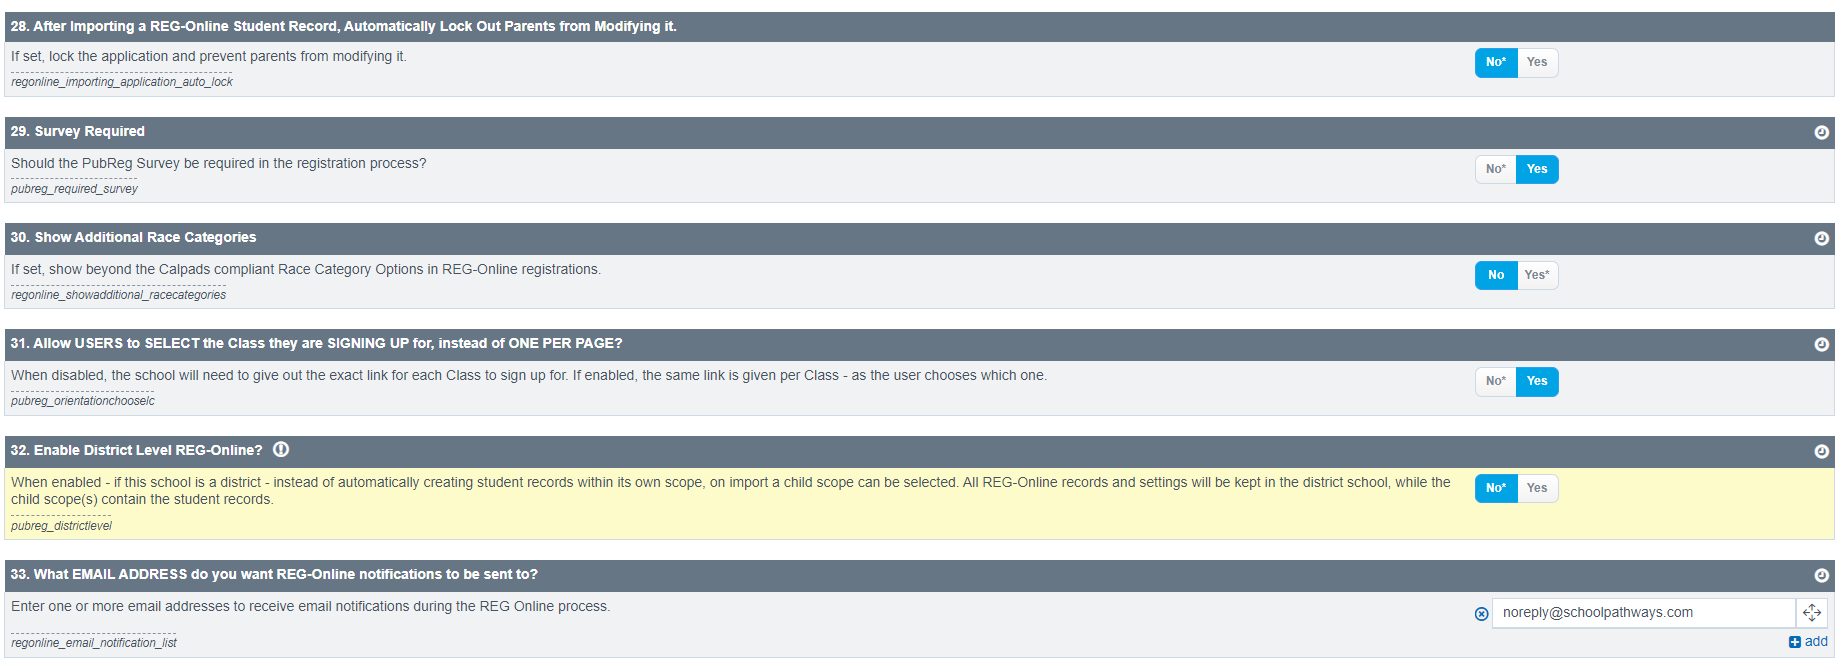
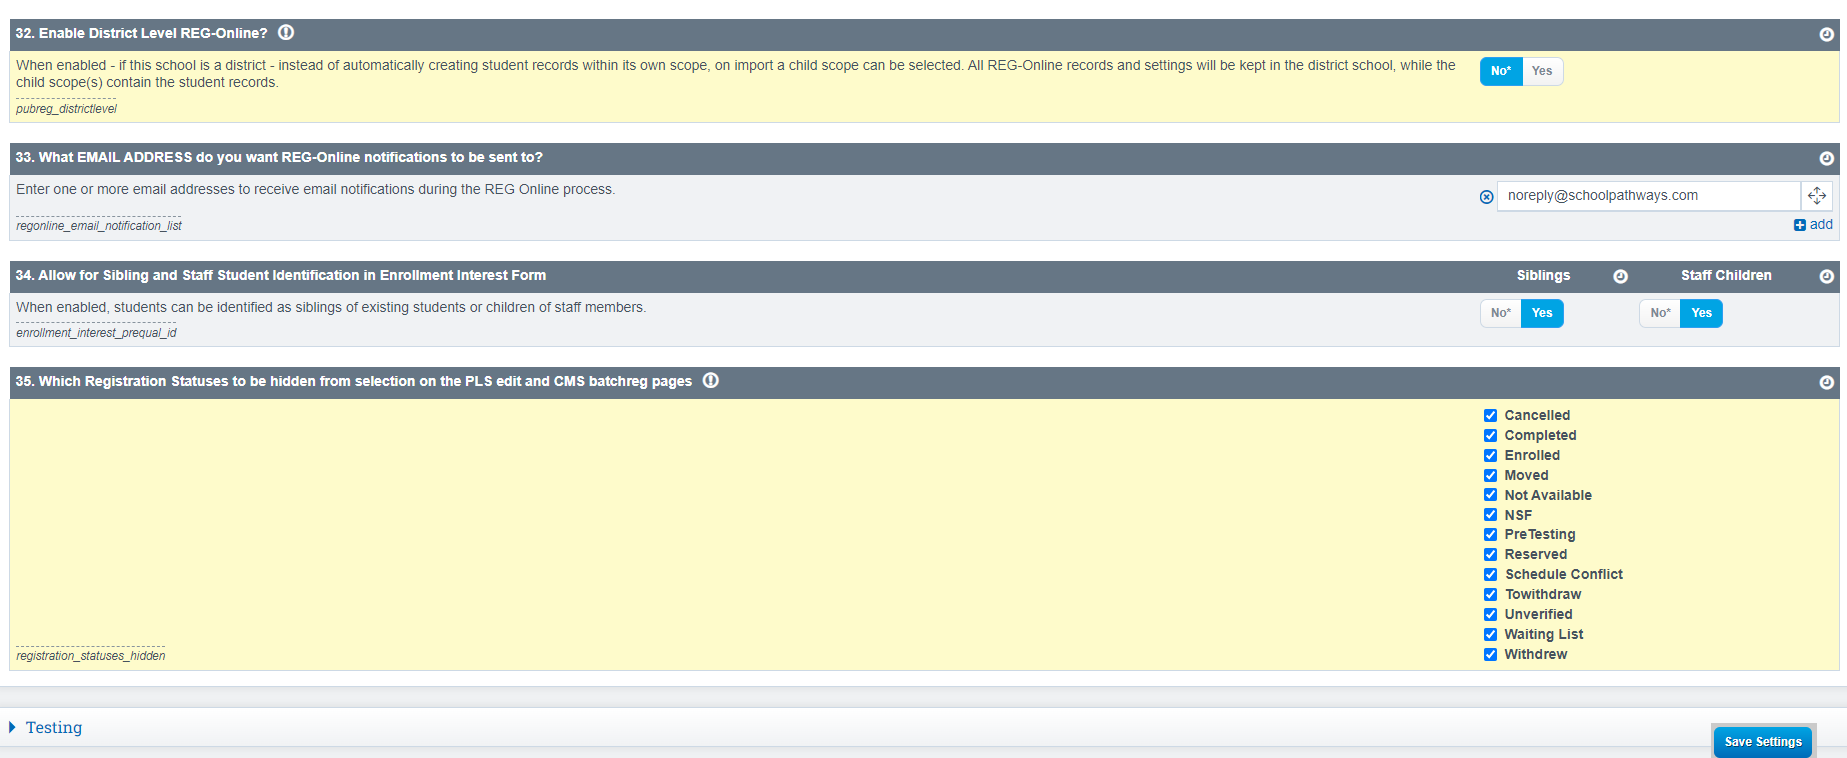
- Admin > Settings > Policies
-
Choose “Student Registration”
-
Review and choose How you want your policies set in this areaThe screen shot is of our sample school, your policies DO NOT need to match what we have
Reg- Online Administration
- Admin > Reg- Online > Admin
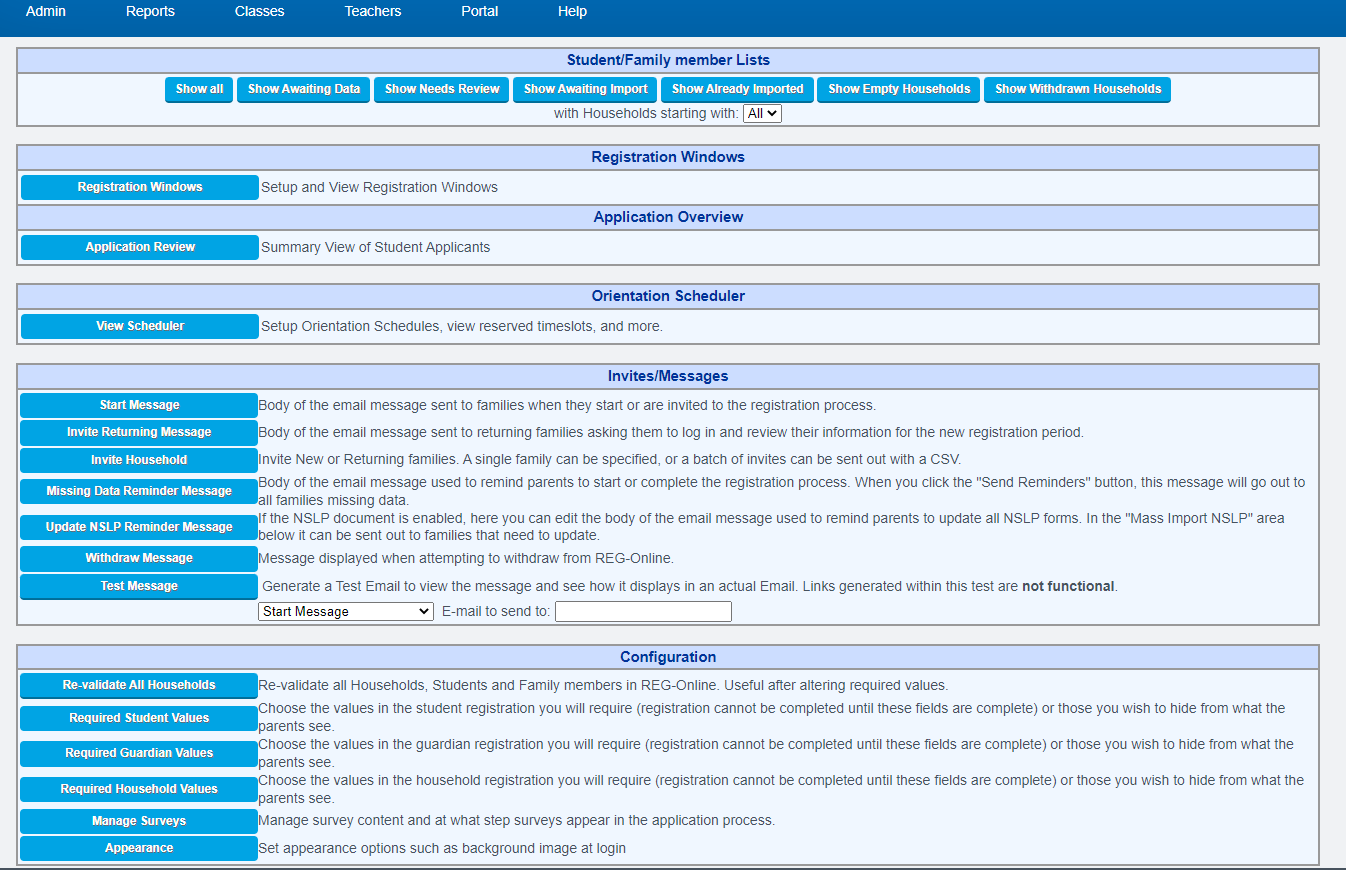
- Invite Messages/ Trigger Emails: This is where you will set up the Emails that will be sent out to families to register. The verbiage in the trigger email section is what will pull into the letters sent out to families. Start Message- body of the email message sent to families when they start the registration process (Admin > Settings > Trigger Emails)
- Invite New Message- body of the email message sent to a family that you would like to send a personal invitation to and is new to your school. You can use this for a mass email to all your returning families too if they have never used the system before.
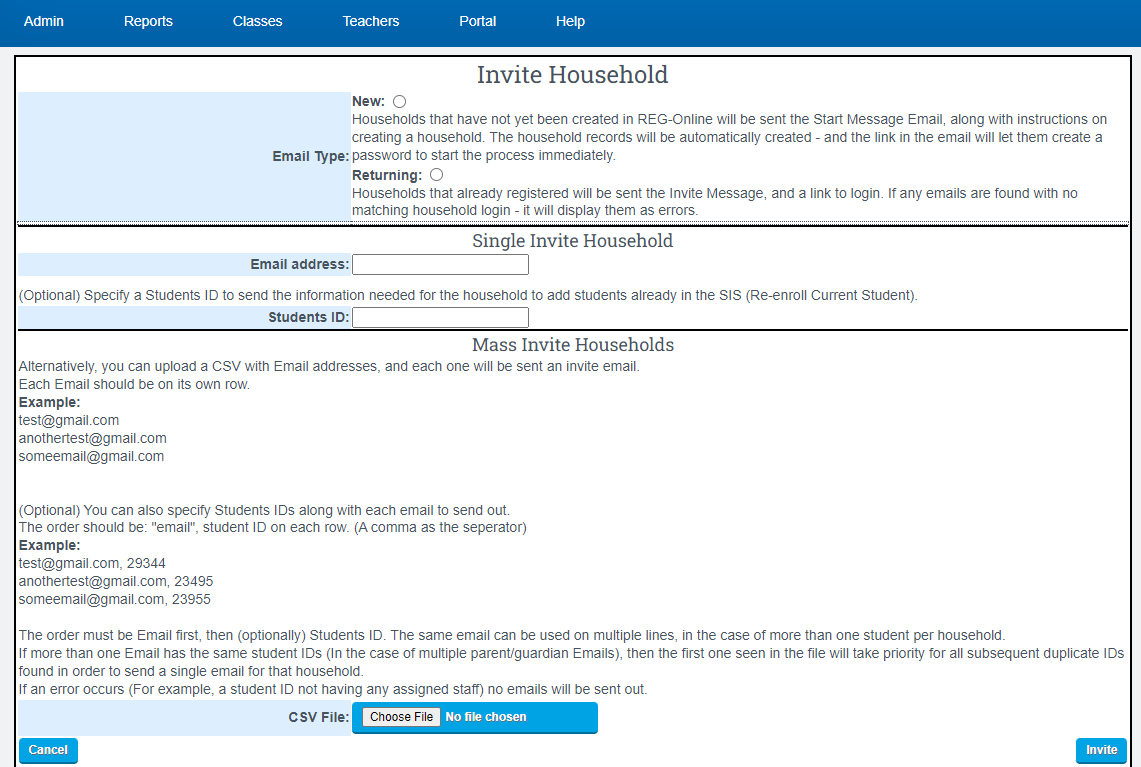
1. Invite Household- the mechanism used to actually send the emails
NEW Family
- If you’d like to invite a specific family, click the NEW BUTTON
- Then enter the email address. New is for families new to REG Online even if the student had been in your school previously.
2. RETURNING-If you’d like to invite a specific current family, check off returning button then enter the parent/guardian email addresses and student local IDs.(For directions on how to create this file for upload, see below this section.)
- Save it in a file or on your desktop
- Click choose file and browse for the file.
- Click Invite

School Pathways has created a Create-A-Report you can use to invite families to start the re-enroll process. Look for “REG-Online Invite (Parent Email/Student ID)”
Terms
Invite Messages: Create messages families will see
Start Message- body of the email message sent to families when they start the
registration process
Invite New Message- body of the email message sent to a family that you would
like to send a personal invitation to and is new to your school. You can use this for a
mass email to all your returning families too if they have never used the system
before.
Invite Household- the mechanism used to actually send the emails
NEW- If you’d like to invite a specific family, click the NEW button. Then enter
the email address. New is for families new to REG-online even if the student
had been in your school previously.
Returning-If you’d like to invite a specific current family, check off
returning button then enter the parent/guardian email addresses and student
local IDs. (For directions on how to create this file for upload, see below this
section.) Save it in a file or on your desktop. Click choose file and browse for
the file. Click Invite.
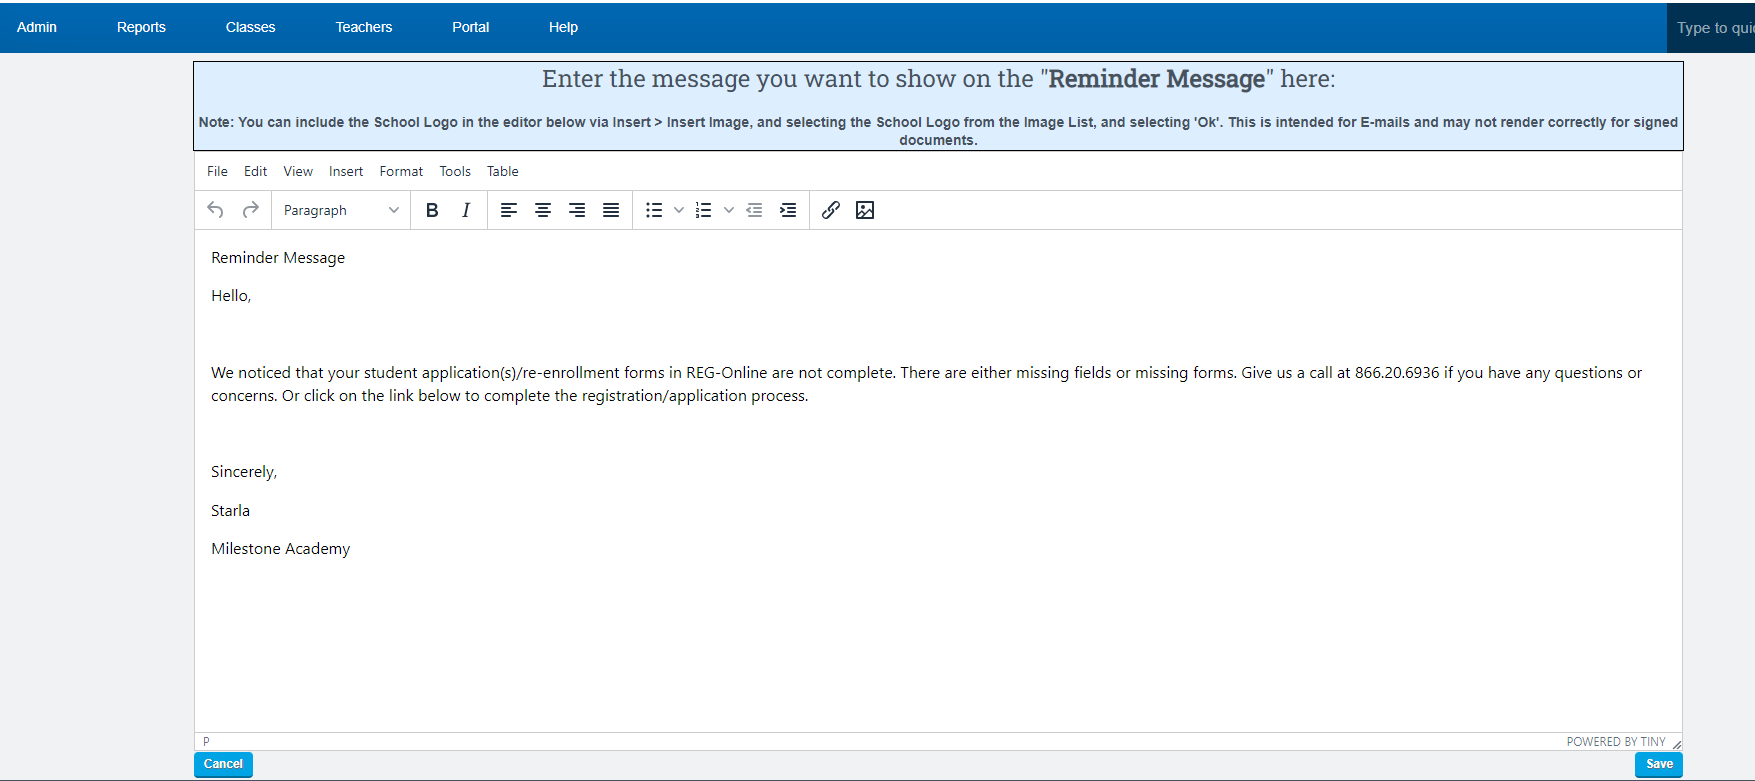
Reminder Message- body of email message used to remind parents to start or
complete the registration process. When you click the “Send Reminders” button,
this message will go out to all families missing data.
Test Message- If you’d like to see what your messages look like in an email,
Configuration
Below is a list of buttons to choose for configuration
-
Re-Validate All Households- If required values have been changed, use this button (only at the beginning of REG Online for a new school year)
-
Required Student Values- Set your student values
-
Required Guardian Values- Set your guardian values
-
Required Household Values- Set your household value
-
Manage Surveys
-
Appearance

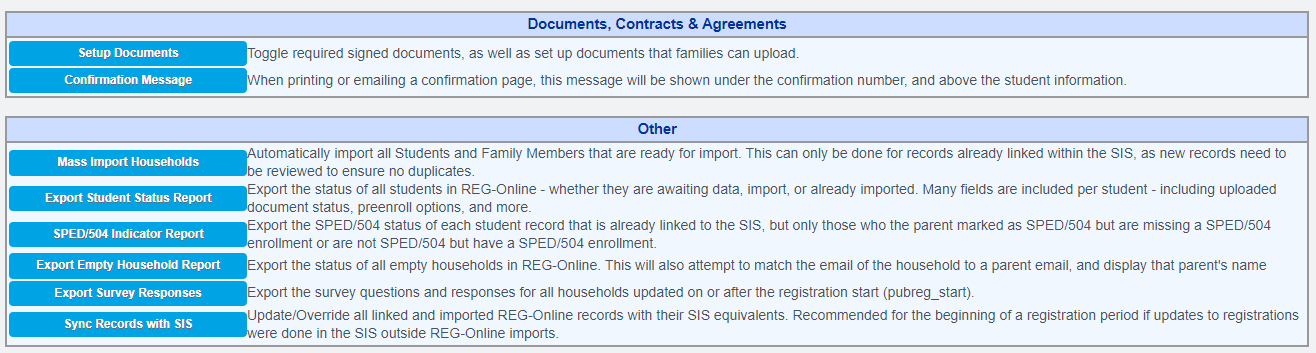
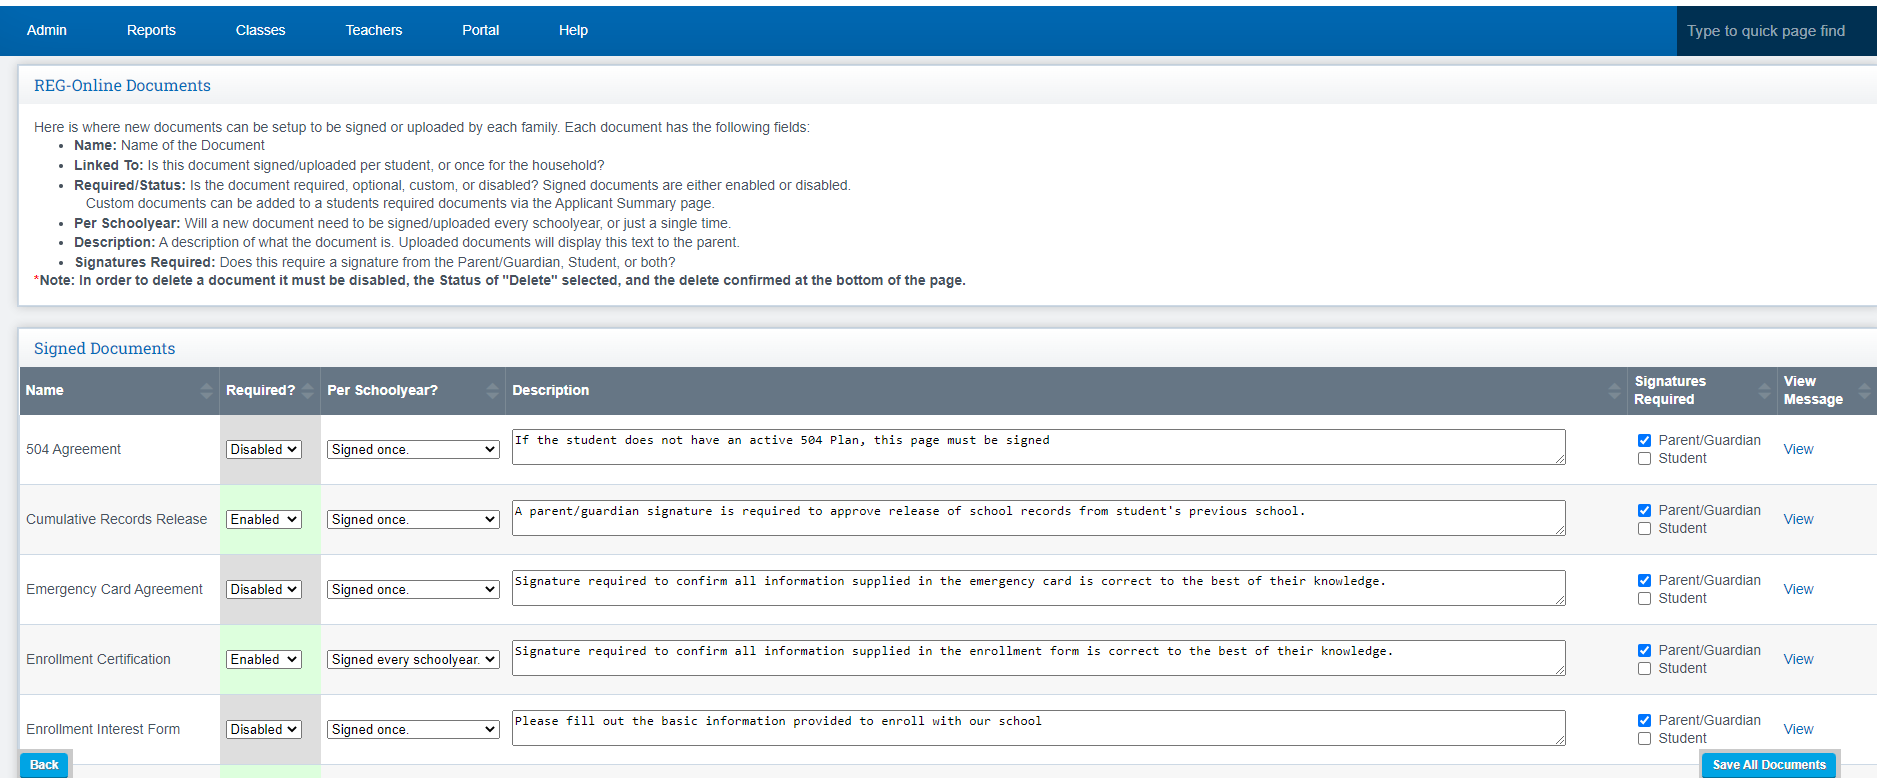
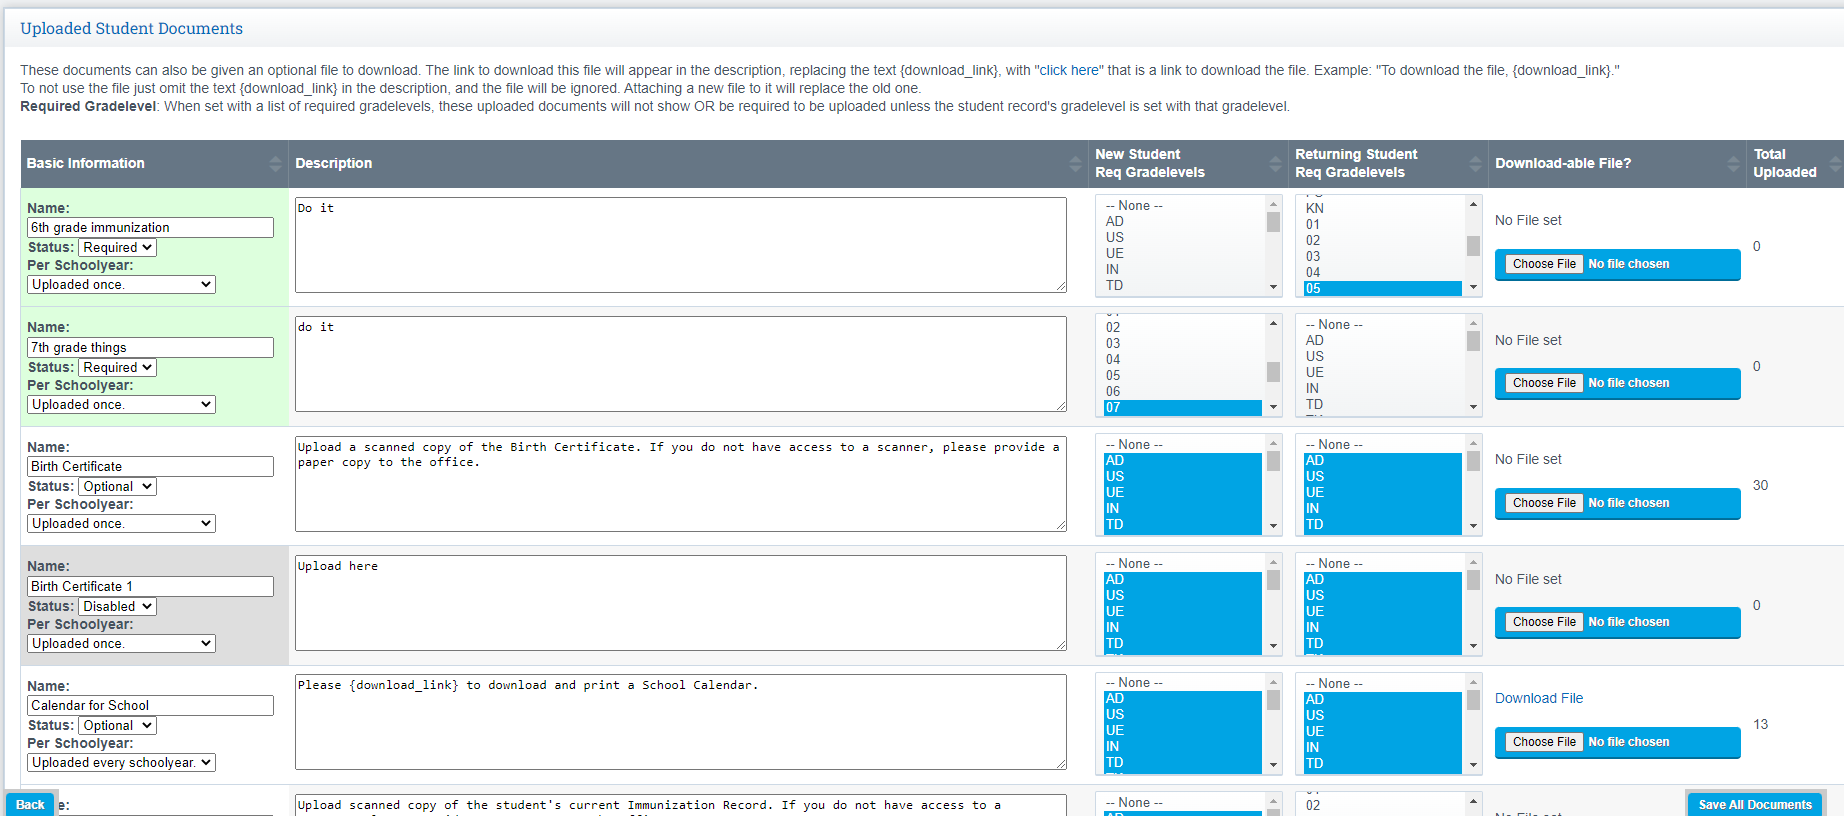
Set-Up Documents

-
Decisions can be made on this page about enabling certain documents needing signatures
-
How often the documents need to be signed
-
Why each signature is required
If you’d like to require parents/guardians to upload documents to the REG-Online system:
-
Step 1. Choose to Add a New Document Type
-
Step 2. Enter new document information and click create a new document
-
Step 3. Create New Document and SAVEMass Import Households- Ability to mass import all students in the Re-enroll process. This feature is not available for new enrollments.Export Student Status Report- Gives you a report of all students by household that have entered data on students
Import Process
-
Step 1. Find the import areaAdmin > Student Information > Reg- Online.
-
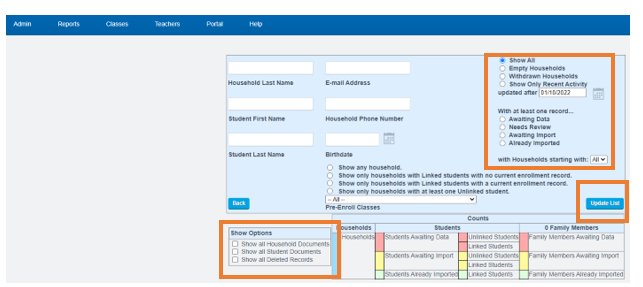
Step 2. Each button allows you to do different processes. Choose the appropriate filters to show the list as you need it displayed
-
Show Options-Show all household documents, show student documents, show all student notes, show all passwords, and show deleted records
-
Show All- shows all families (households) that have taken part in the REG-Online system will be displayed by family
-
Show Awaiting Data-Any families/students with missing data will be listed
-
Show awaiting import- If a student’s import is green, it’s a returning student. If it’s yellow, the parent/guardian had noted the student as new to your school
-
Show already imported
-
Show Empty Households- Those families that have started the process but never entered a student. These are often families who ran into difficulties and may have called you for help. They might also be families that were curious about the process but were hesitant to continue.
Step 3. Click Update List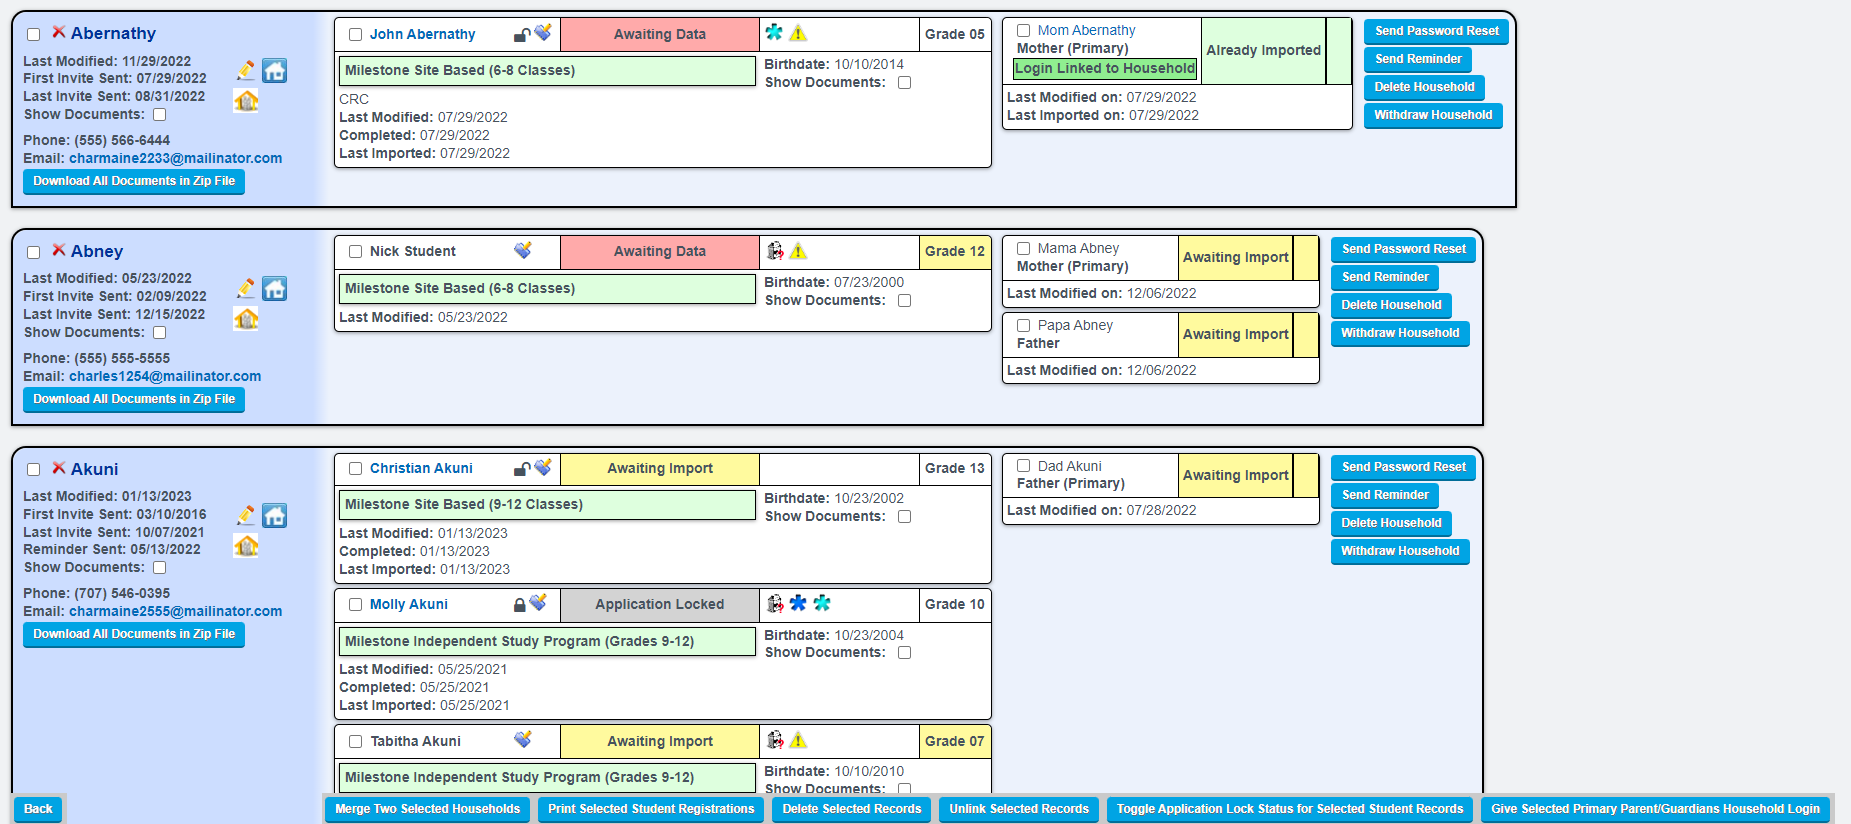
-
-
If a new student is in the system, you will be presented with the best matches (on Name and Birthdate).
-
Click a match and then NEXT. If No matches are found, click the Create a New Student Record button. Save the new student record
-
If the student is a returning student, you will be shown the new values that you will be importing. Click SAVE to import the new values
-
The field name is the first column. Make sure all fields are correct and complete by viewing what the parent/guardian has entered (blue column) with what will be imported (right column.) You can change what they have entered by entering data in the right column. Or you can request the family to update the registration
-
When complete click SAVE. This will import the registration record into the SIS. You do not need to save again once the registration view appears but you can change or add extra fields and save again
Students will then be found on the intake roster, unless the student is given an immediate enrollment.
When you are importing a student that is already in your system, you will get more information to check. The Student’s Value column shows what is currently in the SIS.
Applicant Summary
- Admin > Reg- Online > Admin Page
- Click the applicant summary for a student
- The Applicant Summary Page will display whether or not the parent or guardian answered “yes” to Custody Issues, as well as any notes provided.
- In addition, the Previous School Field in the Reg-Online portal will now recommend schools to parents as they type into the field.
- Students with no data for the last email sent will be displayed as blank instead of an invalid date.