Most users of the PLS use a pre-developed master curriculum laid out using modules, objectives, assignments and standards that makes assigning work much easier. But custom assignments can also be used. If students are taking classes, the classroom teacher might not understand how important modules, objectives, assignments, and standards are to personalized learning record keeping and we are working hard to get the message out.
With all this in mind, the emphasis of this manual will be assigning from curriculum with some comments on adding customized assignments.
Assigning work from Master Curriculum
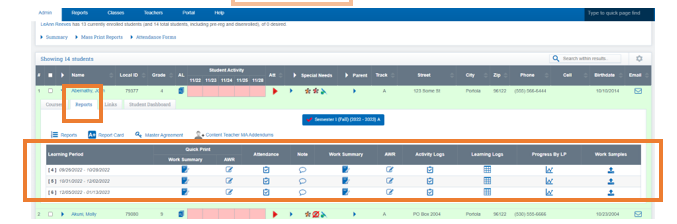
Using “Quick Assign.” From your student Roster
Quick Assign allows you to make assignments without opening the grade book.- Click on the Blue Arrow next to the students name to expand their record
- Click on the Red Grade Book Icon to the right of the curriculum name. The assignment area opens below the curriculum name.
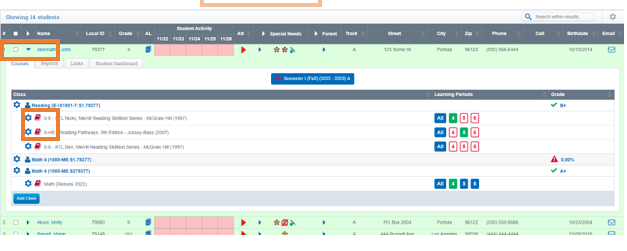
Accessing the grade book
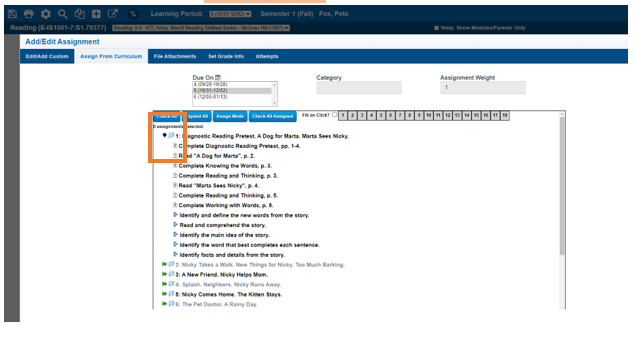
- Open a grade book using a module button in the student file for the curriculum you want assign.
This takes you directly to the curriculum lesson plans if nothing has been assigned yet.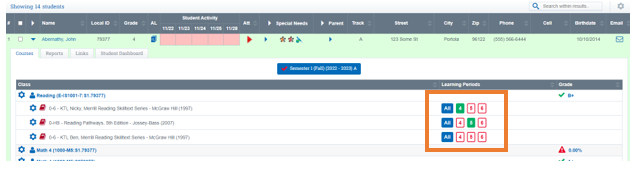
-
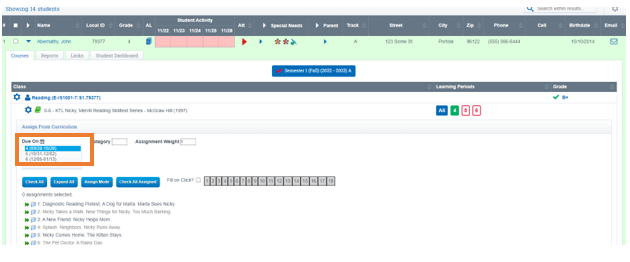
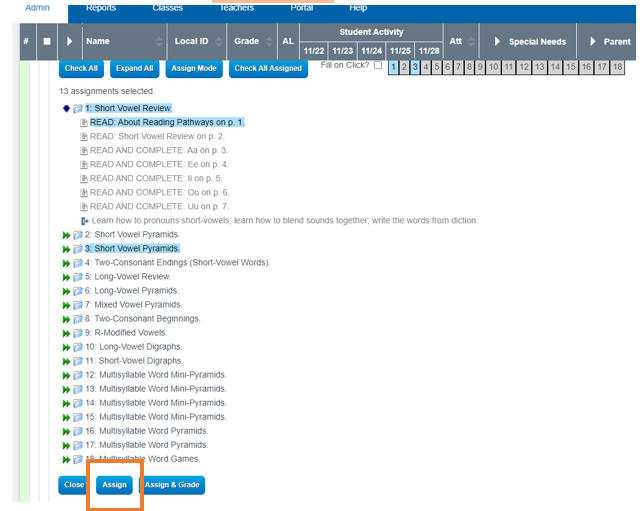
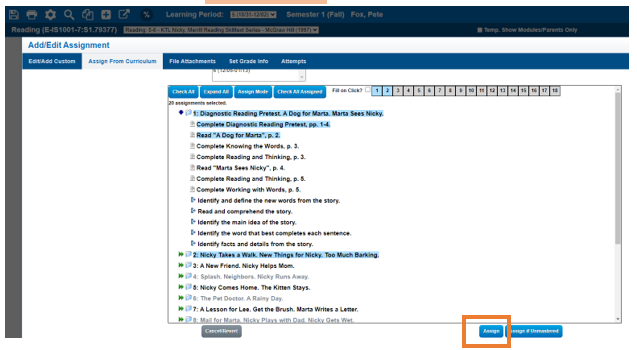
Assign: Master curriculum is organized by module.
-
Click on the Green Arrow to expand lessons
-
Click on the Module Wording or the module folder to assign the entire module.Or
-
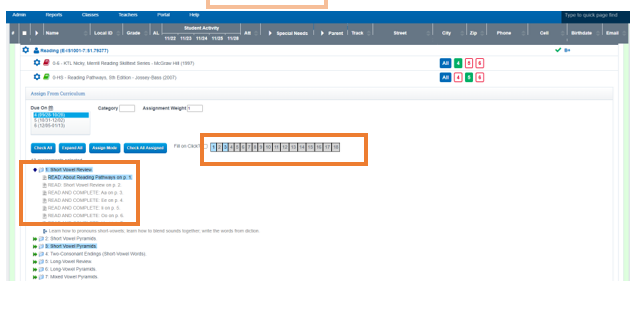
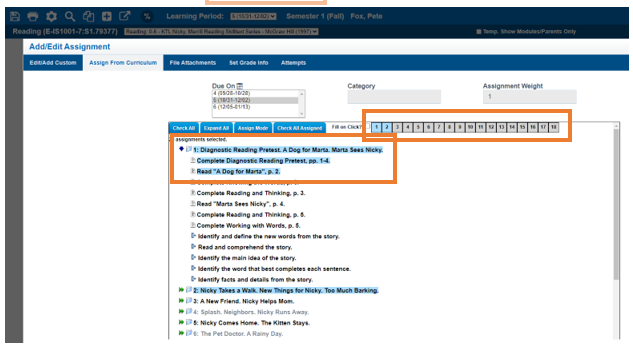
Click on Module Numbers across the top of the ScreenYou can re-assign any module again as long as it's not in the same learning period.Only assignments highlighted in blue are assigned. You can also unclick any individual item you do not wish to assign.You can assign more than one assignment at a time by clicking on the assignment
-
-
Click Assign
-
Once assignments have been made:
-
Note that the module title has no ˄ in the name. Only assignments, objectives and standards have the ˄ symbol.
-
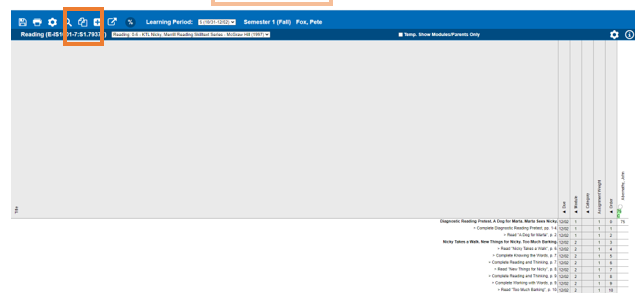
All you have assigned is visible in the grade book. You might not want objectives (denoted with an asterisk) or state standards (denoted by their Standard code and #) to show. You can always hide these by clicking the options wheel and clicking to hide these items.
-
Add a grade in the module line or in any assignment cell. Typically you would grade by either module or by individual assignment – not both.
-
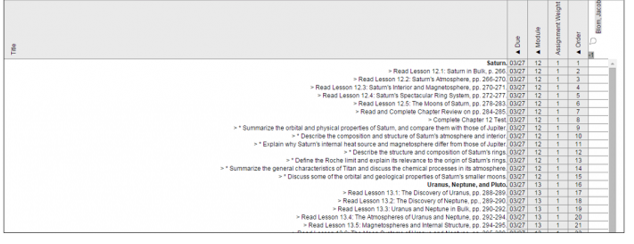
The view below shows
-
Assignments, noted with a > before the assignment.
-
Objectives noted with a >* before the objective.
-
And standards noted by the standards code and number before the standard.
In this view, the module is graded and I have my grade book marks settings to show % grades. See the manual “Grade Book – Settings” manual for more information.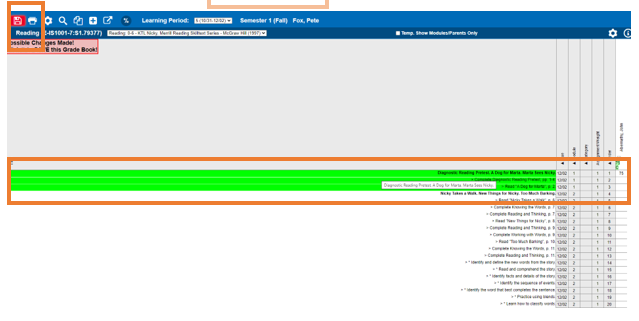
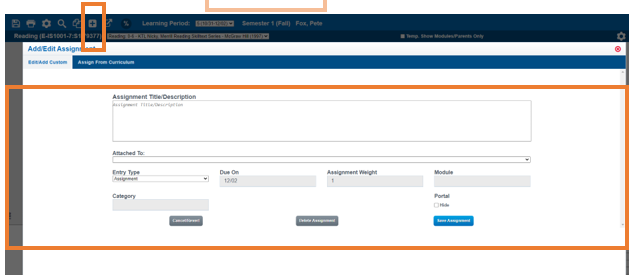
Assigning custom assignments to the module
-
Click on the Plus Icon
- Fill in all info Below
Assigning the same assignment to all future LPs
-
Assign as usual but before you click the Assign button…..
- Click the COPY icon.
- With the Ctrl key held down on your keyboard, choose any/all learning periods you want these assignments to be copied to. Make sure to still have your current LP highlighted.
-
Click Assign.
-
Save. All assignments will be distributed to the appropriate LPs.
Grading Student Assignments
Grade can be entered for any module, assignment, objective or standard in the grade book. Marks can be letters, numbers, or percents. You can also grade by categories. To see how to set your grade book marks, categories and views, see manual “PLS - Grade Book Settings 7-6-15.”
Printing Monthly Student Reports
Access student reports by clicking on the Reports tab for an individual student.