
If you school is not using School Pathways Gradebook you can use this as an area to view what is pulling into the School Pathways gradebook.
To View or Change Gradebook Settings:
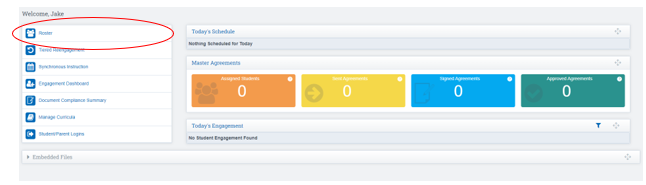
Click Roster
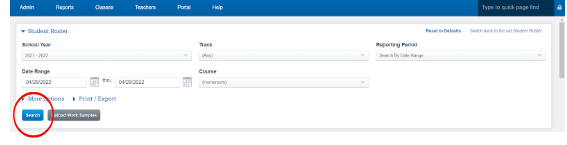
Apply the desired Filter Options, click Search
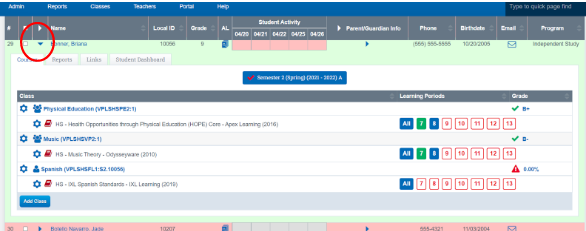
On your roster, click Green Arrow to expand the folder of the student you want to work with
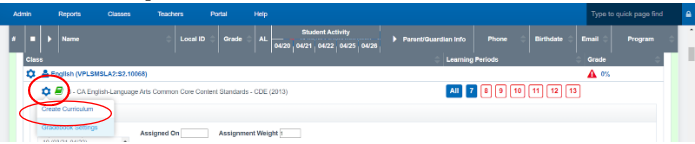
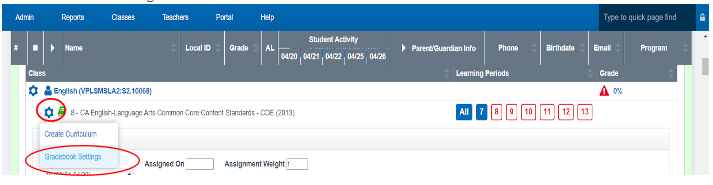
Click the Settings wheel (Cogwheel)
Click Gradebook Settings
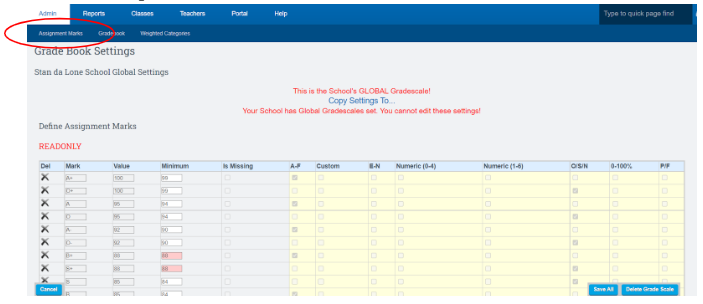
Click on Assignment Marks Tab
Make sure the Assignment Marks are correct
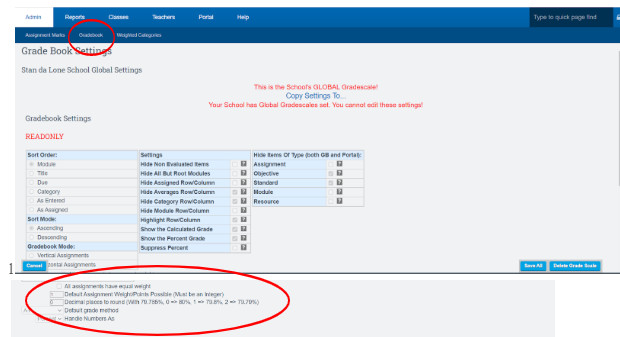
Click the Gradebook tab
Set the Handle Numbers as drop down to Points or Percents, whichever matches your grading style.
*If you would like assignments to have different weights, click on the Weight Types tab and set the types you would like to have represent your grades
*Access Grade Book Settings: This process Might have been set globally for your school, contact your Admin for more info.
Copying Marks and Settings
Customize grade book settings by following the instructions in part I.
Click on the Settings Wheel
Click Gradebook Settings
Click Copy Settings To link….

Select the courses and the curriculum you want to copy these settings for (Check the box under Copy What to specify what you want to copy)
Click Copy to Selected
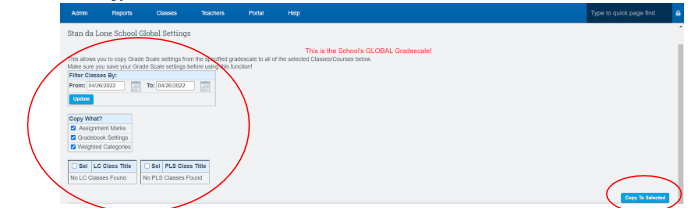
*You can alter the date range if needed to find locate the classes this will affect
To Access the Gradebook:
From your Dashboard
Click Roster:
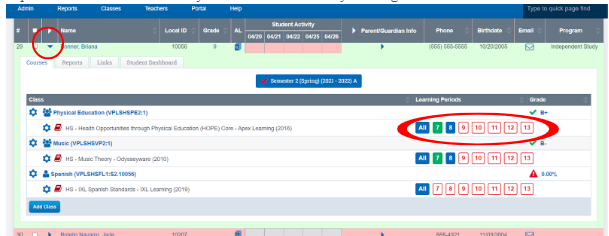
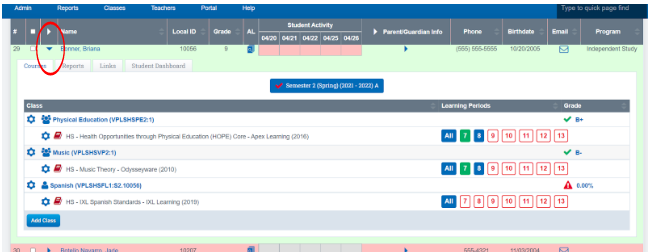
Expand the folder of the student you want to work with by clicking the Green Arrow
Click the Icon under Learning Periods for the gradebook you want to access.
*If there is nothing assigned, it will automatically be directed to the assigning tool.
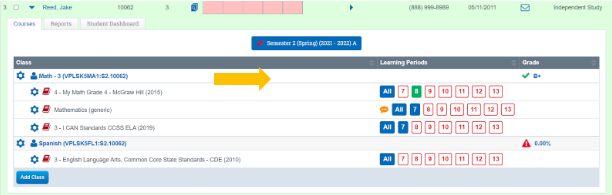
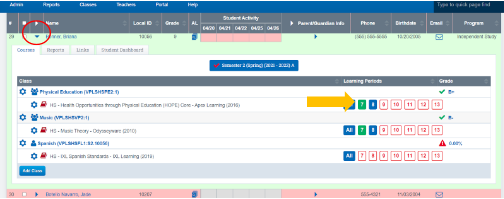
*On this screen you will see all the classes the student is enrolled in
* For any class you can click on the individual gradebook (LP number)
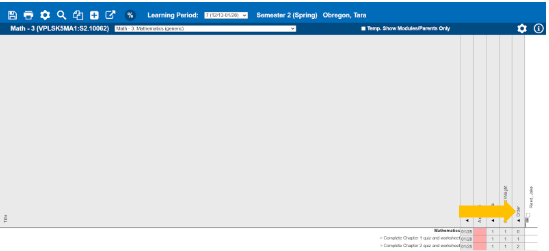
* To access a specific LP in a gradebook, click on the red square labeled with the number of the LP you wish to see
* To access the entire term, click on the book labeled “All”
Note: If a gradebook is red, there is nothing assigned in this gradebook. If it is blue, there are assignments present. If it is green, there are both assignments and grades present
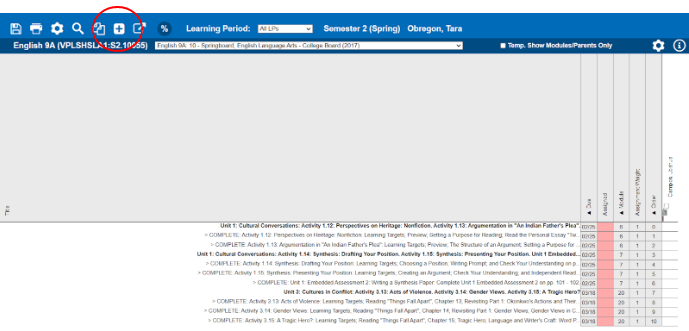
Assigning Work in the Grade Book
Click the plus Icon to open the Assigning Tool
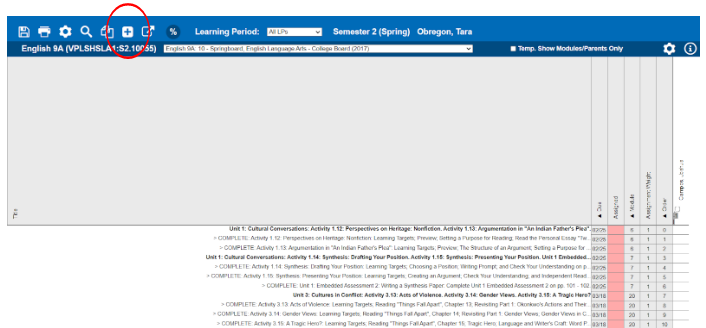
* Once you are in the gradebook, you can use the dropdowns to view the LPs
Assigning Tool
Click Assign from Curriculum Tab
Choose the LP (Due on Column) Date will be highlighted based on your previous selection
Click Green Arrow next to the lesson to view the full list of assignments within the lesson
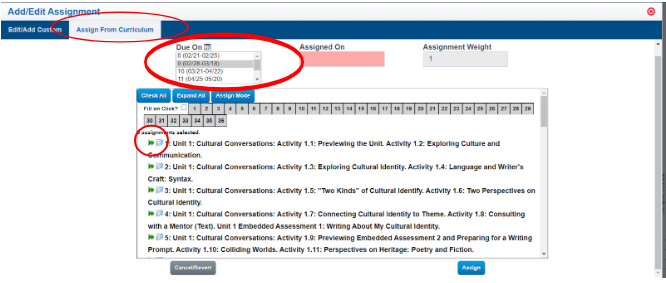
Click the Lessons you want to add (They will be highlighted blue when selected)
Click Assign
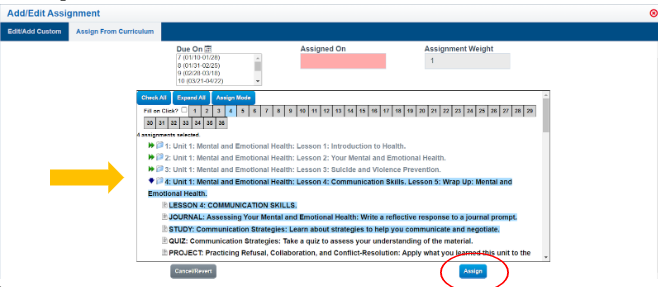
*You can select entire modules by clicking on the Module name
*You can select part of the module by clicking on the green arrows next to the module name and clicking on individual assignments
* The selected assignments will be highlighted in blue
*If the assignment has been previously, it will be light gray, you can hover the assignment to see the due date assigned
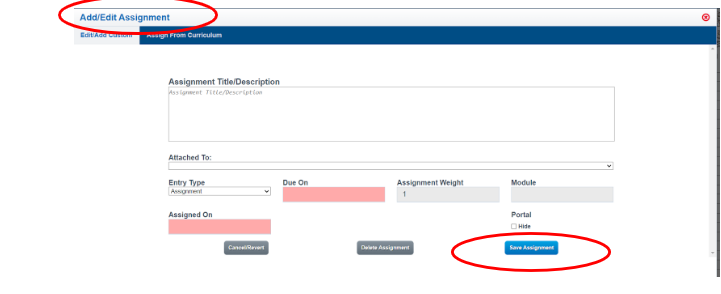
Custom Assignments
Inside the gradebook, Click the Plus Icon
Click Add/Edit Custom
Give the Assignment a Title “Ex: Write a 3-page Essay about Your life as a DR”
Click the dropdown “Attached To” to attach this to a Module
Click Entry Type and choose the type of assignment you are assigning (This will Default to assignment)
Add a Due on Date
Add Assignment Weight if you are working with points (1=100)
Click Save Assignment
Copying Assignments
You can only copy assignments if you have more than one student taking the same class with the same curriculum.
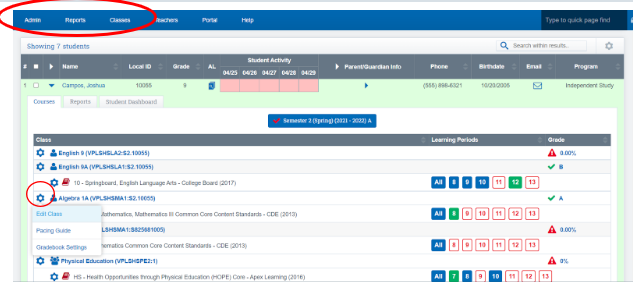
Teachers >PLS Roster
Click the Green Arrow next to the students name to expand the folder
Click the Cogwheel next to the Class Name you want to copy to other students
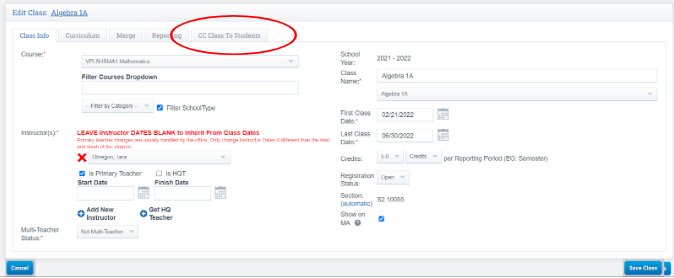
Click Edit Class
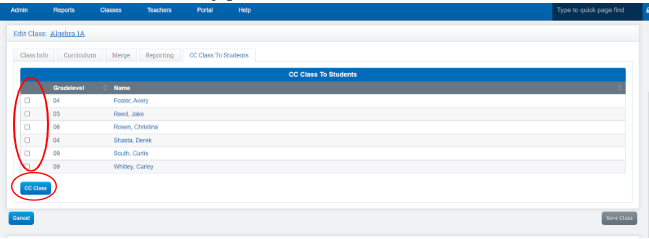
If the class is saved, you can click the CC Tab to copy class to other students
Check the box next to each student you want to copy the class to
Click CC Class at the bottom of the page
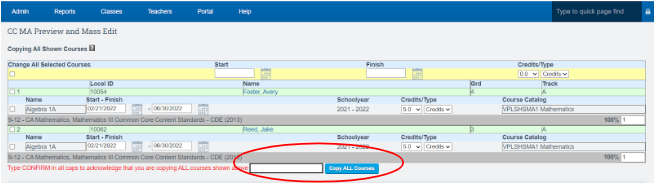
Verify all info on this screen is correct and type CONFIRM in the box
Communicating with Students/Parents through the Gradebook
Teachers can send messages to their students through the grade book and students can send messages through the student portal to their teachers
Orange Icon next to the ALL-blue square means you have a message
From the gradebook page, next to the student’s name you will see a message bubble icon
Click on the icon to view and send messages to Students or Parents
Posting Grades
Teachers > PLS Student Roster
Click the Green Arrow next to the student’s name to open student roster
Click the LP you wish to open
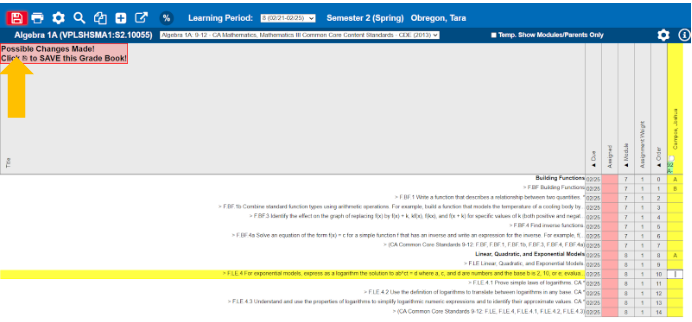
Click in the Row you want the grade to appear in (the Row will turn yellow when chosen)
Enter Grade Info
Click Red Save Floppy Disk Icon (Top left of the screen)
*In the gradebook, assignments that have comments or files attached to them will be highlighted orange.
*Students/parents can send comments
Settings
-
Step 1. On your roster, expand the folder of the student you want to work with.
-
Step 2. Click on the grade book for the class you want to work with.
-
Step 3. Click the Settings wheel
-
Step 4. Click on Assignment Marks
-
Step 5. Make sure the Assignment Marks are correct.
-
Step 6. Click the Gradebook tab.
-
Step 7. Set the Handle Numbers As drop down to Points or Percents, whichever matches your grading style.
-
Step 8. If you would like assignments to have different weights, click on the Weight Types tab and set the types you would like.
-
Step 9. Click Save All.
II. Copying Marks and Settings
-
Step 1. Customize grade book settings by following the instructions in part I.
-
Step 2. Click on the settings button in that gradebook.
-
Step 3. Click Copy Settings To…
-
Step 4. Select the courses and the curriculum you want to copy these settings for.
-
Step 5. Click Copy to Selected.
III. Accessing the Grade Book
-
Step 1. Go to your roster
-
Step 2. Expand the folder of the student you want to work with.
Note: Here you will see all the classes the student is enrolled in. For any class, you can access its gradebooks either by Learning Period (LP), or for the entire term of the class (Semester/Trimester/et al). To access a specific LP in a gradebook, click on the red book labeled with the number of the LP you wish to see. To access the entire term, click on the book labeled “All”
Note: If a gradebook is red, there is nothing assigned in this gradebook. If it is blue, there are assignments present. If it is green, there are both assignments and grades present. -
Step 3. Click the icon for the gradebook you want to access. If there is nothing assigned, it will automatically open the assigning tool.
IV. Assigning Work in the Grade Book
-
Step 1. Open the grade book you want to work in (follow instructions in part III)
Note: If there is no work assigned, the assigning tool will open automatically.
A. Assigning from the Curriculum
-
Step 1. If the assigning tool does not open automatically, click the Assign button in the top left corner.
-
Step 2. Select the items you want to assign.
-You can select entire modules by clicking on the Module name.
-You can select part of the module by clicking on the green arrows next to the module name and clicking on individual assignments. The selected assignments will be highlighted in blue. -
Step 3. Once you have finished choosing your assignments, click Assign.
B. Custom Assignments
-
Step 1. Inside the gradebook, click Assign at the top.
-
Step 2. Click Edit/Add Assign
Note: You must have a module assigned to attach your custom assignment to (there do not need to be any assignments from the curriculum attached to that module)
-
Step 3. Choose the module you want to attach your new assignment to.
-
Step 4. Type your assignment into the box. The assignment can be as simple or complex as you wish (ex. “Personal Essay” or “Write a personal essay about a time in your life that you faced hardship. This paper must be at least 3 pages in length.) There is no character limit for this box.
-
Step 5. Teacher Notes may be entered into the box. This field is informational only, and its contents will not appear anywhere else in the system.
-
Step 6. Enter a Due Date. If you are viewing a specific Learning Period, the final day of that Learning Period will be auto-populated into this field.
-
Step 7. If this assignment will have a weight other that one, specify that in the weight box.
-
Step 8. Click Set Assignment Text.
-
Step 9. Save the gradebook.
C. Assigning More from the Same Module
-
Step 1. Click on the module name in the gradebook.
-
Step 2. Click Assign from Curriculum.
-
Step 3. Click any assignment in the module you want to assign.
-
Step 4. Click Assign.
D. Assigning the Same Assignment to All Future LPs
Assign the assignment as usual, but before you click Assign:
-
Step 1. Click the green copy icon next to the due date.
-
Step 2. Hold the Ctrl key down on your keyboard, choose any/all LPs you want these assignments to be copied to. Make sure you keep the original LP highlighted.
-
Step 3. Click Assign
V. Copying Assignments
Note: You can only copy assignments if you have more than one student taking the same class with the same curriculum.
-
Step 1. Open the gradebook you want to start with and make assignments. Make sure to save.
-
Step 2. Once you have saved, click the CC button at the top.
-This will open a list of all classes that use the same curriculum that you can copy assignments to. -
Step 3. Click the box to the left of the class that you want to copy assignments to.
-
Step 4. In the yellow box, click all the assignments that you want to copy or click Check All.
-
Step 5. Select an option for due dates. (Ex. Match Due Dates)
-
Step 6. Click Perform CC
VI. Setting or Adjusting Due Dates for Dis-Enrolled Students
Note: This section only applies for Classroom-Based Classes.
-
Step 1. Click into the grade book for the class.
-
Step 2. Find the student's name.
-You will notice their grade boxes will be grayed out. -
Step 3. Right click into one of the grayed out boxes.
-
Step 4. Select Edit Grade Info.
-
Step 5. Enter the due date. If the student left the class early, enter the date the student exited the class.
-
Step 6. Click the box that says Apply to Anything Attached to this Module.
-
Step 7. Click the Set Gradebook Info button.
-
Step 8. Save the gradebook.
VII. Posting Grades
-
Step 1. Enter grades into the cells for the assignment/module.
-Grades can be entered into both assignment and module cells, both will be averaged into the grade. -
Step 2. Click Save.
You can also enter credits for a module to be displayed on a Progress Report.
-
Step 1. Right click in the cell you want the credit to appear in.
-
Step 2. Click Edit Grade Info.
-
Step 3. Put the credit in the box.
-
Step 4. Click Set Grade Info.
VIII. Communicating with Students/Parents through the Gradebook
Teachers can send messages to their students through the grade book.
-
Step 1. In the grade book for the class, click on the magnifying glass until it shows the icon:

-
Step 2. Click on an assignment or a module you want to send a message to the student about.
-
Step 3. Click File Attachments.
-
Step 4. Click the green Add New Message icon.
-
Step 5. Type your message into the box. You can attach files if you wish by clicking the paperclip icon.
-
Step 6. Click the black floppy disk icon at the top-left of the green box to save the message. If you want to edit the message, click the pencil icon and re-save when finished.
-
Step 7. Click Done.
Back in the gradebook, assignments that have comments or files attached to them will be highlighted orange. Students/parents can send comments and documents back to you through their portal. If the grade box for an assignment is highlighted orange, there is a message/comment/attachment for you to view. You can see this comment by right clicking the box and clicking Set Grade Info. Students can view comments and files for an assignment in the Grades and Comment section of their portal. They will click on the [View Assignments] link under the class they need to look at. If there is a comment or attachment for any assignment, they will see a message under the assignment, it will say “Your teacher has sent 1 message for this assignment.” If your student sends you back a comment or attachment they will see a message, “You have sent your teacher 1 message for this assignment.” Students can view the message by clicking on “1 message(s)”. In order for the student to comment back or upload a document to you, they will click on the paper with a plus icon for that assignment.
documents back to you through their portal.
*If the grade box for an assignment is highlighted orange, there is a message/comment/attachment for you to view.
*You can see this comment by clicking the message icon