PLS: Teachers - Classic Report Cards
This guide explains how to view and create a report card for one student in the PLS Roster, including navigating the system, customizing settings, and finalizing or editing report cards. It also covers additional functionalities for multiple students
Table of Contents
- Accessing the Student Roster
- Viewing and Creating a Report Card
- Column Descriptions
- Finalizing the Report Card
- Multiple Student Report Card Access
- Generating a GPA Report
- Handling Two Report Cards for One Student
- Additional Page Functionality
Accessing the Student Roster
- Navigate to: Teachers > PLS Student Roster
- In the "Student Roster," select the desired reporting period in the filter section.
- Click Search.

Viewing and Creating a Report Card
-
Click the Arrow next to the student you want to work with.

-
Select Reports, then click Report Card.

-
Review the Include current classes only checkbox.
- This can be set by default in Admin > Page Policy Options Cogwheel > Page Policies > lc/reports/reportcard_compliance.php: defaultincludeclasses.
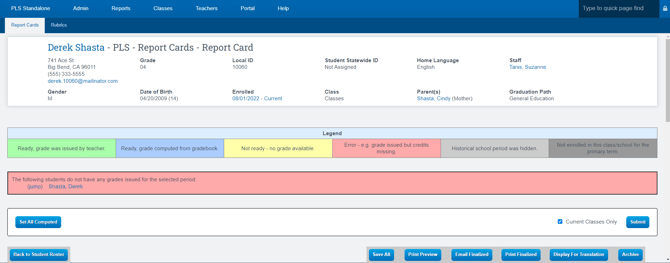
- This can be set by default in Admin > Page Policy Options Cogwheel > Page Policies > lc/reports/reportcard_compliance.php: defaultincludeclasses.
-
Adjust settings as needed for the reporting period and student classes.
Column Descriptions
- Class Information: Displays class names for both PLS and CMS classes.
- Credits Attempted - Credits: Default credits from class settings.
- Credits Attempted - Override: Allows manual adjustment of credits attempted.
- Computed Grade: Displays grades based on gradebook calculations.
- Override Computed Button: Manually override grades displayed in the Computed Grade column.
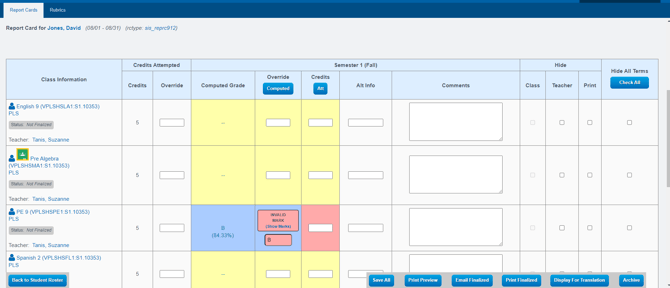
Notes:
- If a class is missing from the report card, ensure the Hide From Report Card option is unchecked in the Edit Class settings.
- For high school students, credits and computed grades will show in their respective columns.
Finalizing the Report Card
-
Click Save to save changes.
-
To finalize the report card:
- Check the Finalize box.
- Click Save again.
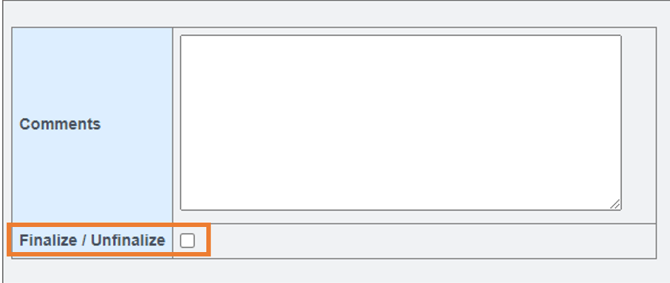
-
To make changes to a finalized report card:
- Uncheck the Finalize box, make the updates, and re-save.
Important: Only finalized report cards can be printed.
Multiple Student Report Card Access
-
Navigate to: Teachers > PLS/RW Oversight > PLS Review Report Cards
-
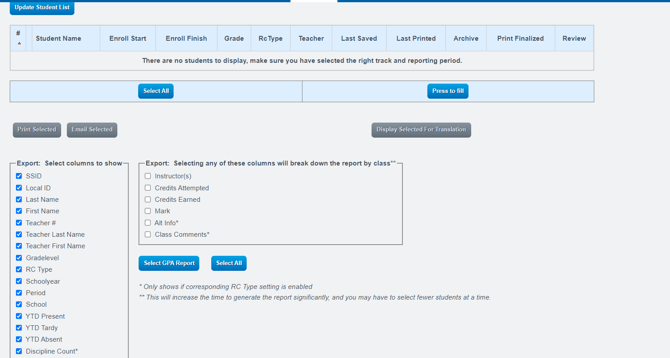
Choose your settings and click Update Student List.
-
Select students by checking the box next to their names.
-
Click Review Report Cards or Review Rubrics.
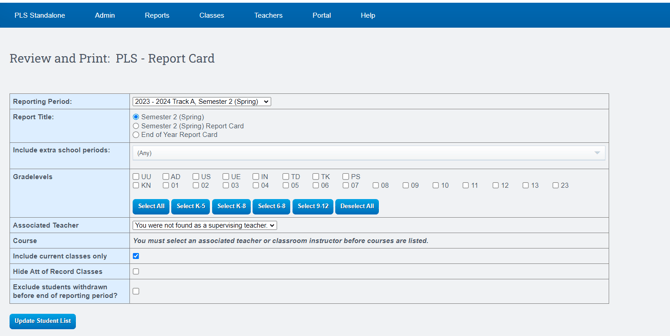
-
Save changes frequently! Finalize each report card individually or in bulk at the bottom of the page.
Generating a GPA Report
- Update the student list with the appropriate grade levels.
- Select students using the checkboxes.
- Click Select GPA Report, adjust settings, and click Export Selected Students to generate a .csv file.
Handling Two Report Cards for One Student
-
Scenario: A student dis-enrolls and later re-enrolls within the same semester.
-
Steps:
- Open the finalized report card and uncheck the Finalize box. Save the report card.
- Edit class settings in the Student Roster:
- Adjust Hide From Report Card for relevant classes.
- Add new classes as needed.
- Create a new Master Agreement for the second enrollment period.
- Assign work for the new Learning Period.
-
At the semester's end:
- Unfinalize the report card, update grades, and finalize again.
Additional Page Functionality
- Print Selected: Generate PDF report cards for finalized records.
- Email Selected: Email finalized report cards to selected students.
- Display Selected for Translation: Preview report cards in other languages using Google Translate.
Note: Report cards must be finalized for transcripts and CALPADS reporting.
