REG Online!
Easily accessed via your school website…. Once you have gone though the training, we will show you how to link Reg Online to your school website.


Administrative Users
REG Online! allows your families to update registration records or start the process of enrolling new students. No records will be permanent records in your SIS until you approve and import them.
Steps for Reg Online Set Up:
|
Part 1: Set-Up A. Set School Information B. Set “School” Policies C. Set “Page Policies” Part 2: Public Registration Administration 1. Header Information 2. Invite Messages 3. Configuration 4. Documents, Contracts & Agreements |
Part 1: Set-Up :
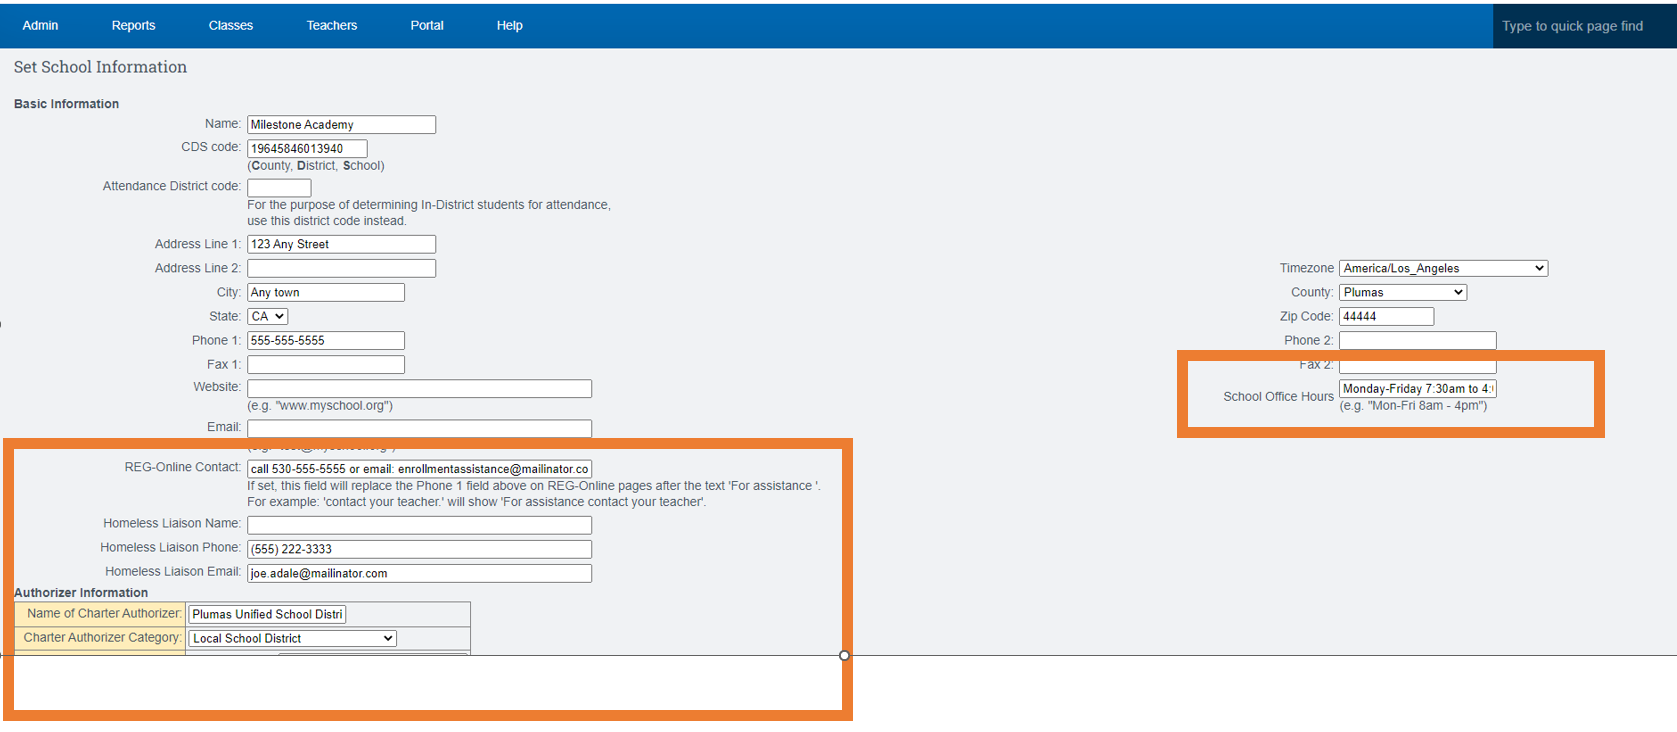
A. Set School Information –
Navigation: Admin>Settings>Set District Information/School Information
The Questions with the Box around the will appear on the Reg Online forms.
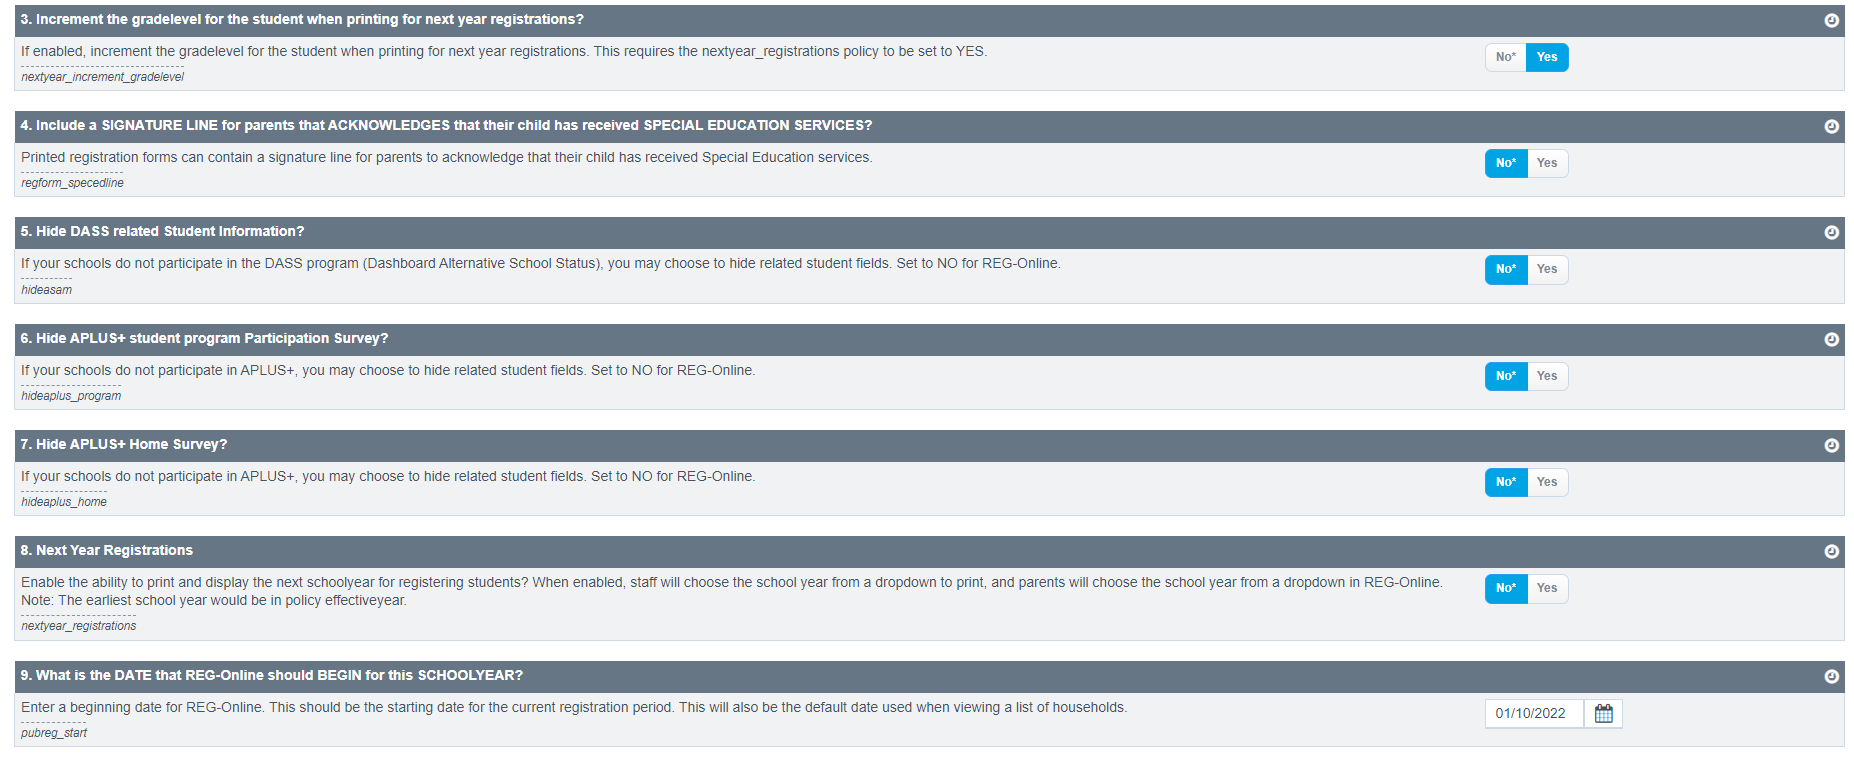
B. Set “School” Policies - Admin>Settings>Policies – Student Registration Policies
- The policies listed below affect Reg Online and should be set accordingly. (There are others that only affect the printed registration form)
- Policies should be set up once and can be adjusted as necessary for your school. School pathways will also make periodic updates to policies, so the screenshots below may differ from what is displayed on your screen.
This policy should be set to the current school year.

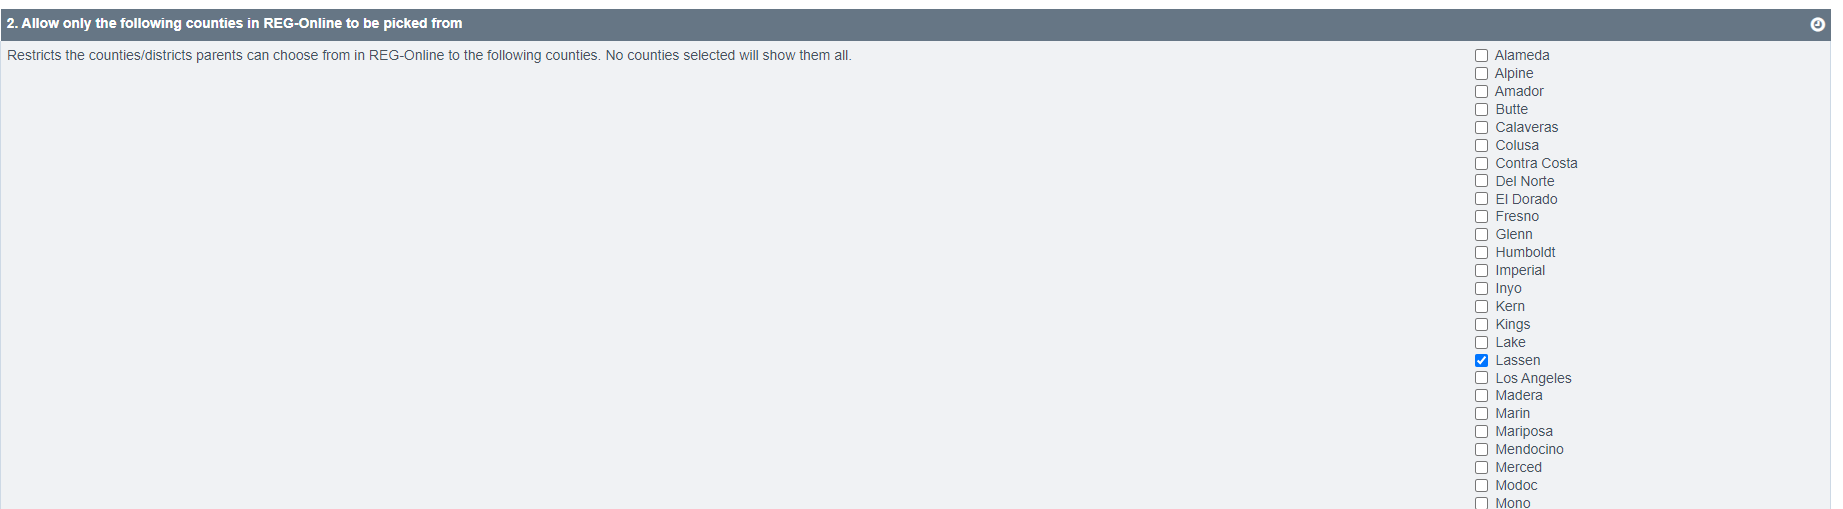
Choose the Counties you desire to have registration open to
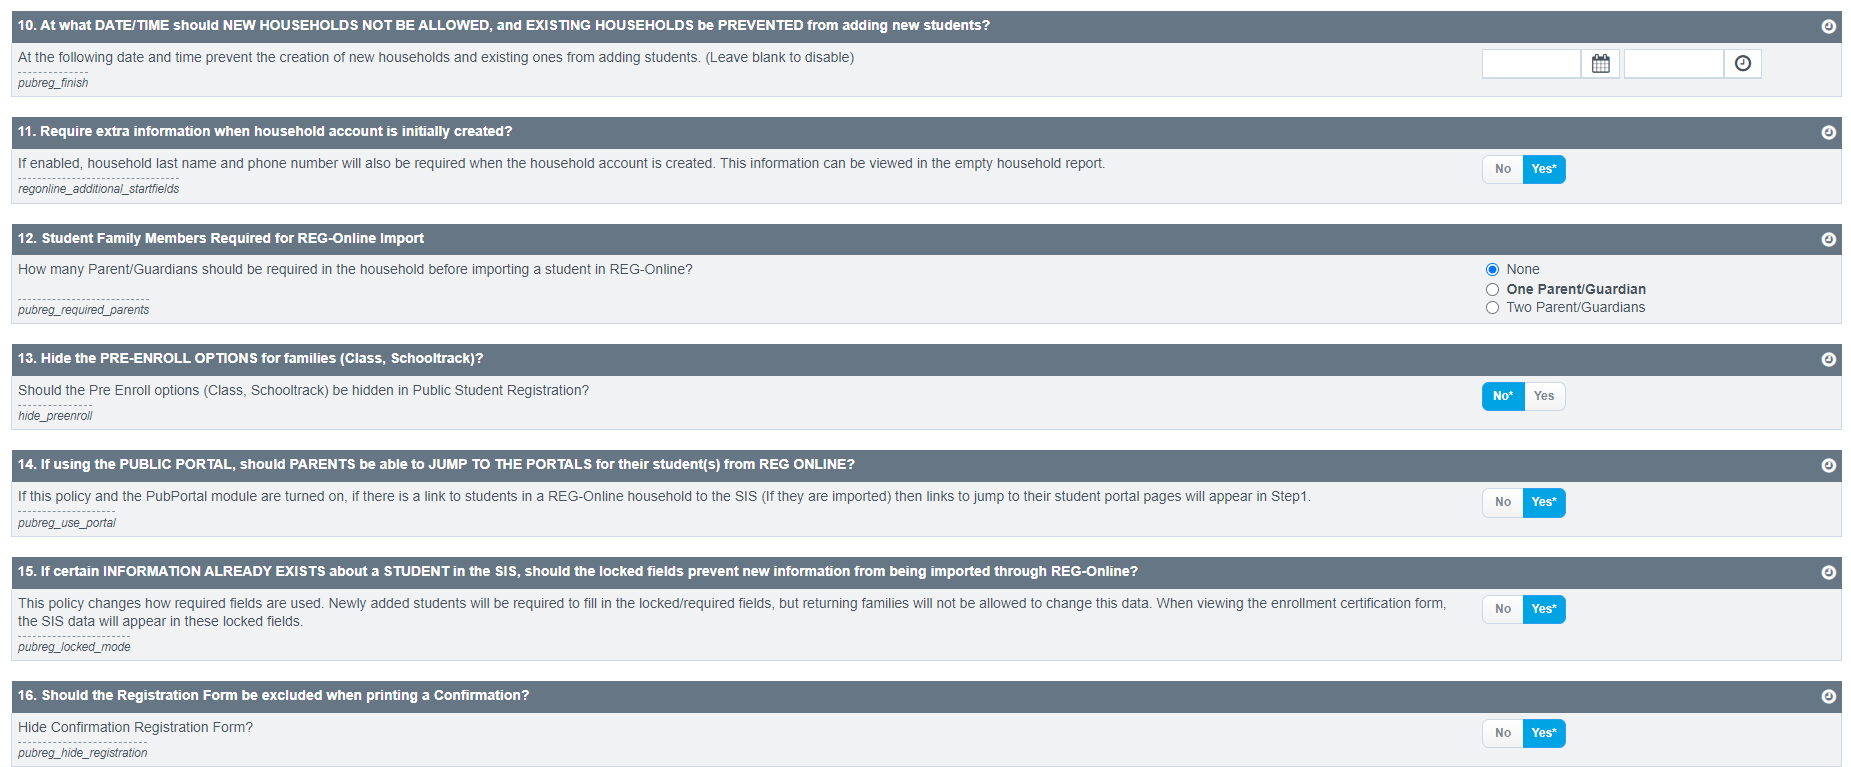
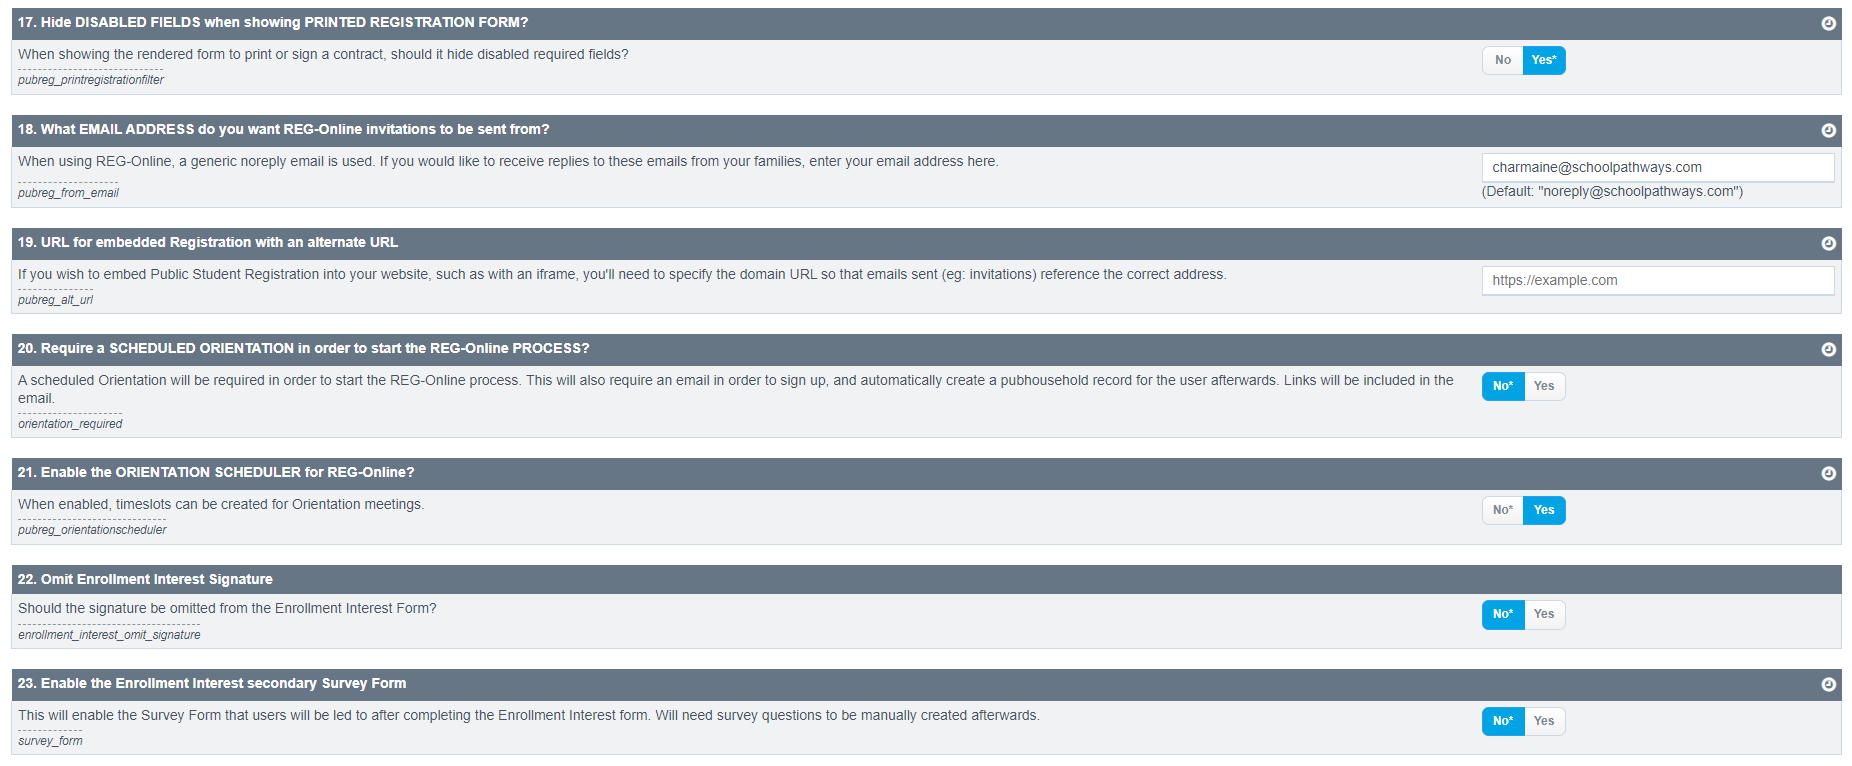
Newer Policies To Point Out
- Only allow the following counties in Reg Online
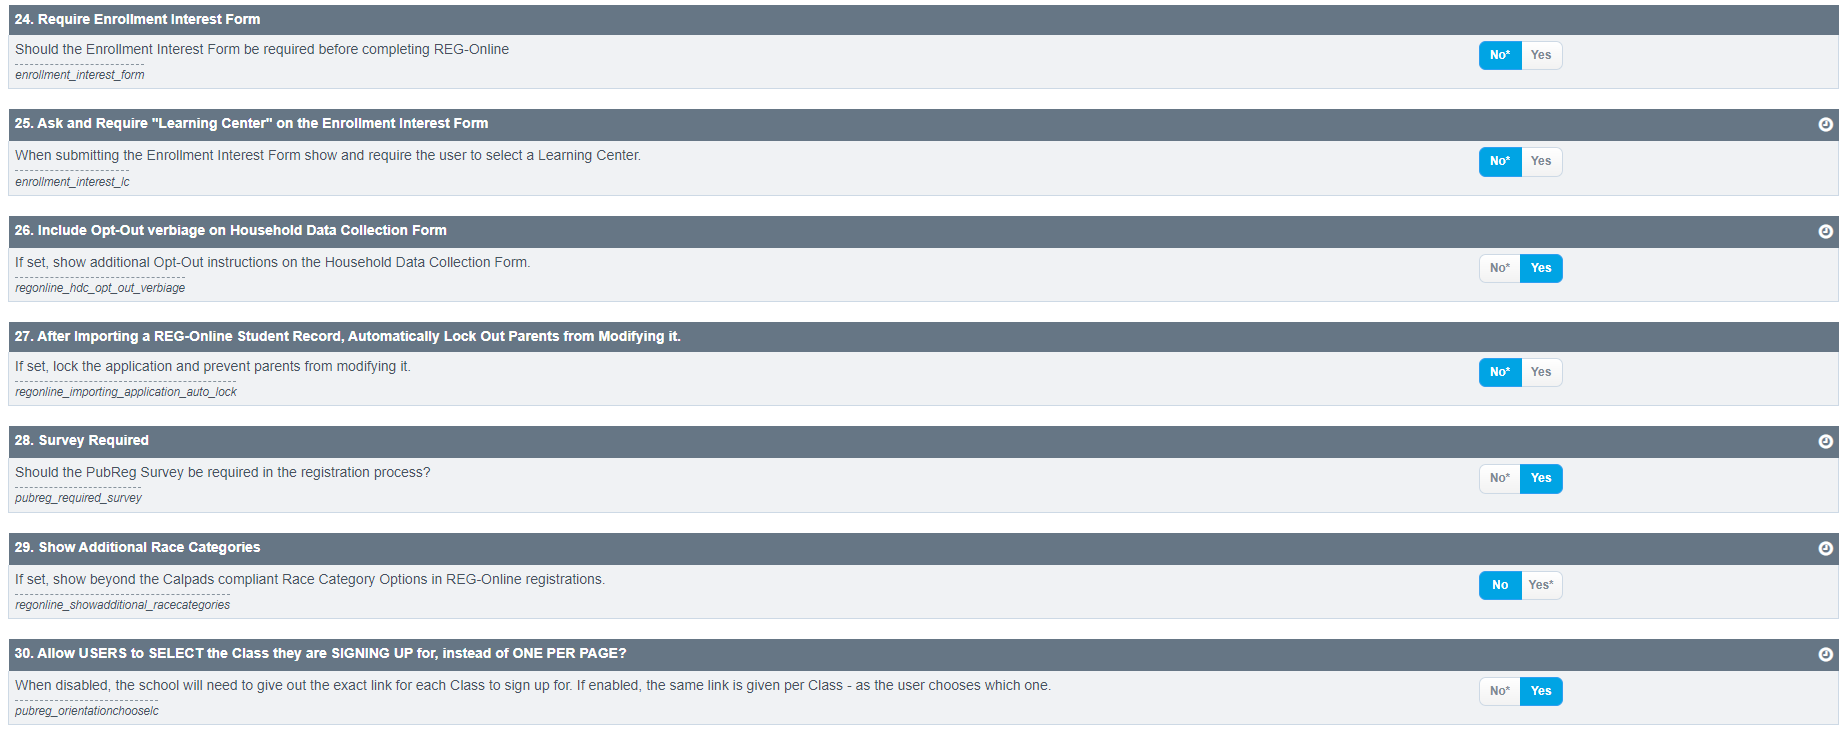
This will allow you to choose which counties you serve, and the other counties will not show for parents to choose from. This will also limit the school districts of residence to those counties selected. - After Importing a Reg Online record, automatically lock out parents from modifying it.
This is helpful for schools that only have students go through REG Online once, not yearly. - Show Additional Race Categories.
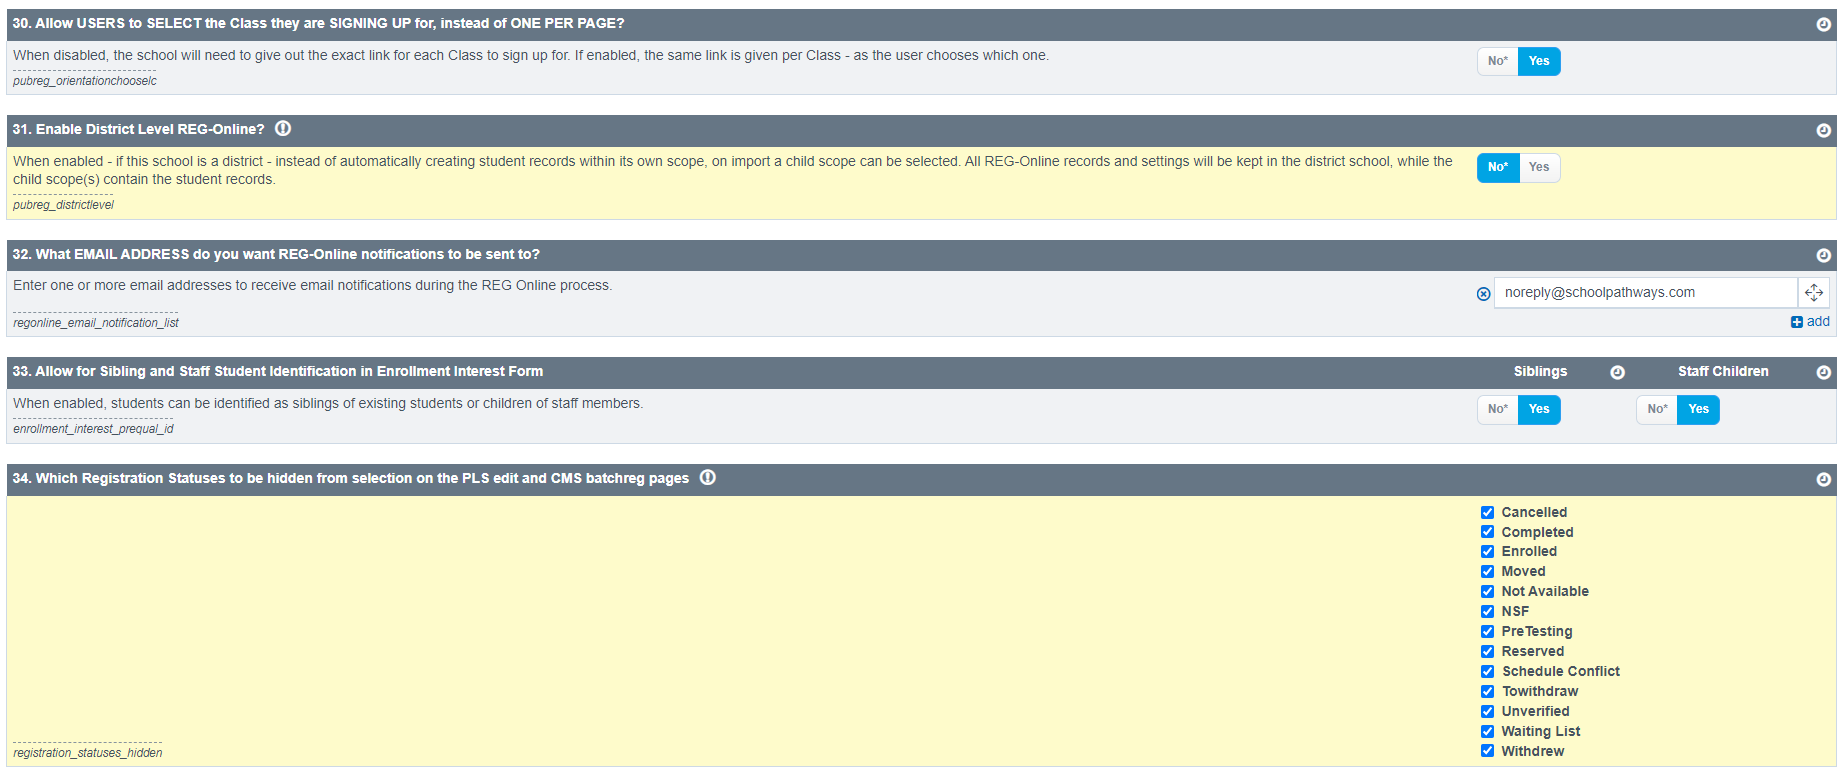
If you only want the Calpads Race Categories to show, you can set this to NO. We have found that families want their race to identify with, not the Calpads more restricted list. - What email address do you want Reg Online Notifications to be sent to?
Outside of your normal registration time, it is helpful to be alerted when a new student is added to an existing household, a new student is complete and may be ready to import, and a returning student is complete and may be ready to import. During registration time, you might get bombarded with notifications. - Do you want to view the first and last names for the AKA (Also Known As) section in Reg-Online?
Portal > Reg-Online > Application > Expand Student
The Reg-Online application has been updated so that both First and Last names are required for AKA Name or Preferred Name if one is entered. - The Required Student Values settings can control whether the Physical Exam question for Immunization Information appears within Reg-Online. Previously this was a page policy
Set “Page Policies”
C. Page Policy Set-Up – Click Options in the lower right corner of your page.
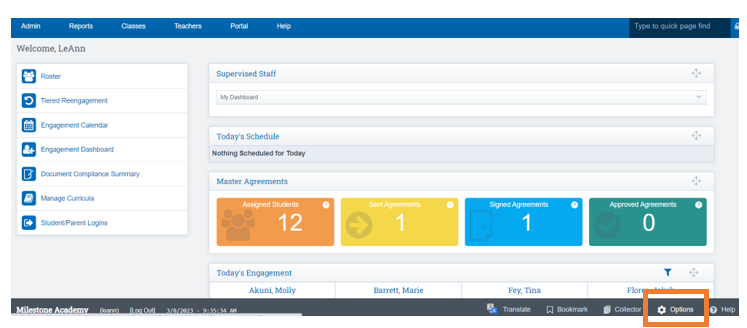
Then click Page Policies
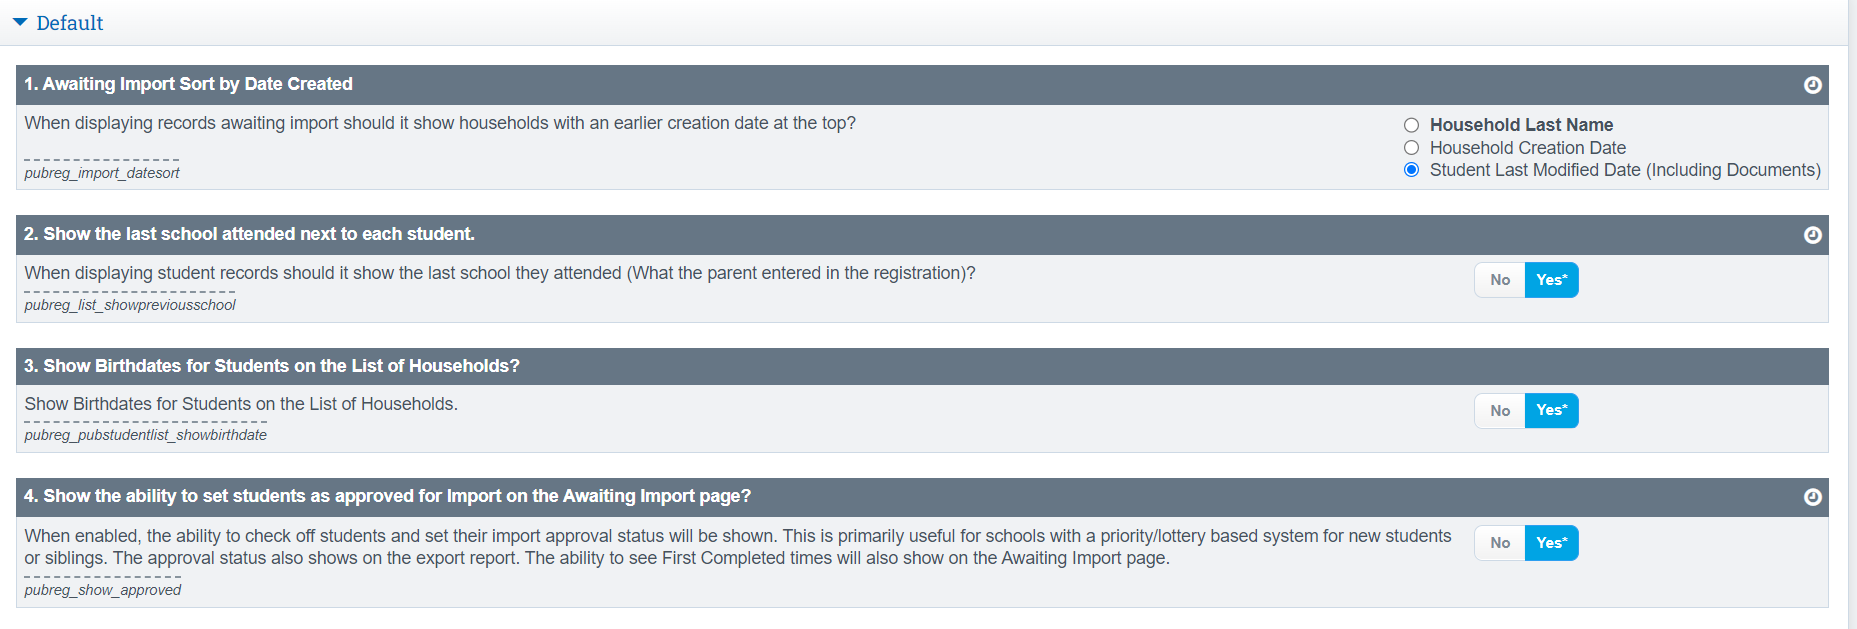
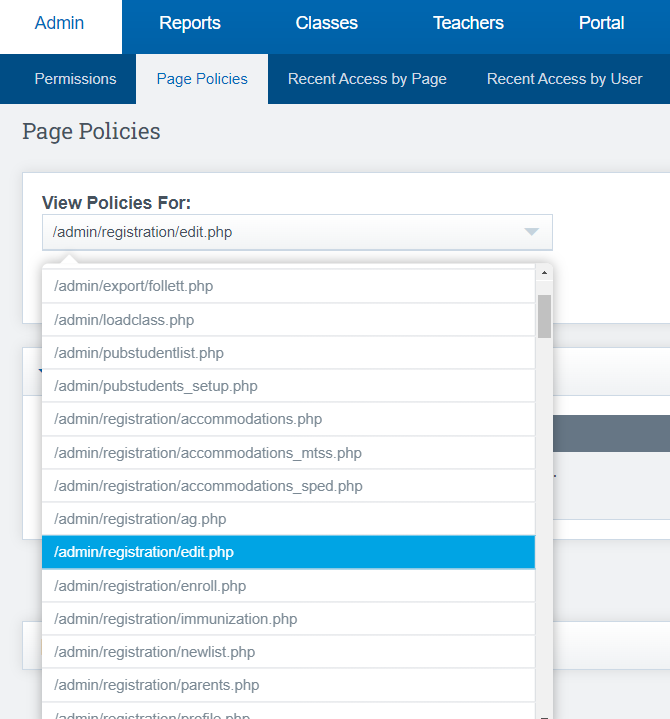
.From the dropdown, choose /admin/pubstudentlist
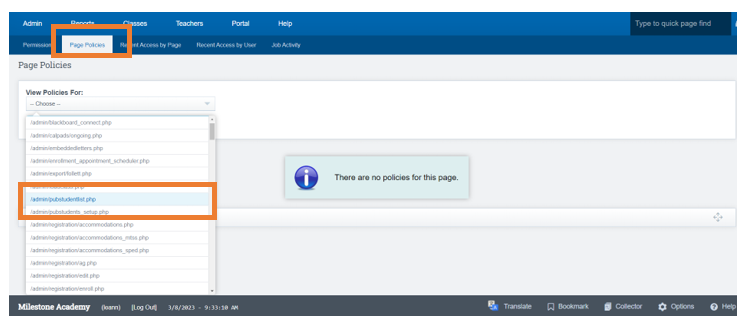
These policies 1-4 should be set to Yes in order to view as much information as possible during the process.
From the dropdown Choose /admin/pubstudents_setup
Click Update
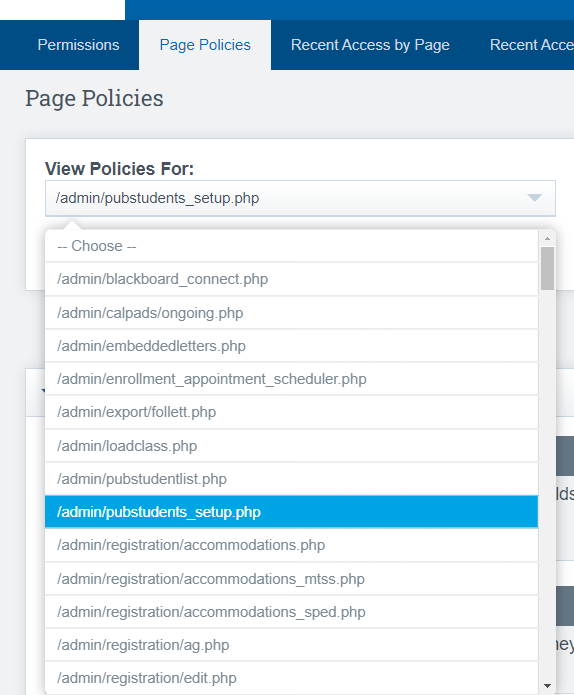
If you will not be asking parents to fill in immunization information during registration, set this policy to Yes.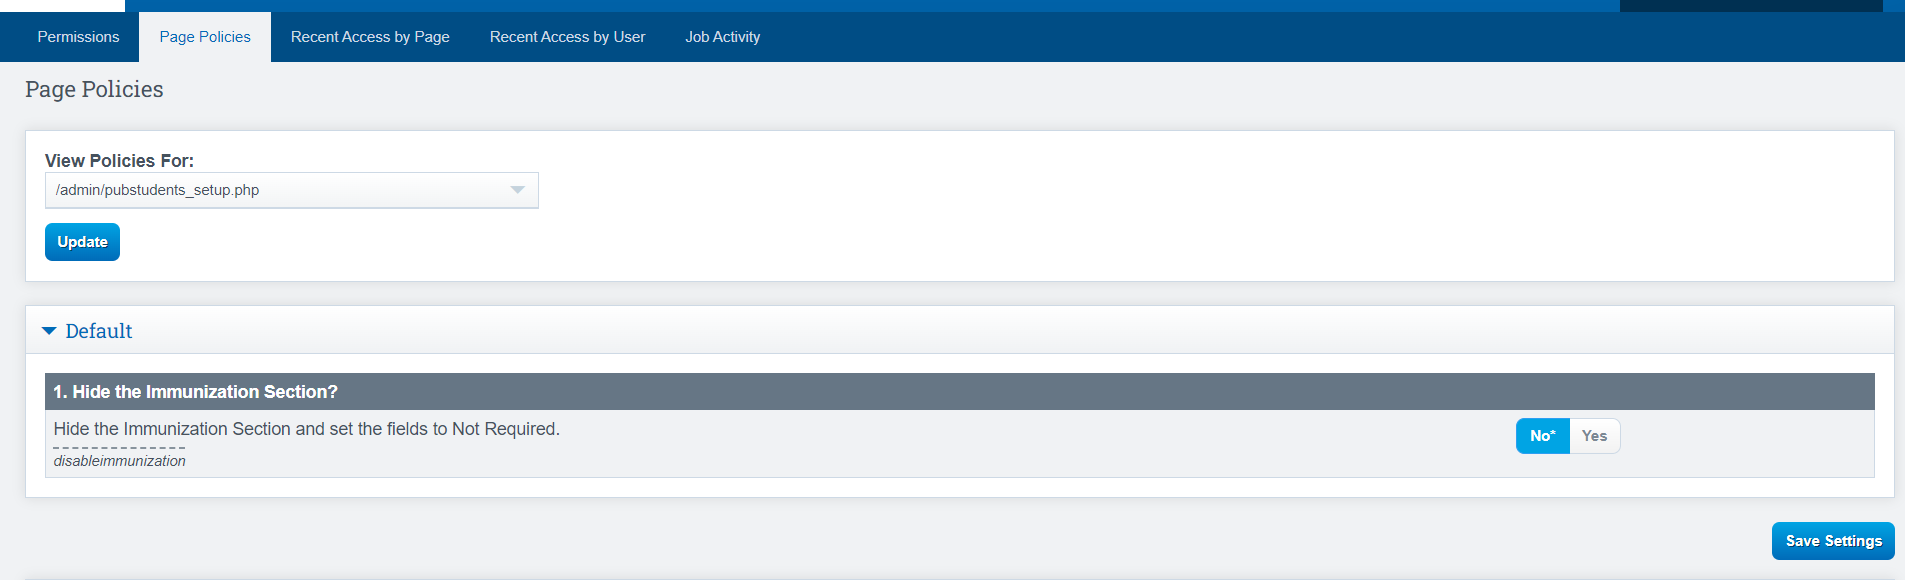
Scroll Back to the top of the Page:
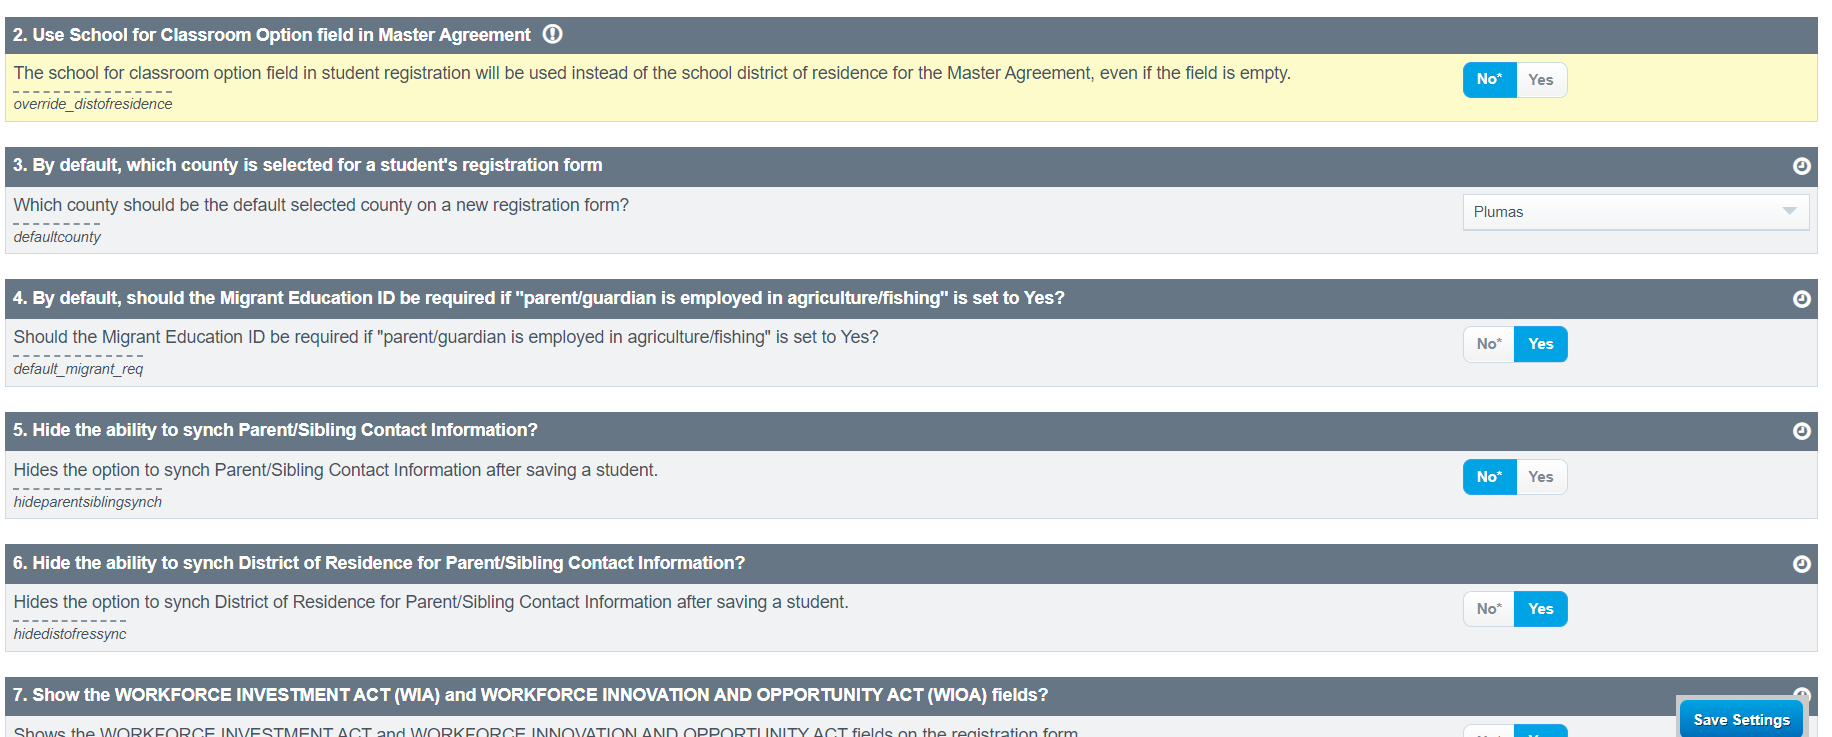
From the dropdown, choose /admin/registration/edit
Click Update
The Following policies should be set according to the school Preferences

Part 2: Public Registration Administration –
Admin>Public Registration>Admin Page
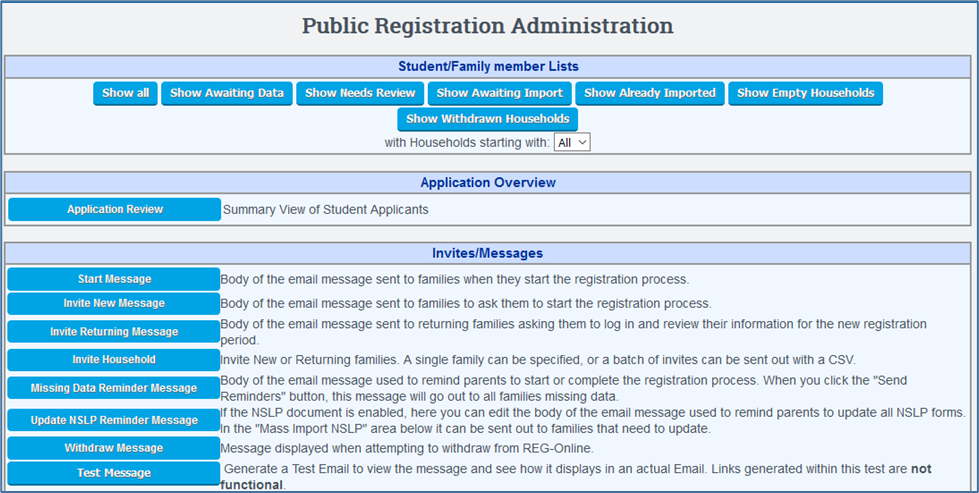
1.Header Information
This will be discussed in the Reg Online Operations Manual.
2. Invite Messages
For set up a few types of messages need to be created:
Start Message: The Start message is used when you have a link to REG Online on your website. It should be worded for new families.

Invite New Message: This message is used when you invite a family to REG-Online manually. It should also be worded for new families and can be the same message as the Start Message above.

Invite Returning Message: This message is used when you plan to invite returning students to review their information and give you any updated information. It should be worded for returning students.

Confirmation Print Message: This message is sent to the family during the last step of the registration process. It should notify the family what happens now that they have completed REG Online.

3. Configuration

Set up required values for Household, Students, and Guardians.

After clicking on Required Household Values, you will set up the fields that you want to be required, optional, or disabled.
Setting Up Household Values:
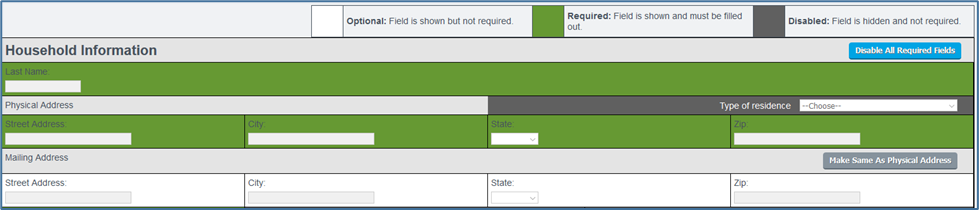
The Color Key is at the Top of Page:
- Green is required and the family must answer the question.
- White is optional and the family can skip the question.
- Gray is disabled and the family will not see the question.
All you need to do to change a setting is click in the field in this area and it will change to the next setting.
Each click in a field changes the color and setting.
Once you have the page set, click Save.
After clicking on Required Student Values, you will set up the fields that you want to be
- Required
- Optional
- Locked
- Disabled

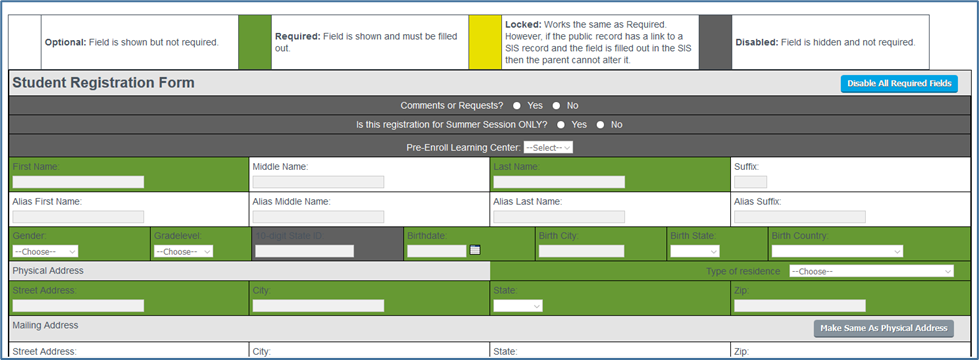
There is another setting in the student values and it is “locked”.
This is to be used when you are inviting returning students and you do not want certain information in the SIS to be overwritten on import.
The fields that we recommend you lock:
- Race/ethnicity questions
- Language Survey questions
Once you have the page set, click save.
After clicking on Required Guardian values, you will set up the fields that you want to be required, optional, or disabled.

Once you have the page set, click save.
4. Documents, Contracts and Agreements

Click Setup Documents:
There are two types of Reg Online Documents.
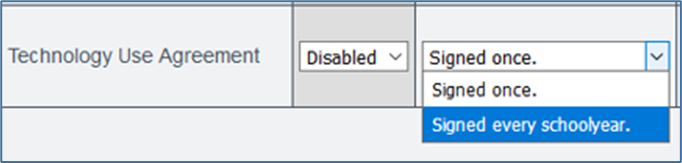
1.Signed Documents The signed documents at the top are defaults. You can choose to use them or disable them. Each of these documents can be set separately and you can add as many more as you’d like.
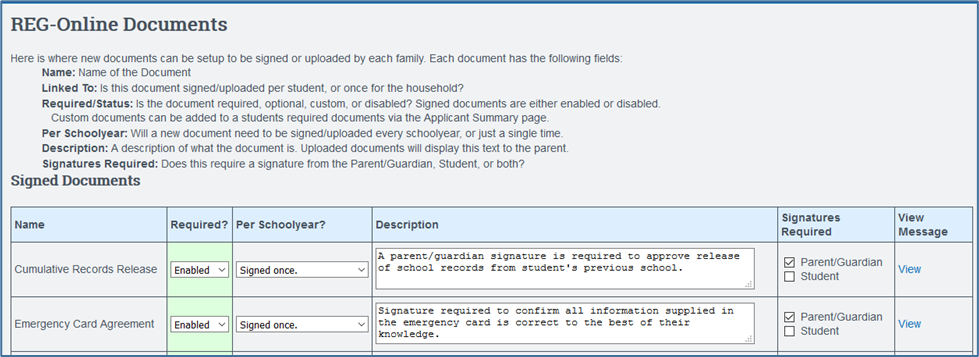
- Each can be set to enabled/disabled. If you do not want it to show, mark it disabled and then click Save All Documents.
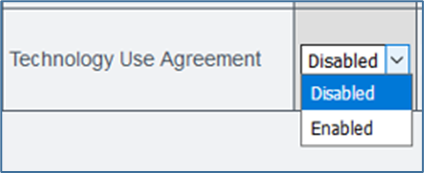
- Each can be set to signed once or signed every school year. Cume records would be a signed once document, but the Technology Use Agreement might be signed every school year.
- You can change the wording in the Description. It is viewable before a family clicks the sign button.

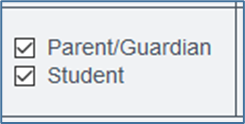
- Choose who is to sign each document, Parent/Guardian, Student, or both.
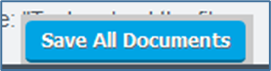
Once any changes have been made, be certain to click the Save All Documents button at the lower right corner of your page.
After clicking the View link, you are able to create your documents or any wording that you want to appear above the signature boxes. (Note: The signature boxes do not appear here, but they will appear for the family in their view).
- You can cut and paste your entire documents and the document can be read and then signed by families.
- You can use a hyper link to add a link to a document as well and have the parents’ sign that they agree with the document. If you have any questions, please contact your account manager.

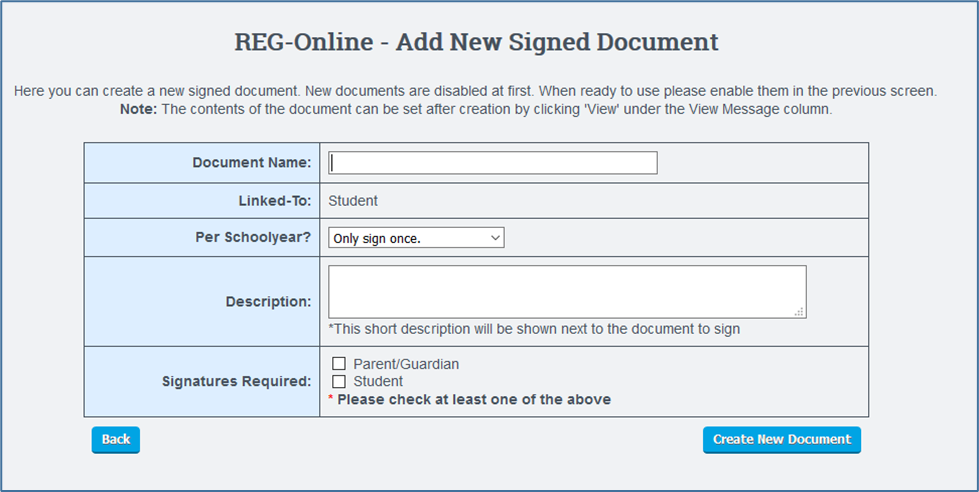
How to Add your Own Signed Document:
Click Add New Signed Document

After clicking, you will fill in the fields for your specific document
Click Create New Document
Uploaded Student Documents:
You have the ability to create documents that your parents will upload.

There are no defaults in this area.
To add a document:
Click Add New Document at the bottom of the page
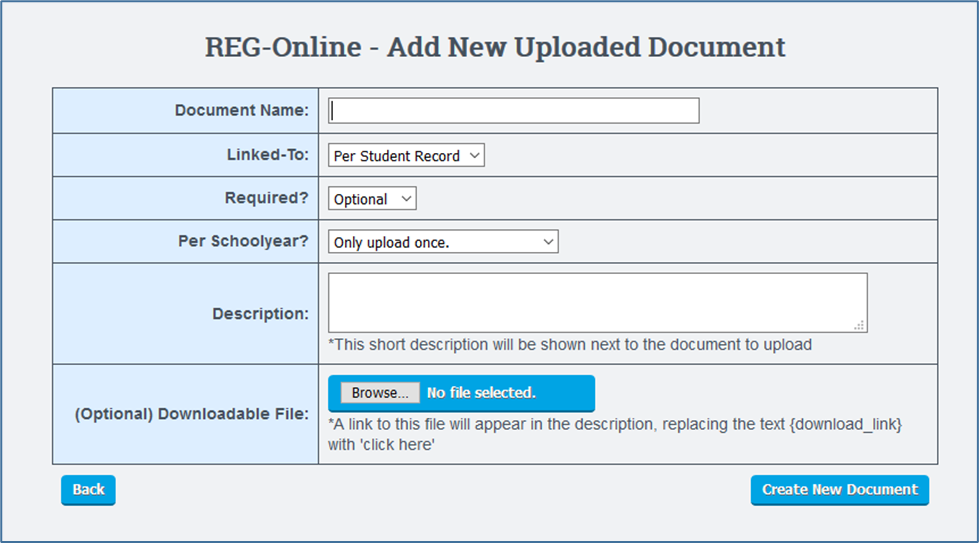
- Name the Document.

2. Will this be a household document or a per student document? (Note: Birth Certificate should be per Student Document and a Proof of Residency could be a Household Document.)

3. Is this an Optional Document or a Required Document. (Note: If you require a document, and the parent has no way to upload a document, they will not be able to complete the application. We recommend that you leave documents set to optional even though it is a required document for enrollment.)

4. Per School year, or upload only once.

5. Description that will appear for the family alerting them to the reason for the document.

6. Optional Downloadable file: If you use {download_link} feature, you can place a document for your families to download, fill out and then they can upload them to you.

Once you have completed creating your document, click Create New Document Button.