Admin: Work Permits /Video & Guide
Starting the Permit Process
3 ways to access the Intent to Employ form:
-
Student or Parent:
-
From the Portal, click on the Work Permits tab. Print off the Intent to Employ form and take it to a potential employer to complete.
- Students can print the Work Permit form and bring it into the school to have it filled out if needed
-

Choose the form you desire to complete
-
- Pre Fill the form in the SIS
- Print the form and provide the form to the student
- Student takes the form to employer to get it filled out
- Student then Signs the form
- Student brings the form back to the school
- School will then upload the form in the SIS under Work Permit tab (directions below)
- School will then approve the form
- School will then click the application submitted
All directions on how to process work below:
-
From the Student Dashboard click on either the Work Permits icon or the Work Permits tab.
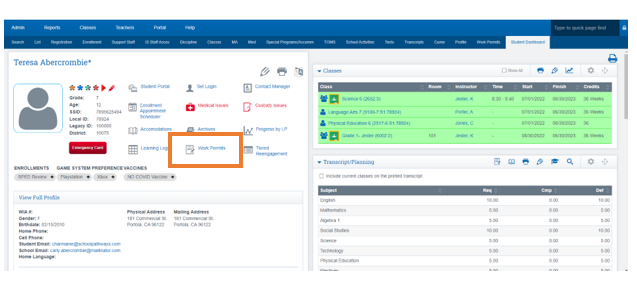
-
Teachers have the ability to Print the Intent to Employ form for a Student.

-
-
Work Permits Administrator:
-
The Work Permits Administrator (WPA) can gain access from either the Student/Parent Portal or the Student Dashboard
-
The WPA can complete/print/archive/store the Intent to Employ (B1-1) form.
-
The WPA can complete/print/archive/store the Final Work Permit (B1-4).
-
Only the WPA can Add, Archive (or manually store) finalized Intent to Employ forms (B1-1) and Work Permits (B1-4) forms. Only the WPA can access archived work permit forms.
-
Step 2: The Intent to Employ Form (B1-1)
The WP Admin clicks on Add Permit to finish filling in any required fields from the Intent to Employ form.
-
The Expiration date will always default to the last day of the school year.
-
The hours that a student can work will default to the hours permitted by the state based on the student's age.
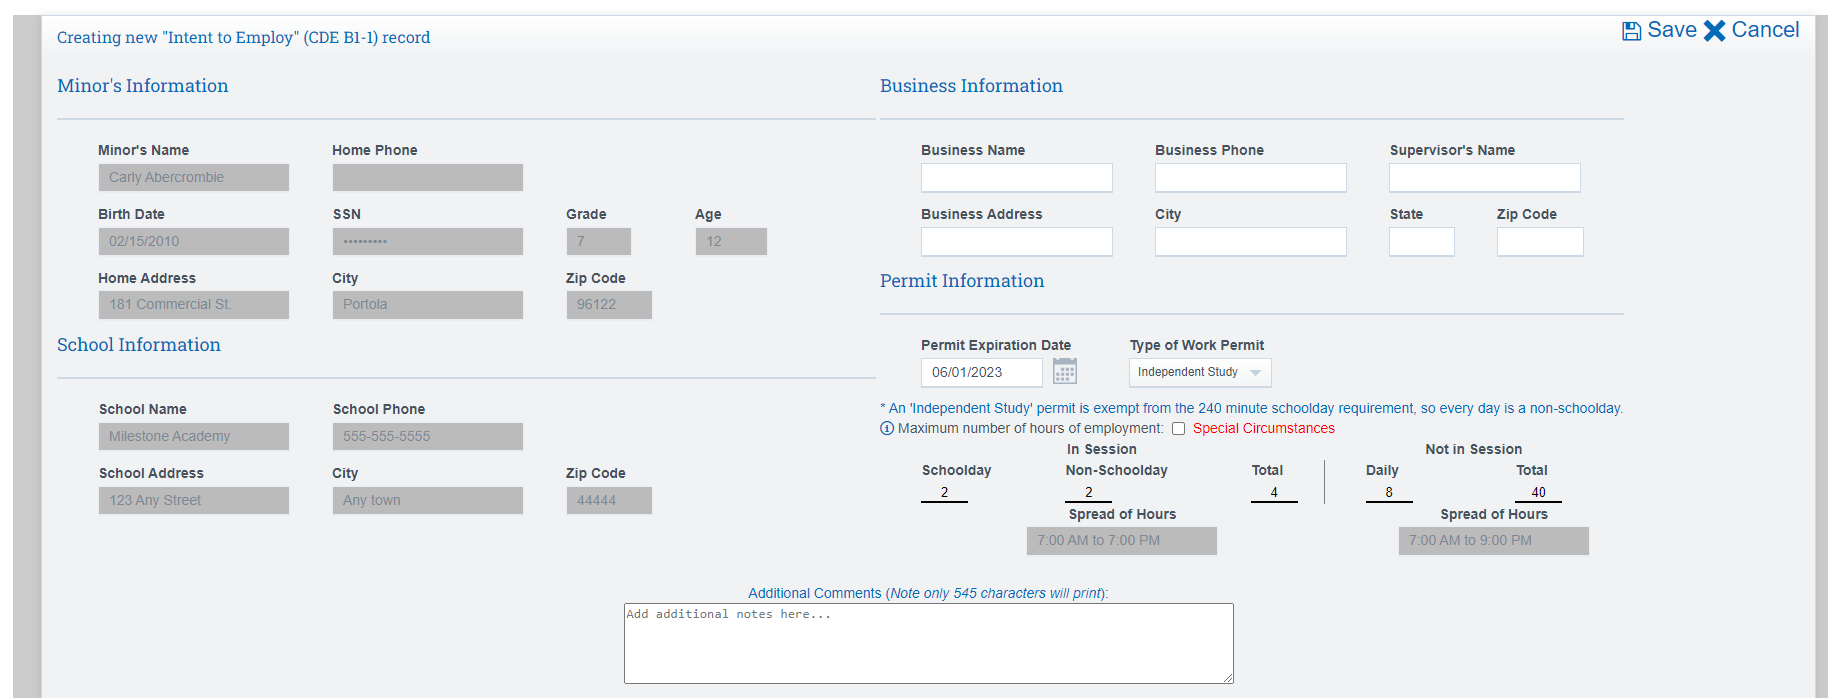
-
Clicking the Save button will move the status to Application Submitted
-
To archive the signed Intent to Employ form, scan the document to your computer, click on the Upload icon for the B1-1 form.
-
Then, Upload the Permit with Signatures and look for the green Uploaded B1-1 Form display to indicate a successful save.
-
Click on the Approve this Permit button at the bottom of the page. This changes the status to Permit ReadyOnce the proper signatures have been submitted and reviewed by the WPA,click on the blue arrow next to Application Submitted
-
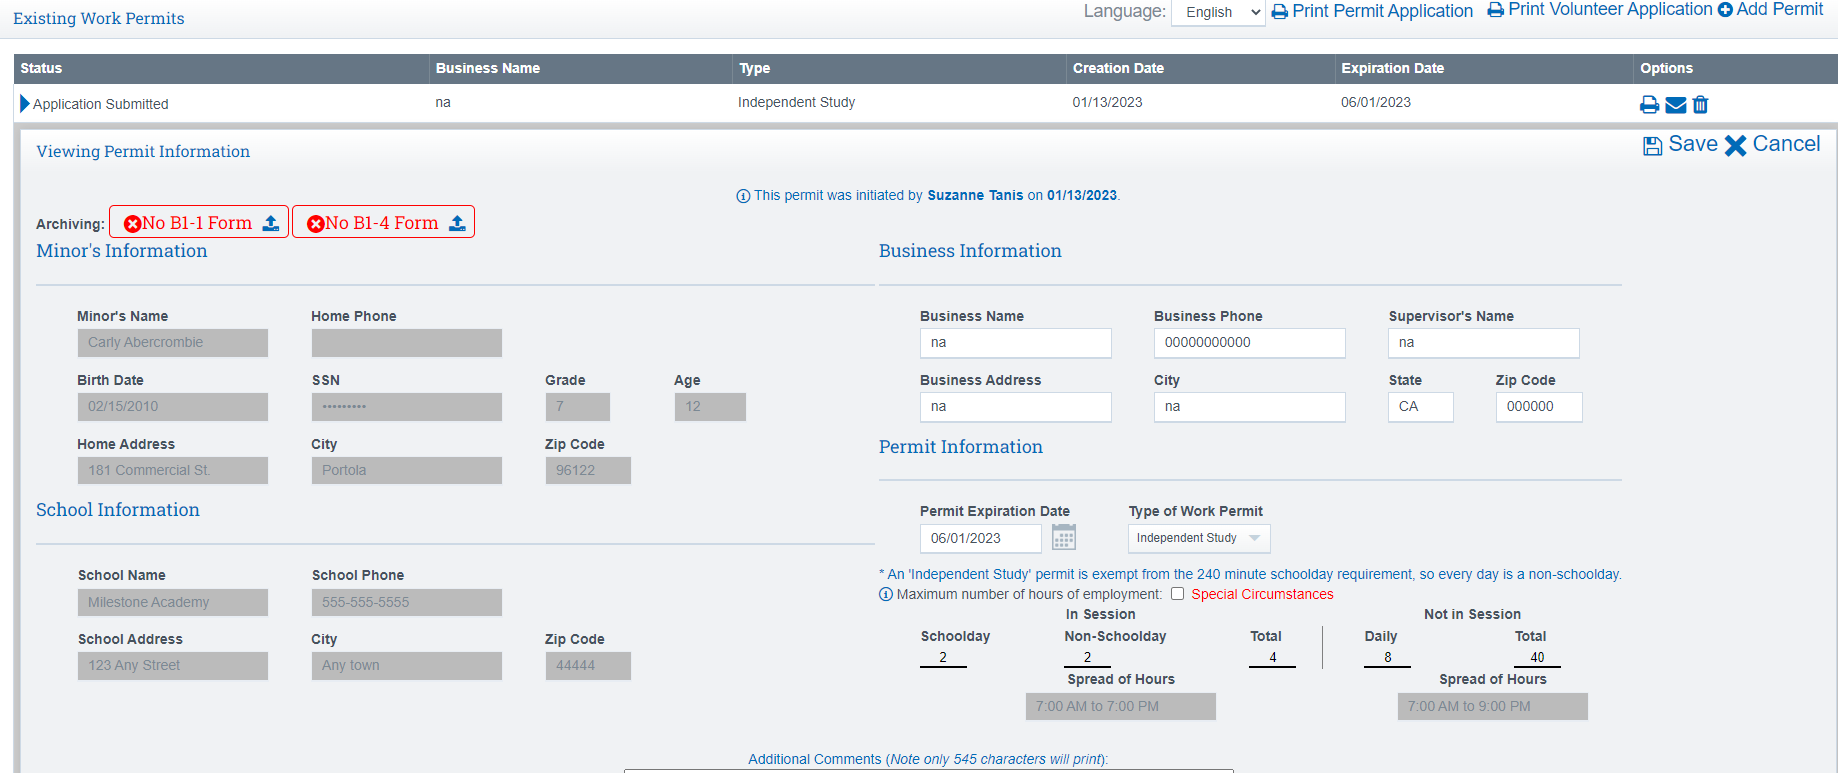
Step 3: Generate the Permit to Employ and Work (B1-4)
-
Click on the Finalize this Permit button at the bottom to Print the Work Permit
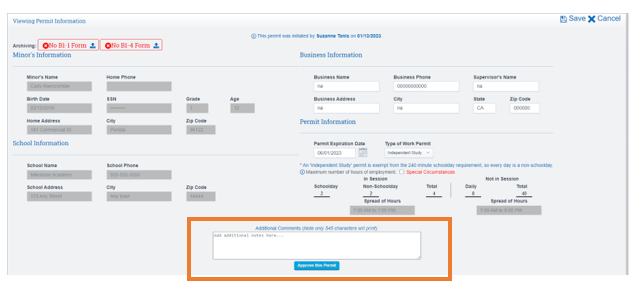
-
After signatures have been acquired, scan/upload the signed permit to your computer,
-
Click on the Upload icon for the B1-4 Form and upload/archive the Permit. Look for the green Uploaded B1-4 Form to indicate successful archiving (Manually store the permit if you do not have archiving).
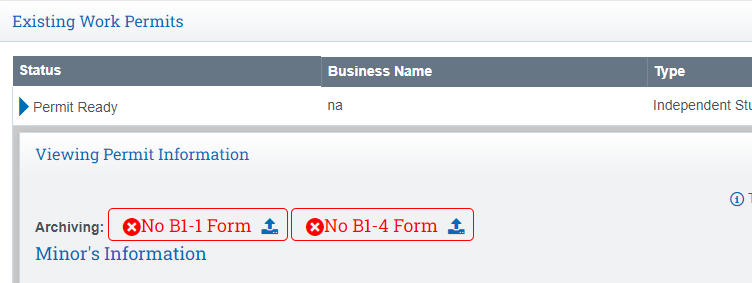
Student Portal View:

Letter of Revocation
There may be certain conditions that would cause a school to revoke a work permit. A primary reason for revoking occurs when the student dis-enrolls from the school. The school is responsible for information an employer that the Work Permit has been revoked.
Defining Revocation Reasons
-
From the Work Permit tab for any student, click on the Define Revocation Reasons link at the bottom-center of the page.
-
You will see “pre-loaded” revocation reasons in this area; however you can edit or add reasons to fit your program. You will be prompted to use one of these “revocation reasons” when creating a “Letter to Revoke”.
Creating a Letter of Revocation
-
Click the blue arrow next to a “Finalized” Work Permit
-
Click on the Revoke this Permit button.
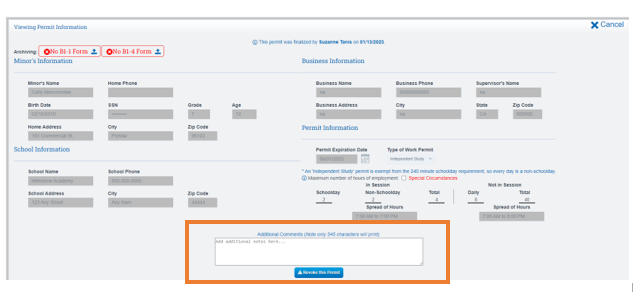
-
From the “Reason” dropdown, select the appropriate revoke reason.
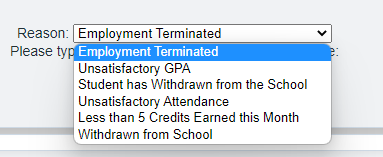
-
CONFIRM that you wish to generate this Letter and your Letter of Revocation will replace the Work Permit. You will now need to mail or email this Letter of Revocation to the Employer. Record the date the letter was sent at the top of the page.

-
Until then, the letter status will be reported as “Revoked, Letter Pending”. Once the letter is mailed/emailed and the date has been input, the status will change to “Revoked, Letter Sent”.
Work Permits Report
A Work Permits Report (found at Reports > Students > Work Permits) has been created to allow the Work Permits Administrator (WPA) to view any and all work permit statuses.
Volunteer Application Form (B1-6) (Optional)
-
There is another optional form supported by the CDE called the Request for Volunteer/Unpaid Trainee Authorization for Minor (B1-6). To see what this form looks like, print a copy for review.
-
As this is NOT a required form, we don't support the tracking of this form at this time.
-
A Page Policy has been added
(Options Cog > Page Policies > admin/registration/wp_settings.php > Printing Options), allowing users to enable the form on the page to conform to the latest State Permit B1-4 standards.
Work Permit Permission Group Notice:
To maintain compliance, the full functionality of Work Permits has always been restricted to the specific group, "Work Permits Administrator." This restriction is in place because the staff member signing off on a permit must be credentialed and authorized to do so. We intentionally limited this authorization to prevent unintended users from illegally approving work permits.
The functionality highlighted in the screenshots, which pertains to the process of approving work permits (and may involve sensitive information such as Social Security Numbers), is also limited exclusively to the Work Permits Administrator group.
