
Table of Contents
- Navigate to the School Calendar Settings
- Index
- Set/Define School Tracks
- Set School Year Details
- Enter the First and Last Day of School
- Define Specific Dates
- Customize Calendar Days
- Print the Calendar
- Activate the Calendar
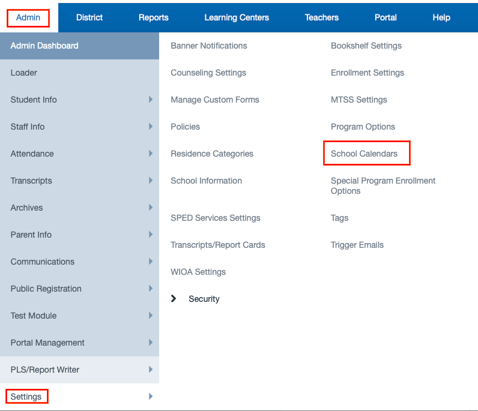
1. Navigate to the School Calendar Settings
Go to: Admin > Settings > School Calendars
2. Index
The calendar setup guides you through each essential step, from defining basic parameters and configuring months to adding key dates and customizing labels. As you progress, the specific table you’re working on will be visually highlighted, providing a clear, intuitive cue that helps you stay focused and ensures you’re always on track. This step-by-step, visually guided process makes setting up your calendar straightforward and error-free.

3. Creating Calendar Tracks
Tracks are used in schools that operate with multiple academic calendars, allowing them to manage different groups of students who start and end terms at various times. This is especially beneficial for year-round schools where instructional days may vary across student groups.
Tracks help organize students into distinct groups that follow specific calendar schedules. They are particularly useful for K–12 institutions where differing start/end dates, holidays, and term breaks require separate instructional planning. By assigning students to tracks, schools can ensure accurate attendance, grading, and scheduling aligned to their designated calendar.
Selecting the letter of a track to activate a track or Add New Track will open a new page.
If the user selected Add New Track a letter will generated by the system. A nickname (i.e. -TK and Kinder) will be created by the user. Check off Hide for new registration to active track selected. Save changes to activate new or pre-existing track. 
Note: School Pathways uses the term Track for two separate pages.
- Calendar Track refers to the administrative schedule that governs when semesters, quarters, or terms begin and end — including enrollment dates, breaks, deadlines, and similar milestones.
-
Academic Track typically refers to the structure and progression of courses, programs, or learning paths. For example, a student might be on an academic track toward a degree in engineering, or a school might offer different academic tracks (e.g., honors, AP, or vocational).
4. Set School Year Details
-
-
Choose School Year: Select the desired school year from the dropdown menu.
-
Choose Track: Select the appropriate academic track.
-
Click “Set Year Details”: This will save your selections and automatically redirect you to the Calendar page.
-

5. Enter the First and Last Day of School
On this page, you’ll enter the first and last day of school for the academic year. If this calendar is intended to be the primary calendar for the school, it must be marked as such here. Please note: only one primary calendar is allowed per school per school year, so be sure to select this option carefully.

Entering P1, P2, or YE dates are not necessary at this time and should not be set until the date passes and you are ready to report your attendance for this time frame
6. Define Calendar Dates
Once these details are saved, you’ll be directed to the next page. There, you’ll click “Define Dates” to begin customizing the calendar further. Throughout the setup process, the current table you’re working on will be highlighted, providing a clear visual cue to guide you through each step and ensure a smooth setup experience.
7. Customize Calendar Days
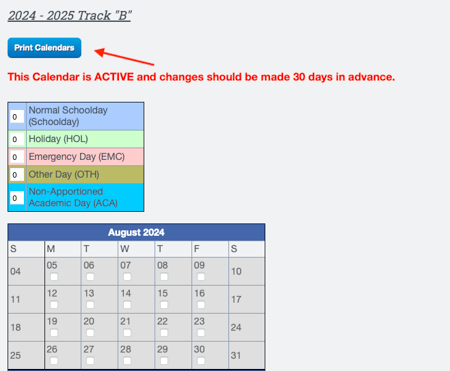
This page displays all the possible calendar days for the selected school year. The name and year of the calendar will be displayed on the top of the page. The number of days in the calendar chart will increase as the user checks off calendar dates. You can click any checkbox to include or exclude a specific day—checkbox colors will update automatically to reflect the type of day (e.g., school day, holiday, emergency day).
You can save your calendar as many times as needed before making it active. Once active, edits become more limited: past dates (before today) can only be changed from School Days to Emergency Days.
Be sure to click “Save” after making changes to ensure your updates are recorded.Calendar Days will increase as there user populates calendars.

8. Print the Calendar
To print your calendar, click on the blue icon labeled Print Calendars located at the top of the page.
9. Activate the Calendar
-
Click Make this calendar Active if you are ready for the calendar to be active.
-
Check the Set all unchecked days to Normal School Day checkbox. This will auto-fill all days with the normal schedule.
Note: The calendar has to be active before you can input reporting periods. You will receive a warning message if your calendar has fewer than 175 days.