
Dashboard View
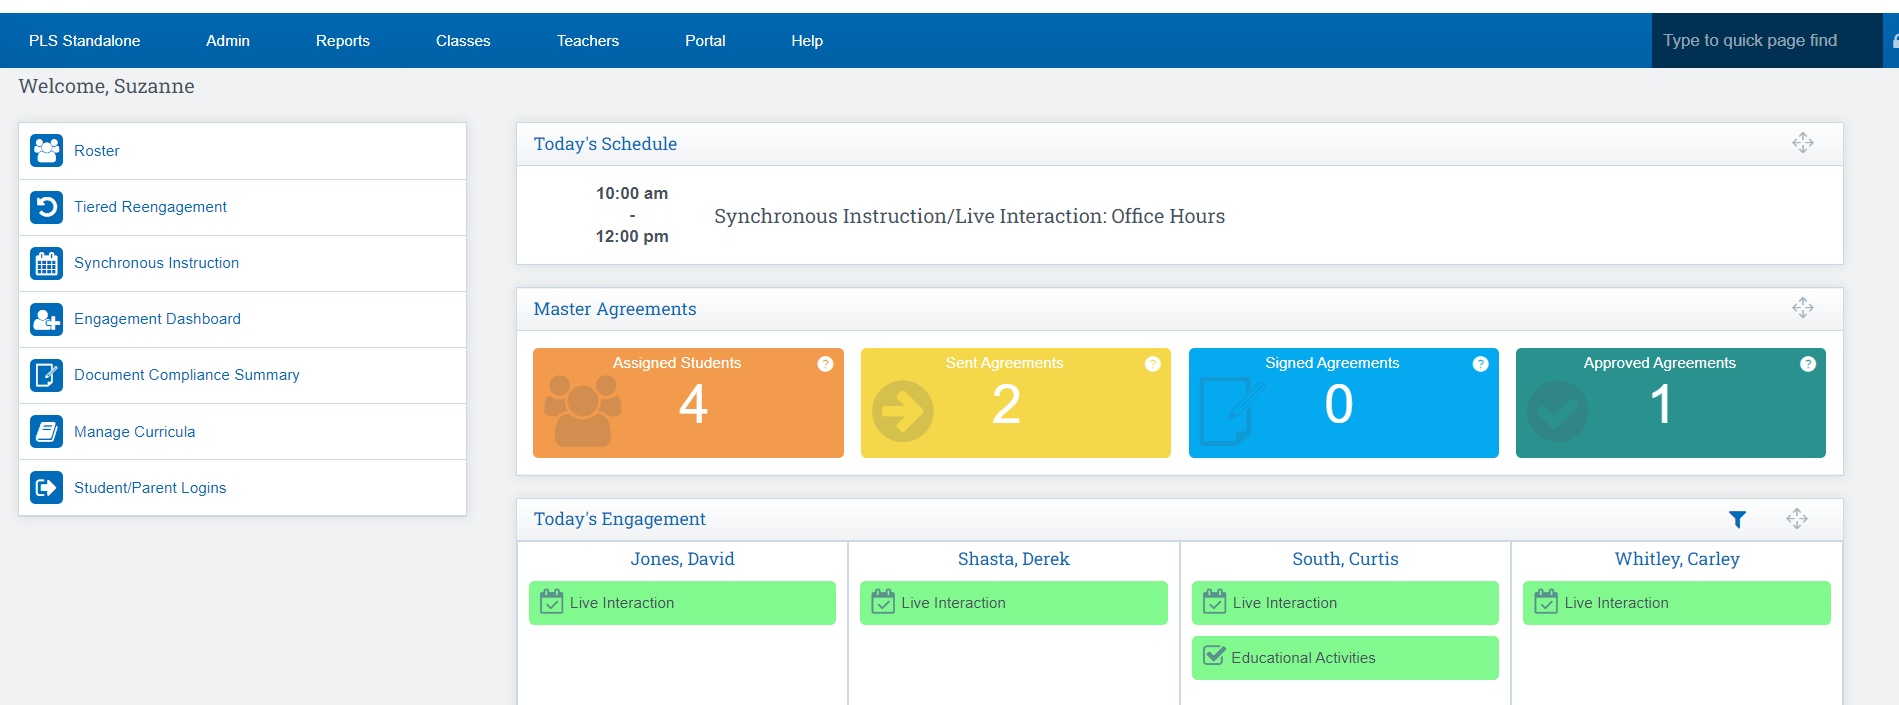
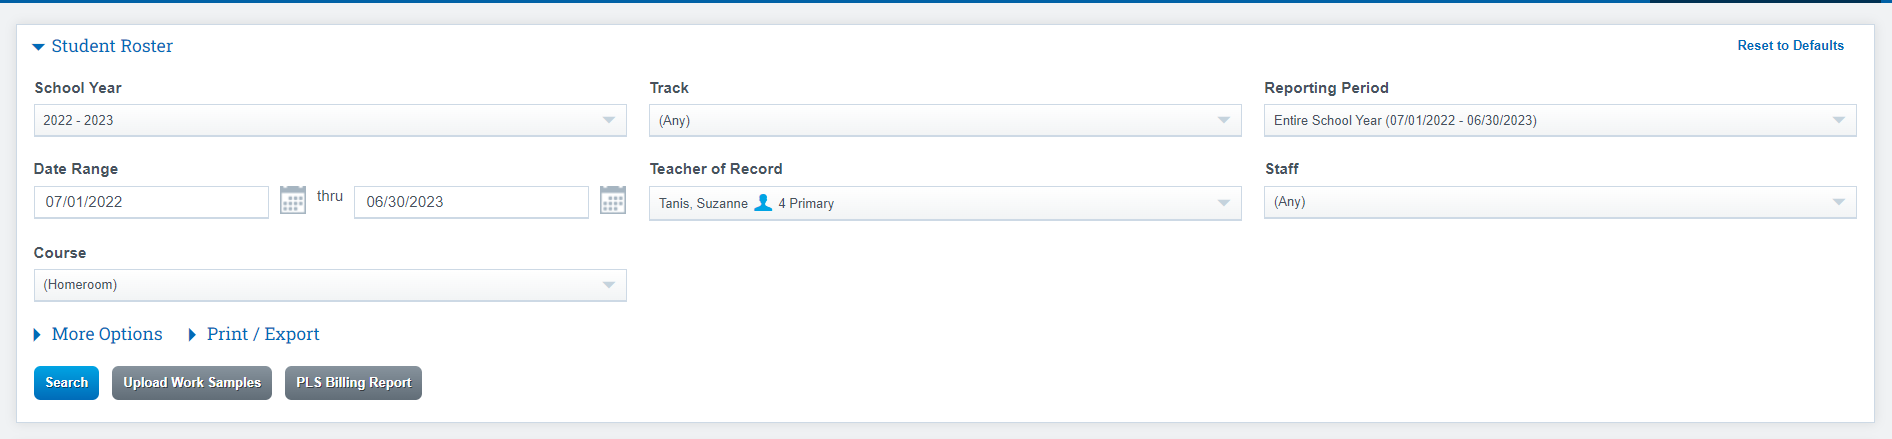
PLS Roster View: will display your current students as of today’s date. To update the date range, click on “Student Roster” and select from report criteria.
- Select School Year/Track
- Select Date Range by reporting Period/or set Manually
- Click Search to apply changes
- *If accessing as a supervisor, only the teachers you supervise will appear in the “Students belonging to” field.
- *If you are a supervising teacher, the Teacher of Record will display your name based on login.
- *If you are set as a highly qualified teacher (content teacher) for any students’ classes in the PLS you will be able to view the student folders by choosing your content class in the Course dropdown.
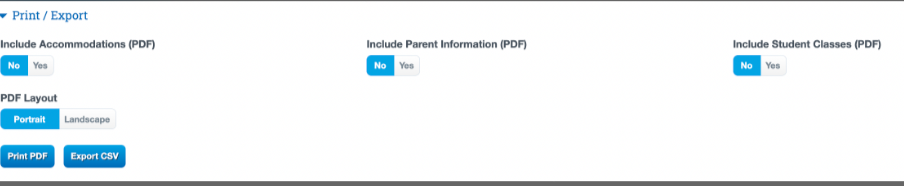
Filter Section On PLS Roster
-
You can filter what appears on your roster by changing different features in this section.
-
You also have the option to Print and Export your roster from this screen
- Staff can download student classes (to the far right) in PDF form
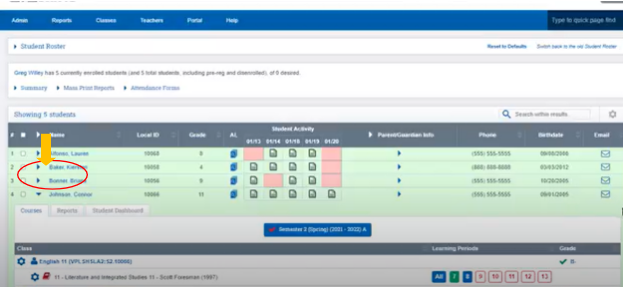
Once you load your Roster:
-
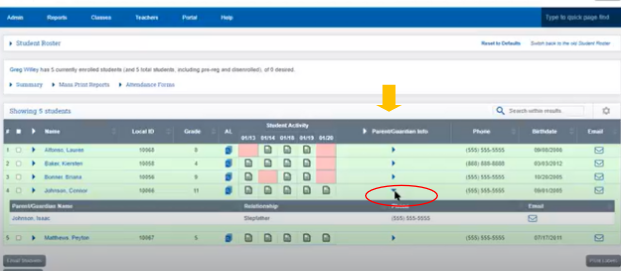
You will see the list of students based of the filters you chose in the filter section.
-
Pre enrolled Students will appear in BLUE on your Roster
-
*Pre-Enrolled students are those who are not enrolled yet, you might be waiting on documents from them before they begin
-
-
Enrolled Students will appear in Green on you Roster
-
Current grade level of the student will appear to the Right of the Students Name
-

-
-
Student Activity View: shows educational activities students, parents, or teachers have listed on any learning log document type. If students are enrolled in site based classes and teacher claims positive attendance, this is also noted as activity and visible in the activity monitor.
- *Some of our online curriculum integrations will bring in time - on - task and or activity submitted to be displayed here.
-
-
If the Cell is RED in the Activity Box this means no activity has been logged for that day
-
If the Cell is GREEN with a PAPER ICON, it means activity has been logged for that day
- *Activities can be logged by Students, Parents, and or Teachers
-
Click the Paper Icon to view what activities have been logged for that day

-
Click the Arrow Under Parent and Guardian Column to view Current information
-
Click the Arrow Next to the Students Name to open the Students Record

Edit a CMS or PLS Class
-
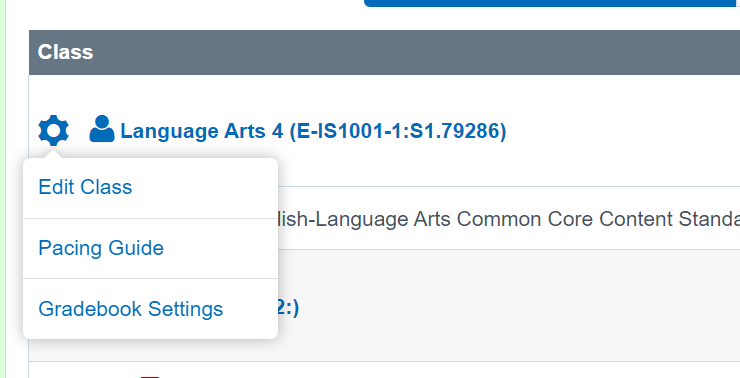
You can Edit a PLS & CMS class in the Student Roster
-
Click the Cogwheel next to the class
-
Click Edit CMS Class

-
PLS View
-
Click Edit Class
Tabs Across the top of Student Record
-
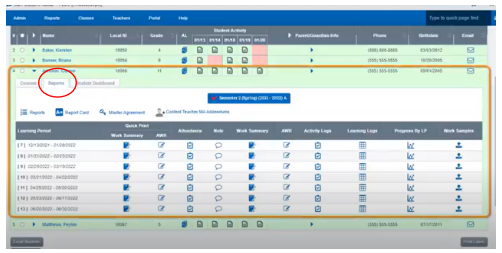
The 3 Tabs across the top of the Student Record is where you can click for more detailed information and gather reports for Individual students
- You can see the Courses (1) the Student Is Enrolled in as well as any Curricula(2) that is attached to the class
- You can also view Gradebooks under COURSE tab (see 2nd Image below)
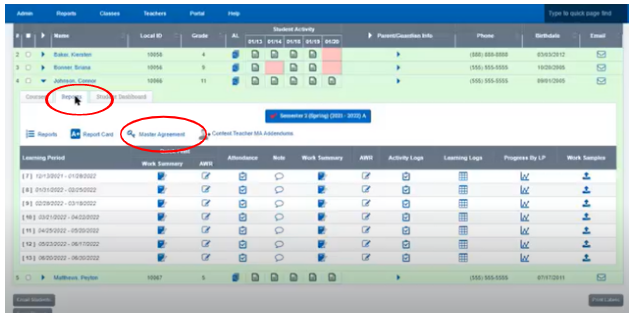
2. Reports Tab: Manage Student Progress, Create Master Agreements
3. Student Dashboard Tab: View a complete picture of all student related details and link to student and/or parent portals.

*If a Curricula is being handled in a third-Party system you might see icons such as Google, ETC
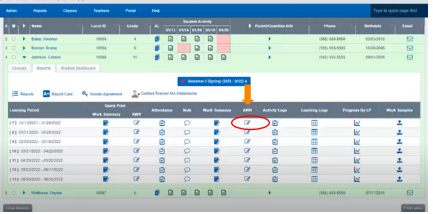
LEARNING PERIODS (LP) Column: You can Assign/Grade/ and Maintain student gradebook
- RED Gradebook Icon indicates no assignments have been created for this learning period
- BLUE Gradebook Icon indicates assignments are created
- Green Gradebook Icon indicated that at least one assignment has been graded

-
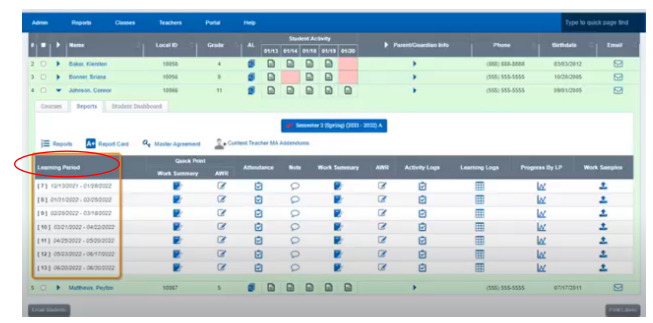
Reports Tab: Tracks the Students’ Progress
*The view above is a view of one Student and their progress
-
Learning Periods Column: Is the list of Learning Periods defined and saved in your school calendar.
-
Attendance Column: Is an option to take single student LP attendance
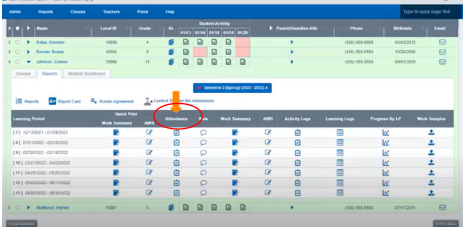
-
AWR Column: Is a detailed list of graded assignments completed in a class for that learning period (Assignment and Work Records
- Click the Icon in the AWR column to expand and view students completed work in detail
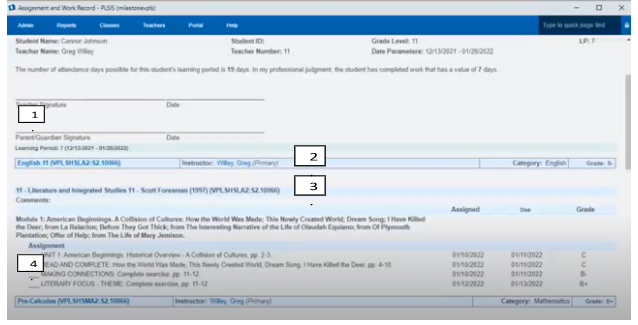
AWR Detailed View: Assignment Work Record is a detailed report that can be Archived
You can make your filtered selections based on what you want to view
- *Filter by Assignments
- *Filter by Learning Periods
- *At the end of the Learning period, you can have the document signed and archived electronically
Or
You can click Preview Report
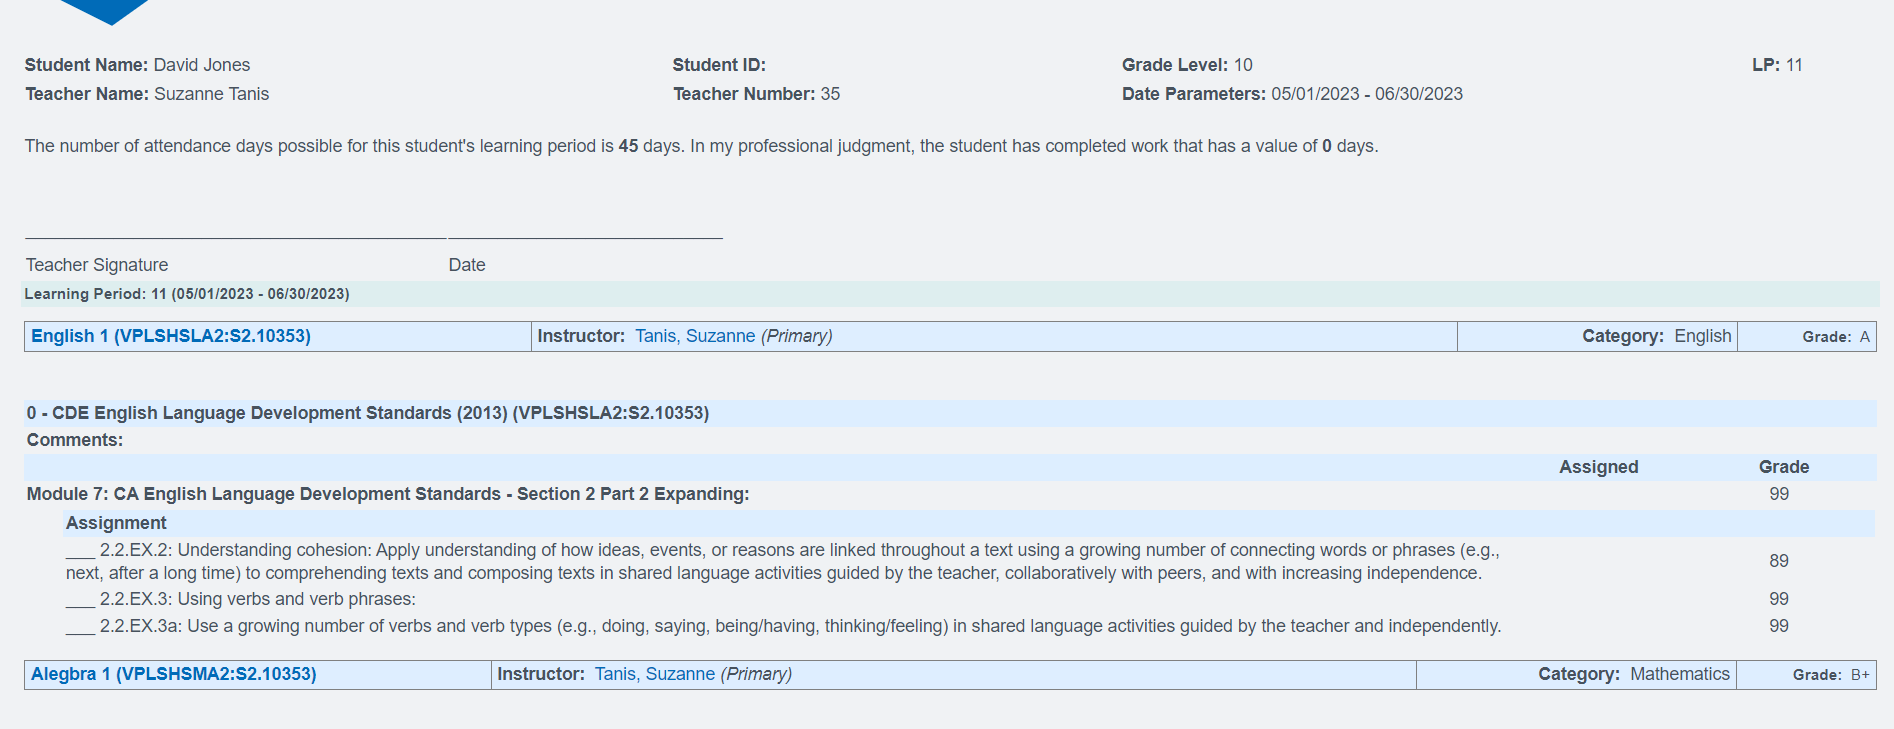
Preview Report View
- Signature Line/Learning Period
- Class
- Curricula
- Assignments Completed during the period
*Click the X in the upper right-hand corner to return to the Student Roster
Learning Logs: Tracks Student Activity
Learning Logs User Guide
- Click the Icon in the Learning Logs Column to open for a more detailed view
Learning Logs Filter Page: Is a way to have different views of the activities for the day for each student
- Click Review Log once you have chosen your options
Grid View
Mark the box when the student was involved in educational assigned activities (box will then turn green once it has been marked as completed for the day)
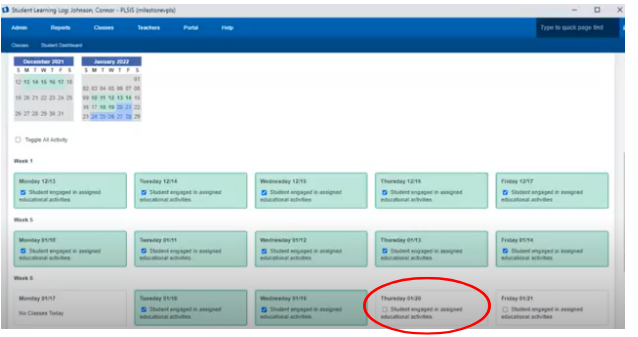
*Students and or Parents can log in daily and check the areas the child was engaged with
Grid Log MA lists the classes the student has on their Master Agreement (click the classes for the day they participated in, box will then turn green)
- *Students and or Parents can log in daily and check the areas the child was engaged with
- *If the Box is green activity has been recorded
- *If the box is white/gray no activity has been recorded for the day
Write In Logs (4 different logs) All the logs have the same options
- P.E.
- Music
- Reading
- Learning Log

*Fill in the activity the student did for that day (once this is filled in on the log, the info will transfer to the activity log)
Activity Logs: Shows learning Activities the student has participated in
- *You can Archive this document by clicking the “Archive Tab upper left-hand corner
- *Information will also be pulled in if you are using a Supported Curriculum Bridge
Work Samples: Upload samples of the students work click the icon to open next screen
Work Samples User Guides
Archiving/ Uploading Work Samples for Multiple StudentsHow Students Upload Work Samples or Assignments
Teachers : Uploading Work Samples for a Single Student
Teachers: Review Student Uploaded Work Sample/ Assignment Submissions
- Transcripts categories are listed Horizontally across the top of the toolbar
- If you have two classes with the same category will both, be listed
- Click the Upload Icon to upload a work sample from your computer
Or
Click the Phone Icon to upload a work sample from your phone
- *You can set filters and generate a compliance report to see who has generated a work sample for class and who is missing work
OR - Students can Upload Work Samples from their Portal,if a student Uploaded a Work Sample you will see a Paper Icon Next to the Learning Periods
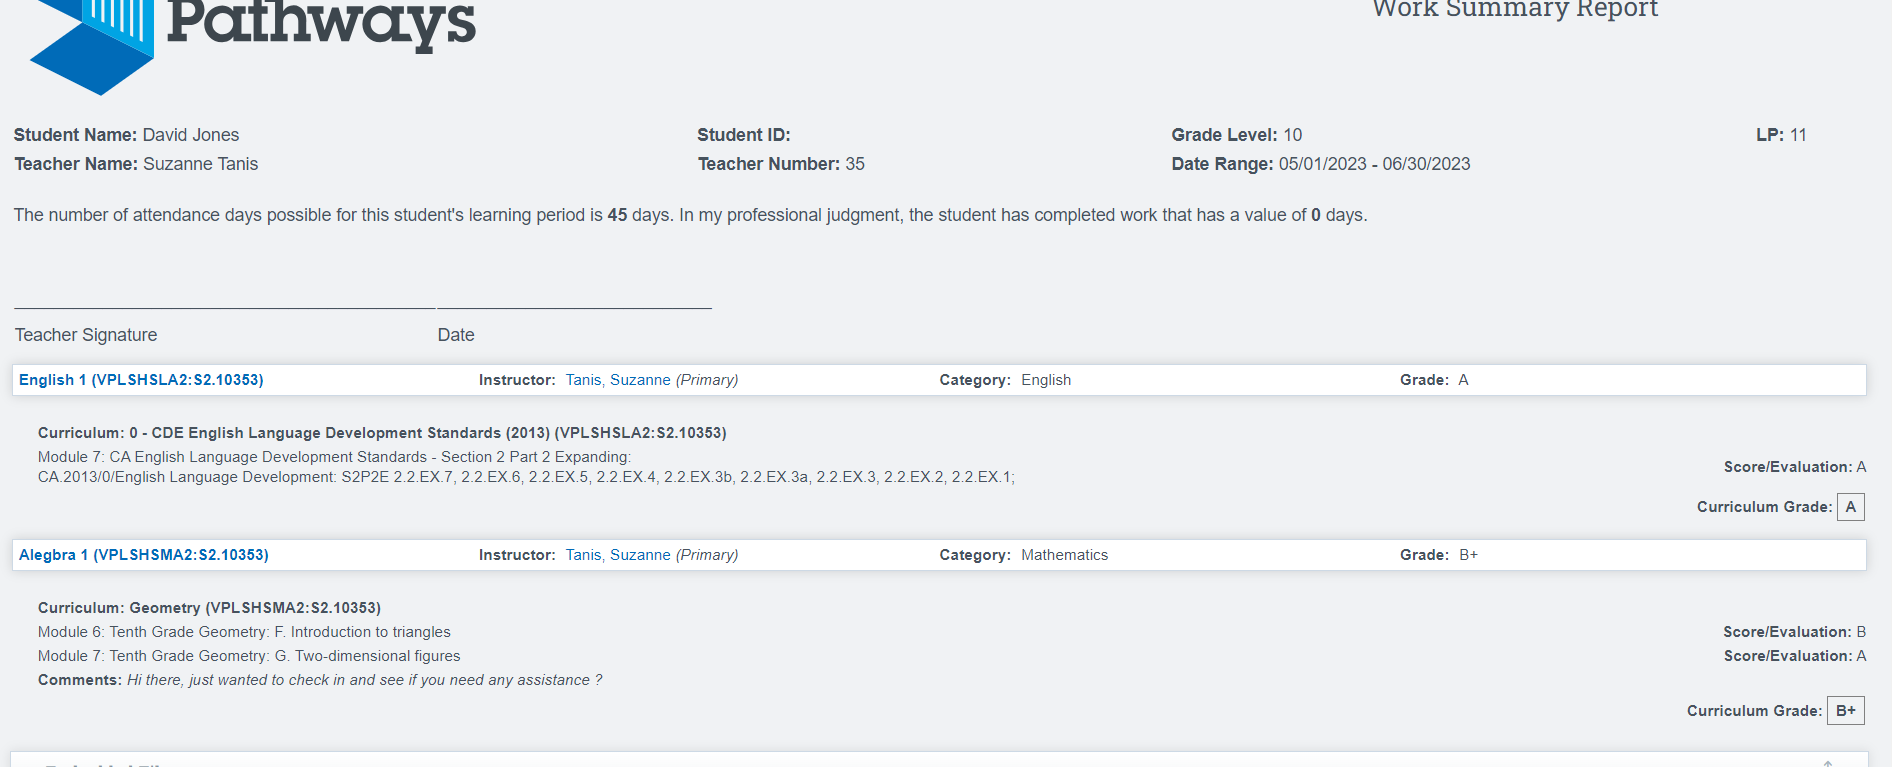
Progress By LP: Another view of what the student as completed this period
- Click the icon Under Progress By LP to filter and view your report
View of Report from Progress By LP column
- *Depending on the filters you select all the Assignments, Objectives, and Standards are displayed
Mass Print Reports Section: This section you can run a report of all your students displayed at once
- Click Mass Print Reports
Engagement Log: Is a teacher driven log that allows the teacher to mark if the student has had live interaction, Synchronous instruction, or Academic Progress each week
Additional Feature with Mass Print Reports
- Click the Engagement Logs Icon
- Change the Week you are viewing by clicking on the School Week Dropdown
Click “Generate Report”
Report View of All Students
- Check the box next to each student to mark how the student was engaged each day click save
Or
Mass Selection Option
- Click the arrow next to the day of the week you want to update, a dropdown will appear, and you can choose the activity you wish to update. This action will mark all your students at once for an activity of engagement, then click save
Depending on how your system is set up, all the activity sources will display in the Student Activity column.
- Click the Icon to view the activity for that day (a dropdown will appear to provide you with the overview)
Student Dashboard Tab: Displays Demographic information as well as provides a link to the student portal
- Click the arrow next to the student’s name to open the student record
- Click Student Dashboard Tab
- Click Student Portal Link (this link will take you to the student’s portal as if you are logged in as the student)
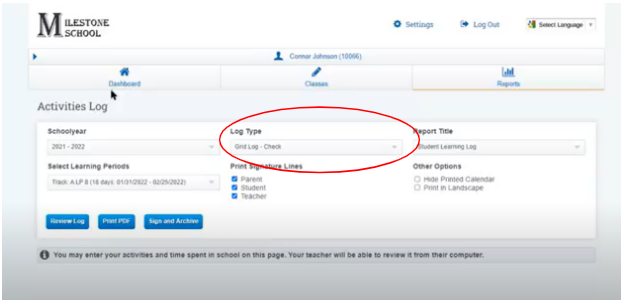
Student Portal View:
Student Dashboard View: Students can enter their activity on their portal as well as view the entries made
Click Log Type to view log or enter activities (students and teachers have the same view of the log)
Create Master Agreements/ Addendum From the Student Roster:
Master Agreements: You can set up your master agreements in School Pathways PLS, this allows your school to create, distribute, sign and archive master agreements online.
Open the Student Record from the Roster by clicking the Arrow next to the student you want to work with
*Verify all classes are listed in the course tab prior to creating the Master Agreement
-
Click The Reports Tab
-
Click Master Agreement
-
Report Type is already set to Master Agreement
*If your school is set up for full year the Full year box will be checked and grayed out
*Choose the Reporting Period you desire to work with
*You can also choose a start date and end Date if you desire
Scroll down the page to view all the selection options you have for this report. Some selections may already be filled in based on your school administration set up in our system
-
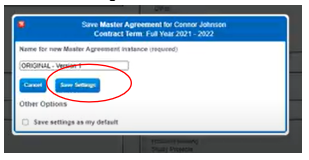
Click Save Master Agreement to generate this agreement
You can use the Default name for the Master Agreement or You can change the name if necessary
-
Click Save Settings
-
The Window will change/ and the default will show that you are working with the Master Agreement you just saved
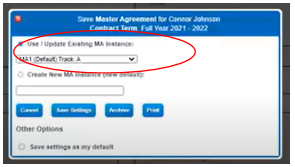
*If you would like a hard copy for signatures Click Print
*To sign the Document Electronically Click Archive
The PLS will Generate the Master Agreement
All the Legal Board requirements are pulled into the Master Agreement Atomically, it is also state compliant with built in boxes for signature lines
*Click in the INVITE Email Address Field, an email address will appear if the email address is stored in the students record, you can also type the email into the email address field to fill in, if the student doesn’t have an email address you can use the parents email address.
*There are two sections that will need to be signed by the student/Parent and the Teacher (Scroll down to view more)
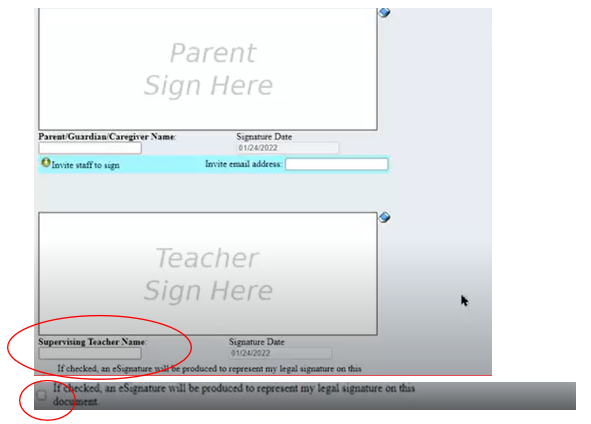
*Click in the Supervising Teacher Field to enter your name or check the box below to activate your e-signature
* You can add another person to sign the document if needed
* As you scroll down the page you will see the responsibility section that will be viewed by the parent and student (Parent and student will sign again as they did before)
* Click Send Invitations/Submit Agreement to Send email invitations to parents and students to sign the document electronically
You will now get a screen that will show you the document has been saved, You can see the document you created has two signatures on it (your signatures), and that four invitations have been sent out.
- Click the Return to go back to the roster
Master Agreement Sent Notifications:
When the checkmark next to your semester (Semester two in used in this example) is orange instead of red it means the Master Agreements have been sent
To View the Documents in School Pathways you Created
Teachers > Compliance > Sign Documents Compliance
- On this page you can filter the documents by year, school track and enrollment rage
- Click Report Title dropdown to choose the report type you wish to view
- On the left side of the lower portion of the page you will see documents you are invited to sign
On the right side of the lower portion of the page you will see documents that need to be signed by others
- Red Check mark means the document needs to be signed (they will turn green once signed)
- You can also, invite others to sign document
- Resend invite if needed (the invite others link will change to finalize once it has been signed
Click the Finalize Link to submit the final document for approval
*The digital Master Agreement is stored in an online archive with all your other documents, this makes it easy for you to pull up all the stored agreements as needed.
School Pathways PLS brings together all the students work in one place when you need it.
Extra Features for the Student PLS Roster:
- Show full Email Addresses in addition to the email icon that was already present.
By clicking the arrow in the header, emails will be displayed for the user.
Show Learning Centers can be added as a column on the Roster via page policy
- Admin can set the Policy globally: Options Cogwheel > Page Policies > Page Policies for: /ef/roster.php > “Select with fields/columns to show in the roster area” - choose Learning Center
Learning Center can be defaulted to Print on the printed roster
- Admin can set this globally: Options Cogwheel > Page Policies > Page Policies for: /ef/roster.php > “Select with fields/columns to show on the printed student roster” - choose Learning Center